2D Radiance Cascades Usage Guide
This guide provides detailed information on how to effectively use the 2D Radiance Cascades lighting system in your Unity projects. It covers light contributor settings, built-in shaders, and custom shader integration.
Light Contributor Usage
The LightContributor component is the core element for adding lights to your 2D scenes. Different light types are available for various lighting scenarios.
Make sure to read about the different available light types in the General Concepts document.
Common Settings And Usage Tips
All light sources have a color controlled by these two settings:
| Setting | Description |
|---|---|
| Color | Sets the base color of the light source |
| Intensity | Controls the intensity of the light |
The resulting light source color is obtained by multiplying the Color RGB components by Intensity. The two settings are provided for convenience, as a separate Intensity slider is generally more intuitive to use than a unified HDR color picker.
Setting either the Intensity to zero, or the Color to black turns the light into an occluder.
The intensity can be set to a negative value. This will turn a light source into a sort of "light sink." Which is not physically correct, but may be used for achieving various artistic effects.
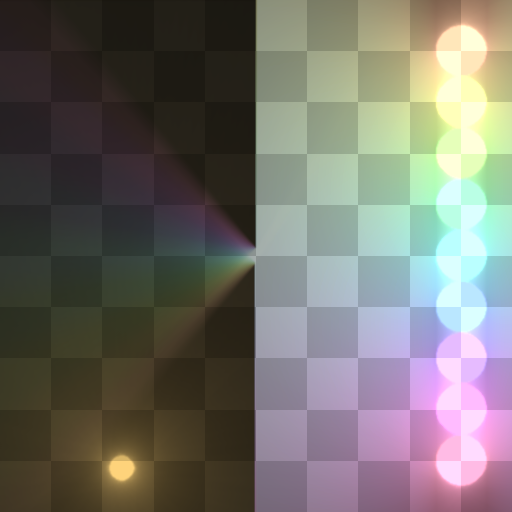 | 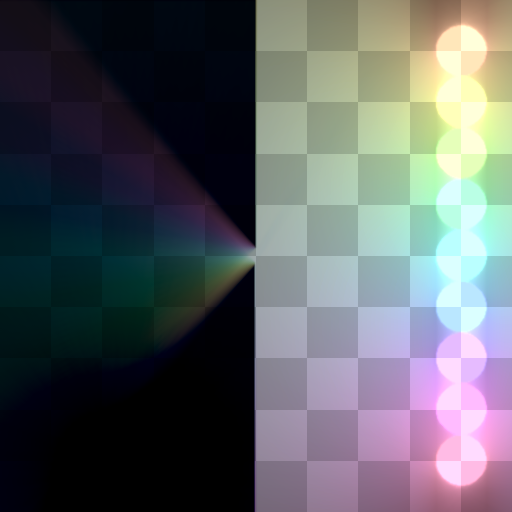 |
| normal orange circle light | negative orange circle light |
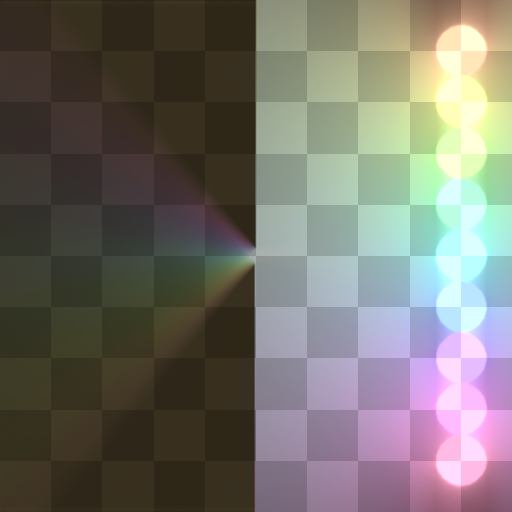 | 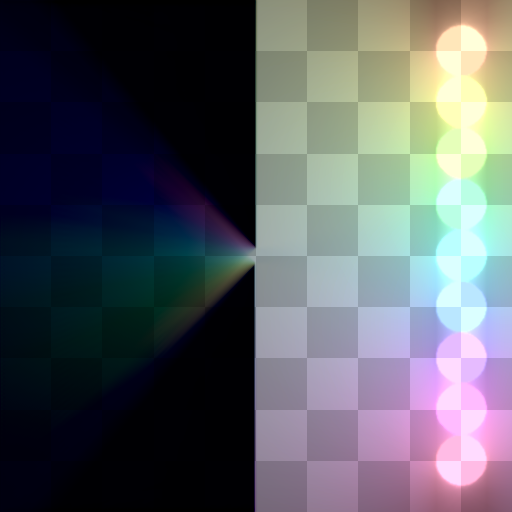 |
| normal orange directional light (shining directly left-to-right) | negative orange directional light |
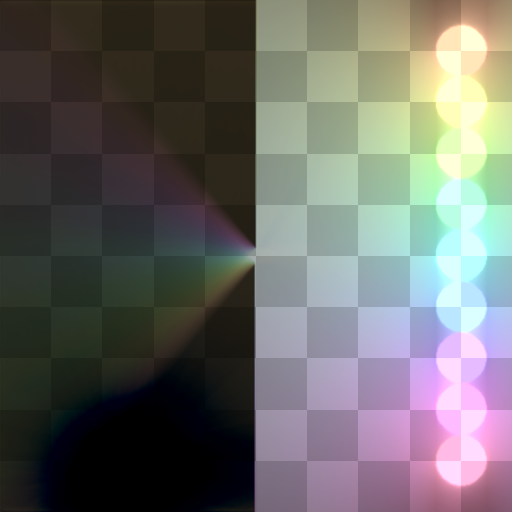 | 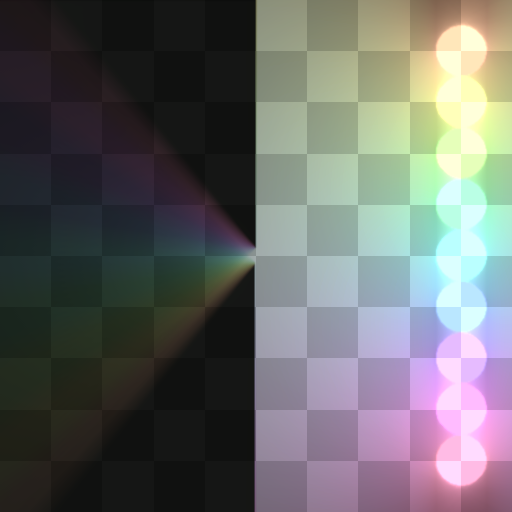 |
| normal directional light and negative circle light | base image |
Global Lights
Global lights (the Sky Light and the Directional lights) provide the ambient lighting. They are the most useful in outdoor scenes when no occluders or other light sources block them. The positioning of their transforms has no effect on how they work as lights.
Sky Light
The Sky Light type provides ambient illumination across your entire scene.
Directional Light
Directional lights simulate light coming from a specific direction, similar to sunlight. Effectively representing the light that is infinitely far away.
| Setting | Description |
|---|---|
| Transform | Use the standard GameObject's transform rotation to set the light direction |
| Softness | Controls the softness of the light source, or the size of the infinitely-far-away light. The range is 0–1, where 0 is a point light, and 1 is a light spanning across the hemisphere. |
Tips
Be careful with sharp directional lights (softness close to zero). Being point light sources, they are easily missable when the lighting algorithm samples the environment light. Which may lead to various artifacts. There are some configurations that provide good results, though. E.g., the HRC variant when the lights are axis-aligned. See the examples below.
Examples
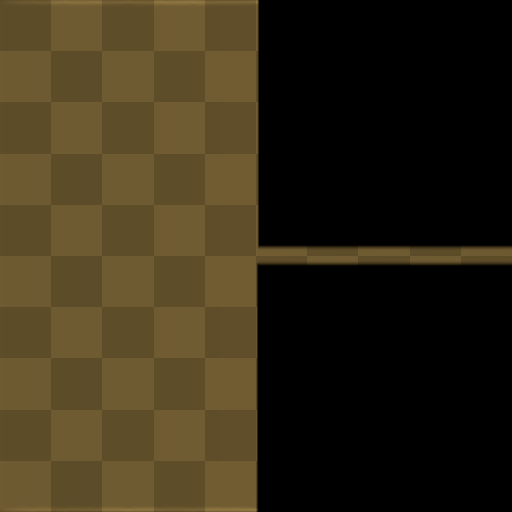 | 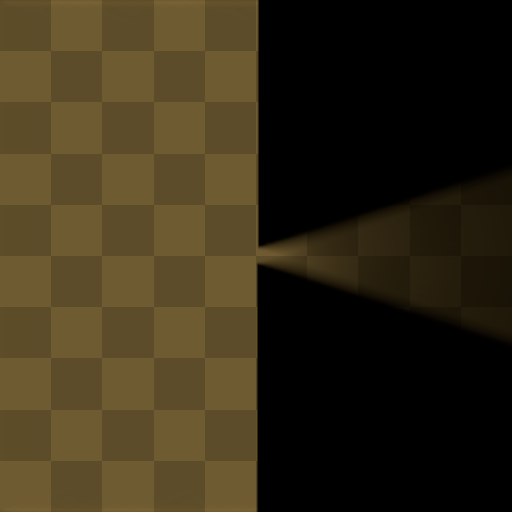 |
| Softness 0 | Softness 0.2 |
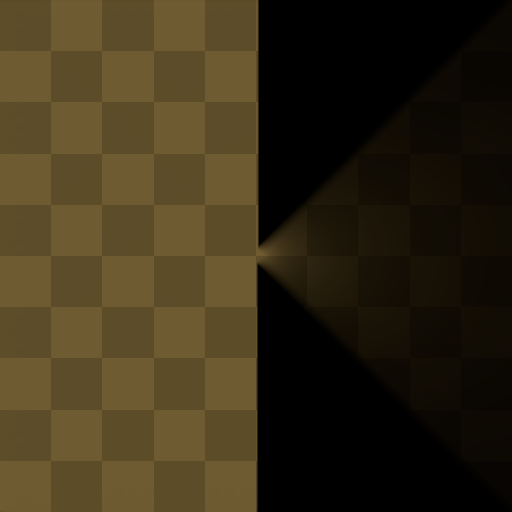 | 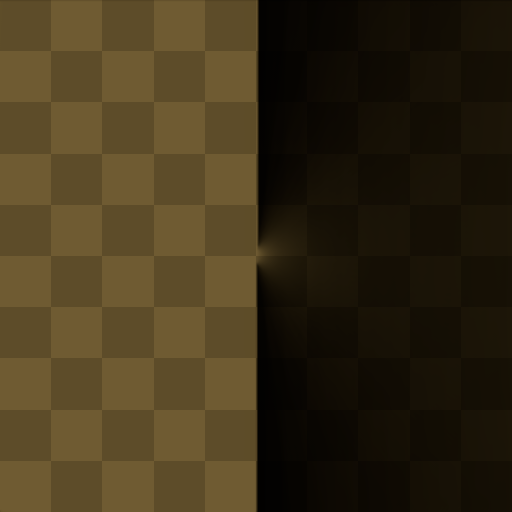 |
| Softness 0.5 | Softness 1 |
Artifacts examples
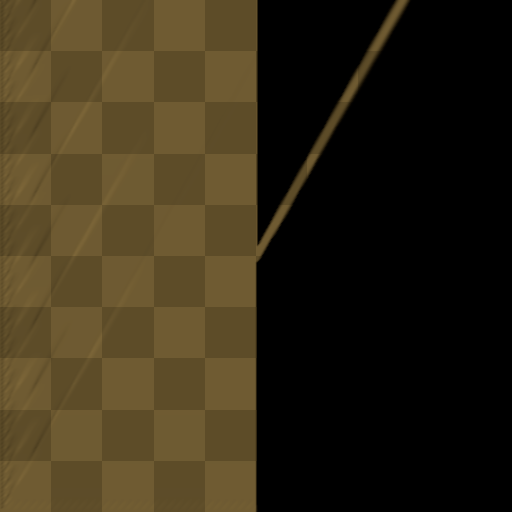 | 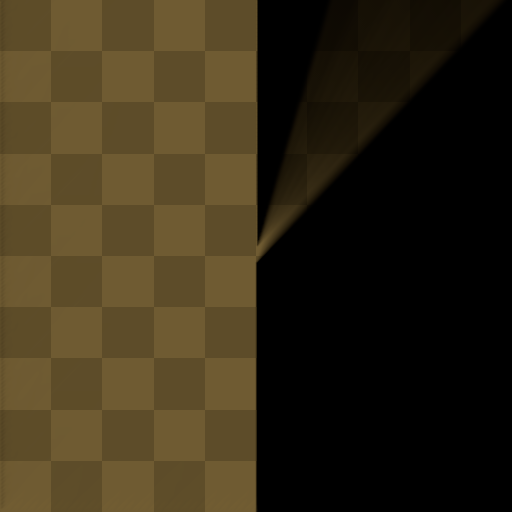 |
| HRC, Softness 0 (note the "hairy" border) | Softness 0.15 |
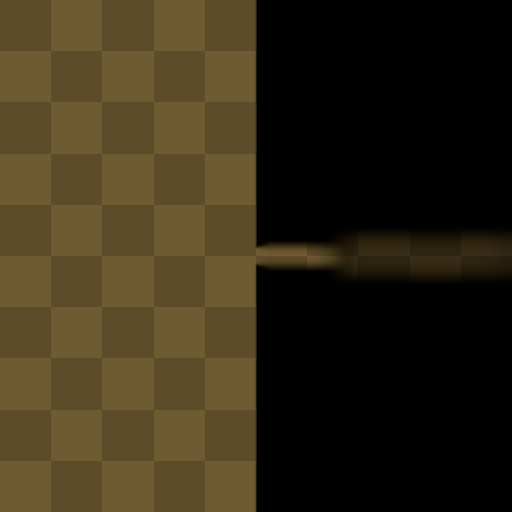 | 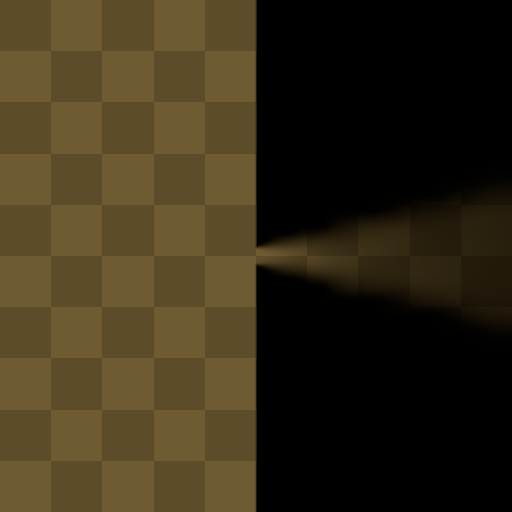 |
| Bilinear fix, Softness 0 (note the blocky shadow appearance) | Softness 0.15 |
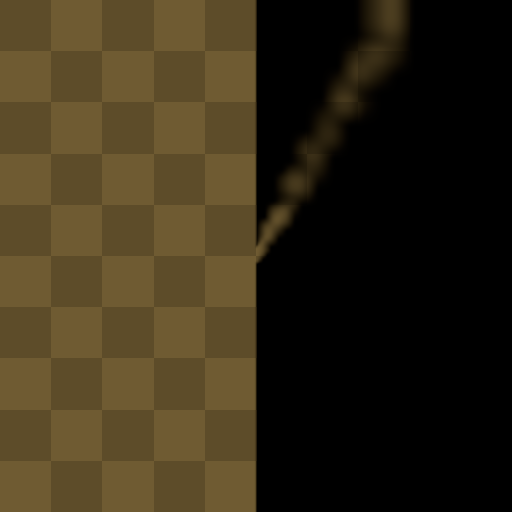 | 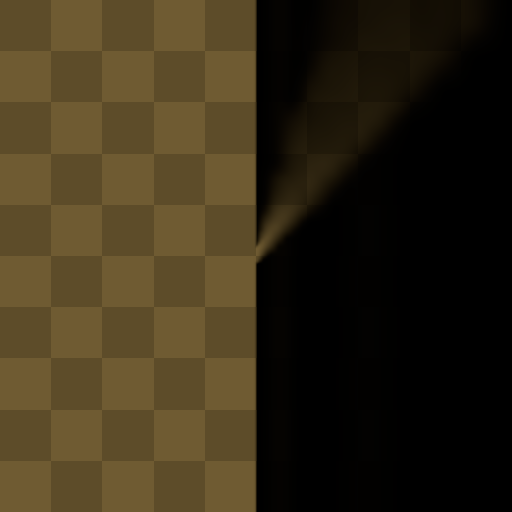 |
| Bilinear fix, Softness 0 (note the blocky shadow appearance) | Softness 0.15 |
Analytical Lights
Analytical lights (circle, line, and freeform lights) represent light contributors made out of geometric primitives. Unlike Sprite lights, analytical lights can affect the scene even when they are outside the camera view.
All analytical lights provide the following properties:
| Setting | Description |
|---|---|
| Single Sided | When enabled, only one side of the primitive's surface interacts with the light. The opposite side is transparent |
| Cullable | When enabled, allows the light to be culled when outside the camera view |
| Cull Distance | Maximum distance (in world space units) at which the light affects the scene when cullable |
Circle Light
Circle lights emit light from the surface of a circle.
| Setting | Description |
|---|---|
| Radius | Defines the radius of the light source |
Line Light
Line lights emit light along a line segment.
| Setting | Description |
|---|---|
| Length | Defines the length of the light source |
Freeform Light
Freeform lights allow for custom shapes defined by multiple control points. Effectively a chain of line lights stitched together and treated as a single object (i.e., all lines share the same properties, getting culled or not culled together, etc.).
| Setting | Description |
|---|---|
| Control Points | A list of control point locations. Each point is a location where one line ends and the next one starts |
Examples
In all the images below, the top shape is a normal double-sided orange light, the right shape is a normal double-sided occluder, the bottom shape is a single-sided blueish light, and the left shape is a single-sided occluder.
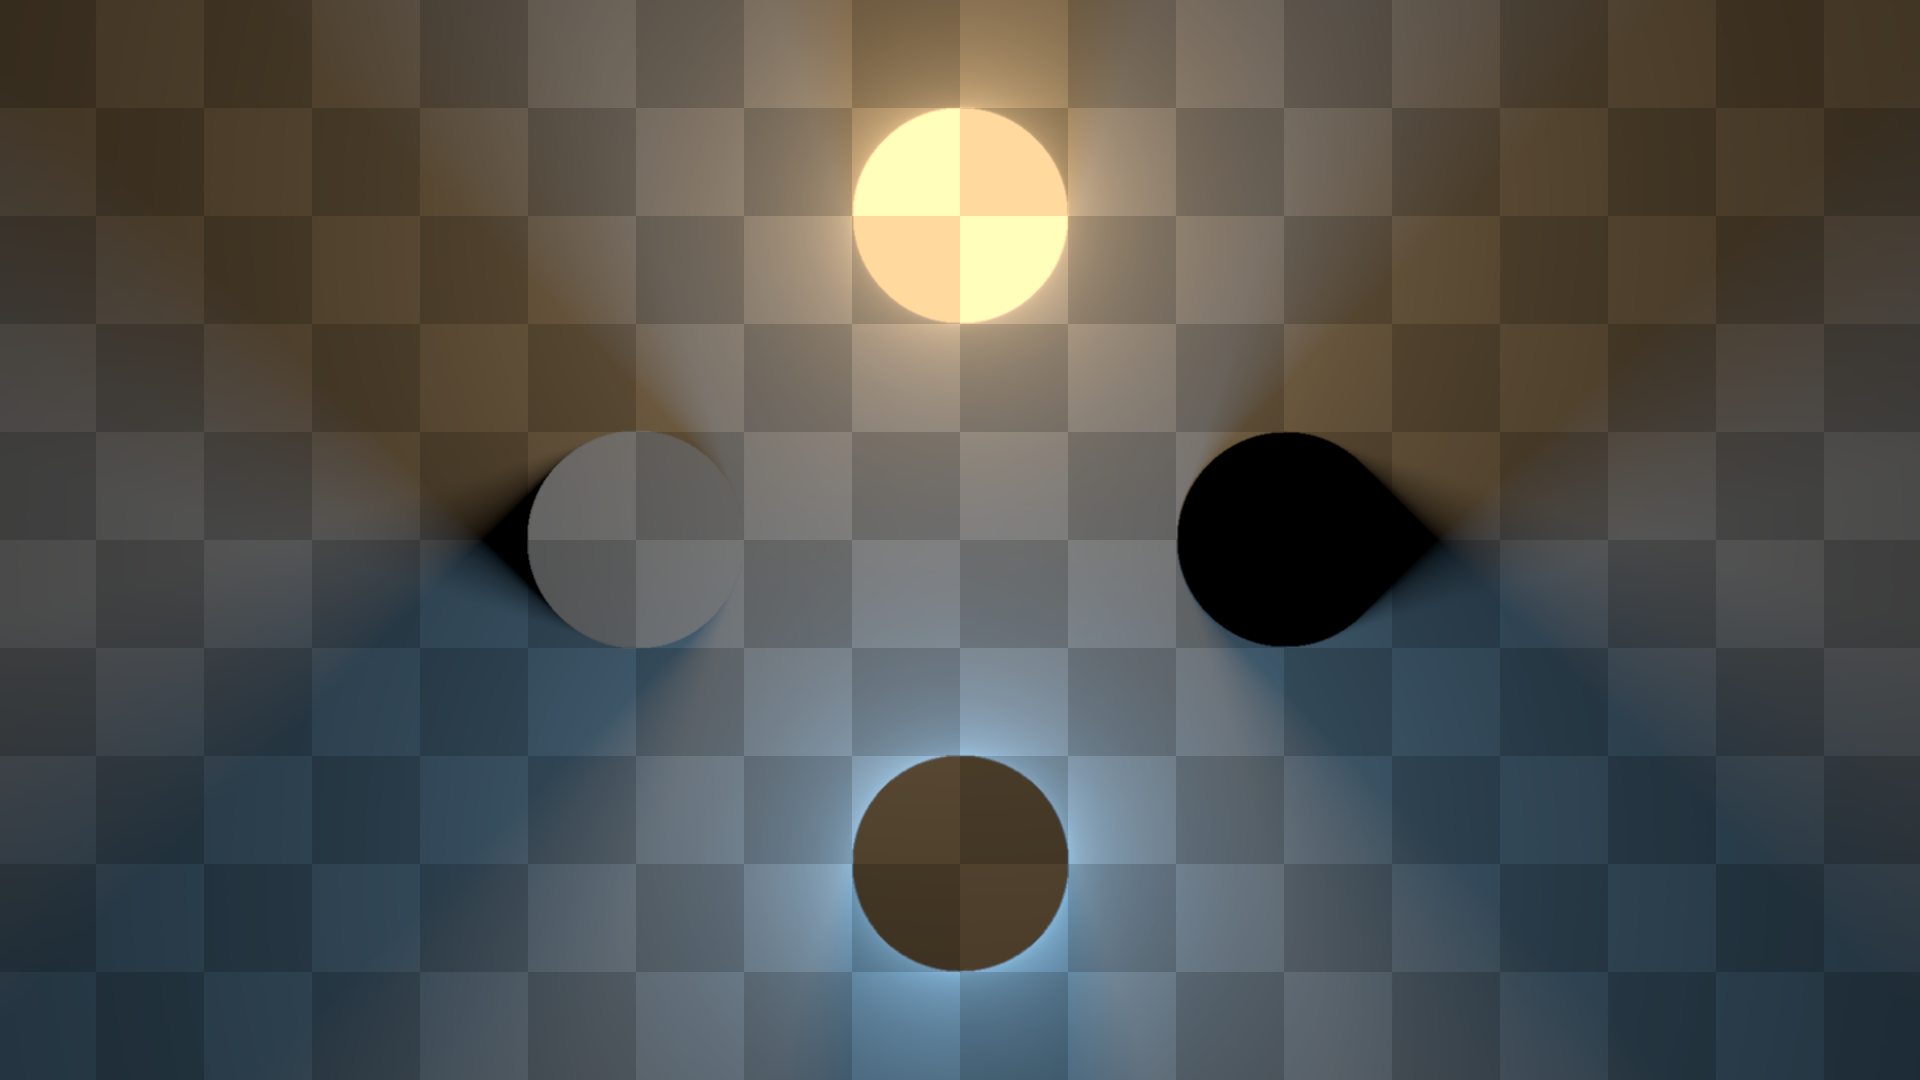 | 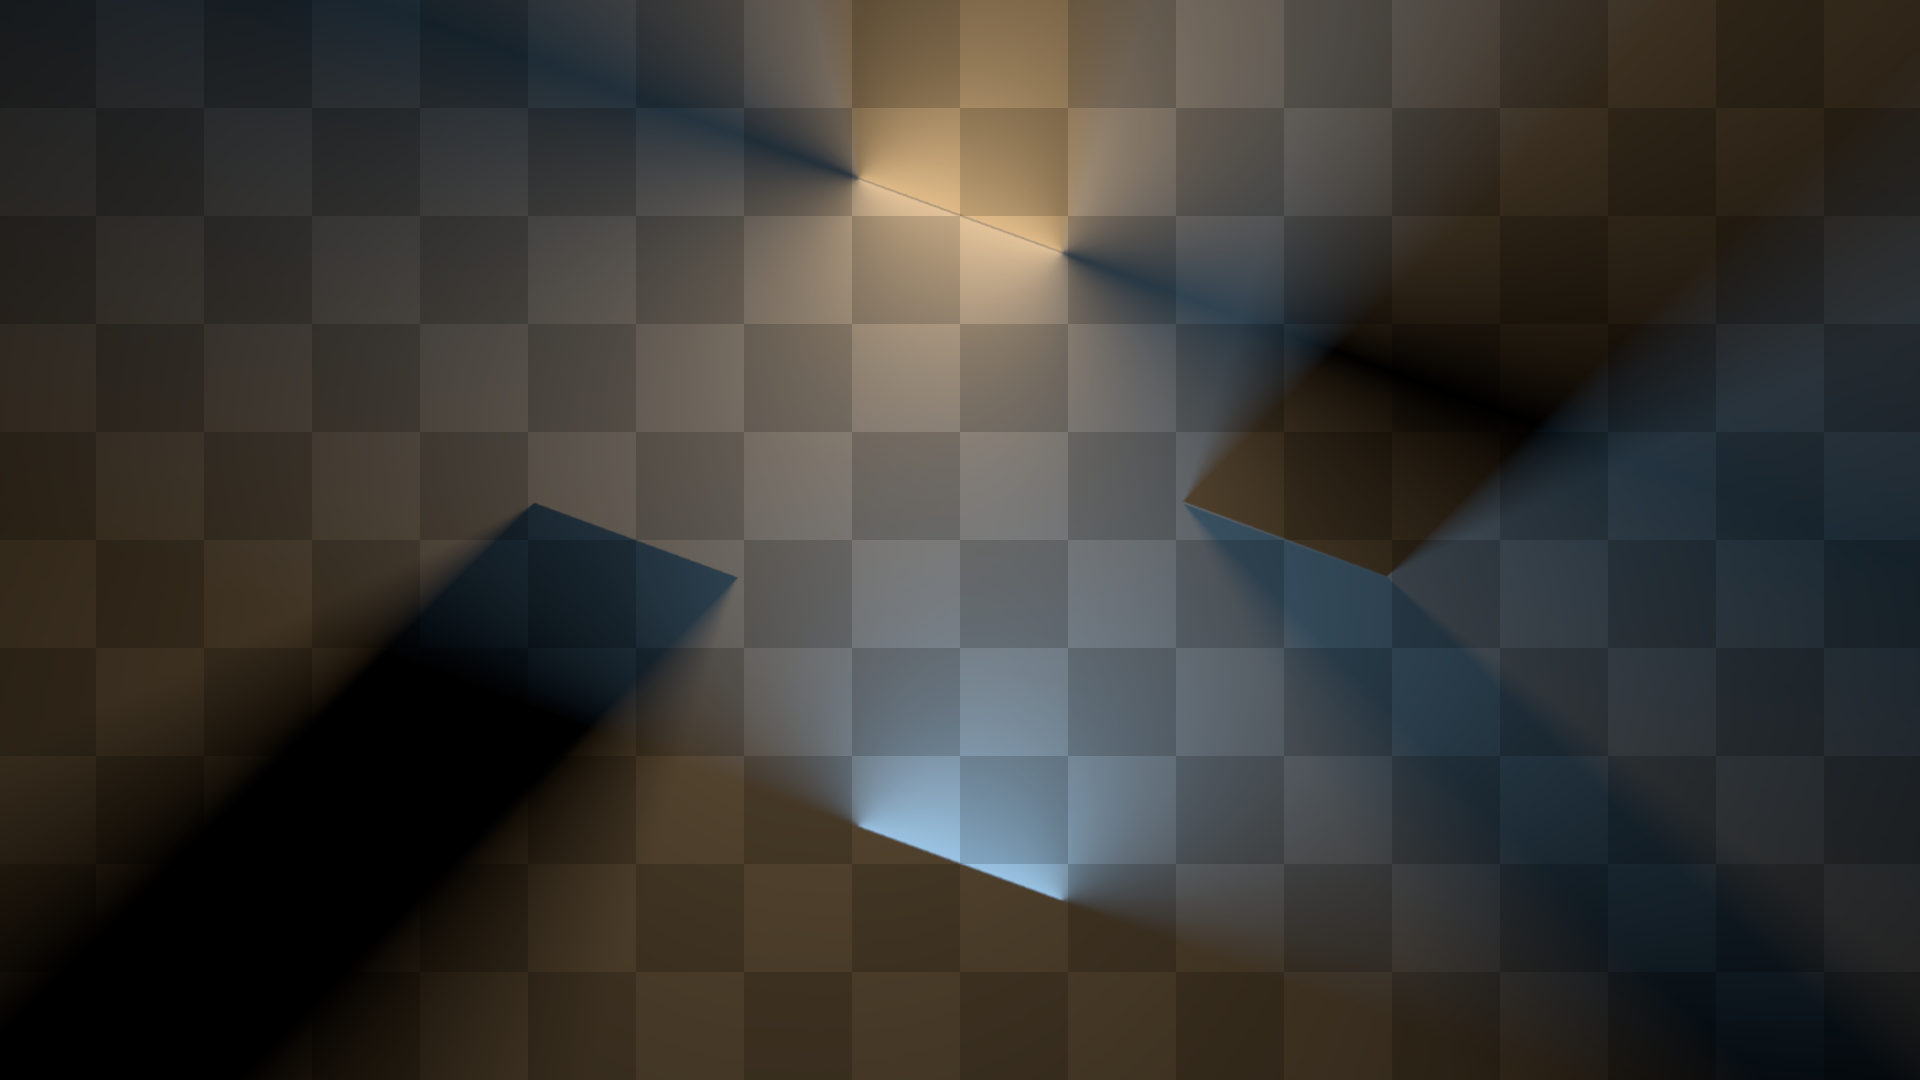 |
| Circle lights | Line lights |
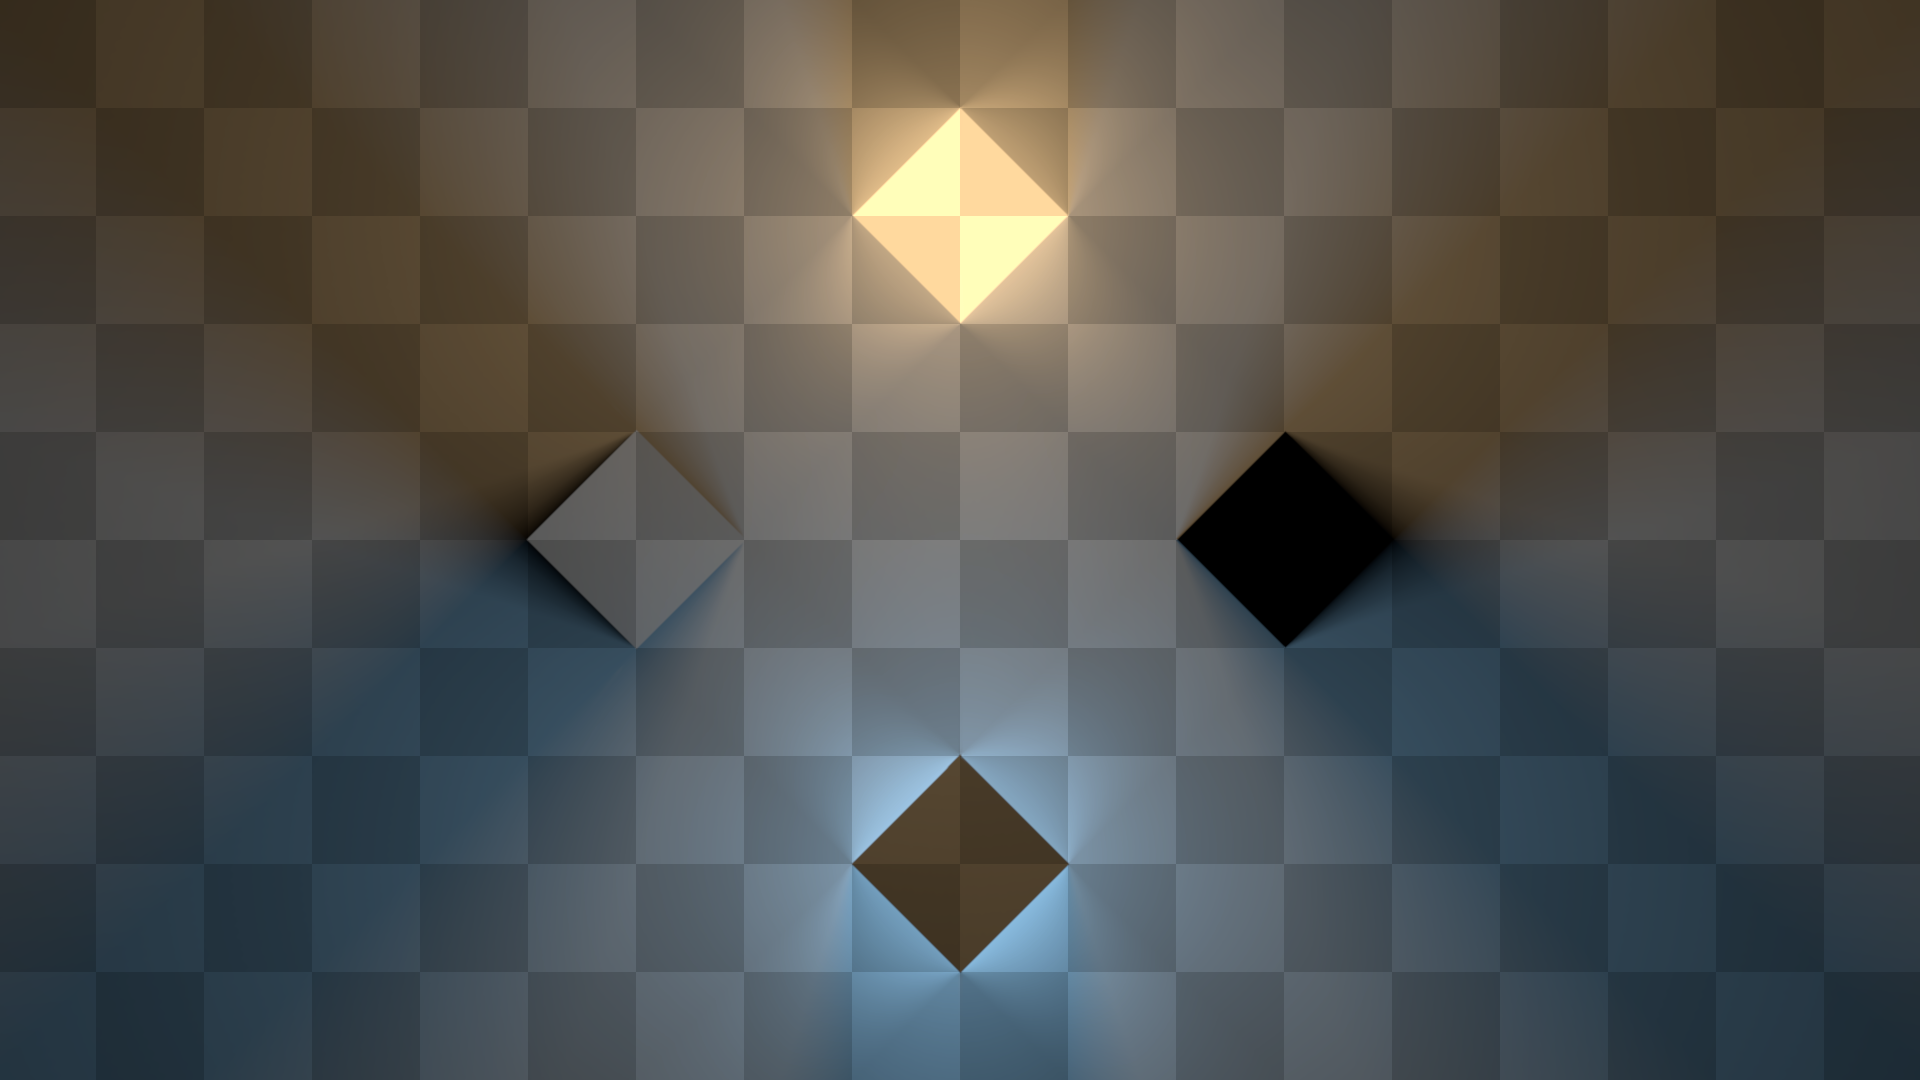 | |
| Freeform lights |
Analytical Lights Editing Tools
Line And Circle Lights
Line and Circle lights provide handles for intuitive visual alignment of the lights:
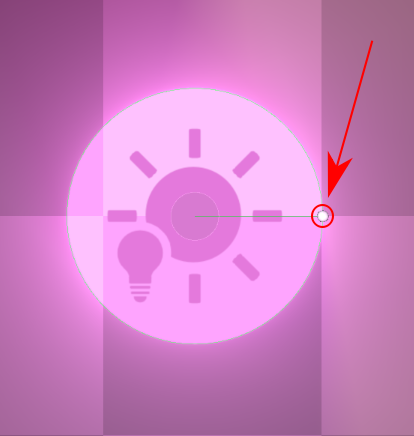 |
| Drag the handle to change the circle light radius |
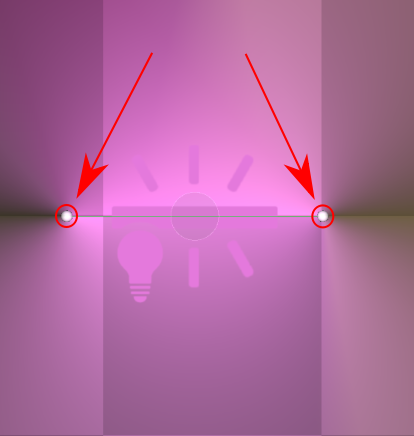 |
| Drag the handles to position the line light |
You can also manually edit the Radius/Length properties for precise control.
Freeform Lights
To edit the freeform light, enter the edit mode in the editor window. The edit mode enables the following tools:
- Scene handles: Interactive handles and buttons in the scene view allowing to visually inspect and modify the shape
- Editable control points: Ability to manually modify the shape control points coordinates (in the local object space)
- Helper editor tools:
| Tool | Description |
|---|---|
| Close shape | Closes the shape by copying the first control point to the end. Inactive if the shape is already closed |
| Flip shape | Flips the shape from clockwise to counter-clockwise and vice versa. Inactive if the shape is double-sided |
| Load default | Loads the default diamond shape instead of the current shape. Handy to start from scratch if something went wrong |
| Load Collider2D shape | Loads the shape from the Collider2D component attached to the same GameObject. Inactive if there is no Collider2D attached |
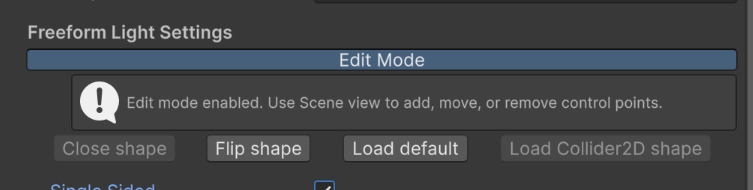 |
| Editor tools |
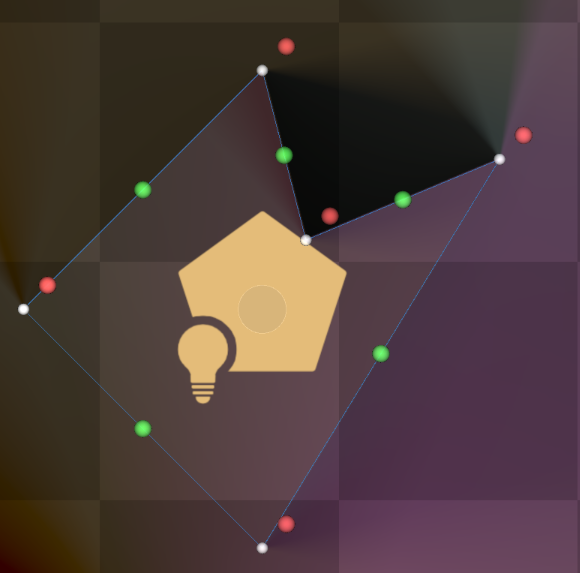 |
| Scene tools |
Scene tools:
- Use white handles to drag the existing control points
- Use the red button to remove the nearby control point
- Use the green button to place a new control point in the middle of the segment
Sprite Light
Sprite lights use a sprite texture to define the light shape and properties. Unlike other light contributors, sprite lights do not work outside the camera view.
| Setting | Description |
|---|---|
| Light Source Sprite | The sprite to be used as the light source |
Note that the sprite's natural color is multiplied by the light contributor color and intensity.
Light Configuration Tips
- Avoid tiny lights, as they are more prone to producing various visual artifacts.
- Don't neglect the culling options for the analytical lights, especially in bigger scenes with lots of light contributors.
- When possible, prefer analytical lights (Circle, Line, Freeform) over Sprite lights. As they are generally more versatile and provide more flexibility.
- In performance-critical scenarios, consider sticking to a single kind of lights in a scene. Both sprite-lights-only and analytical-lights-only setups will perform better than a mix of both kinds in a single scene.
Built-in Shaders and Materials Guide
The 2D Radiance Cascades system includes several built-in shaders designed to work with the lighting system.
Standard Lit Sprites
RC-Sprite-Lit-Flat
This shader provides basic lighting for flat sprites without normal mapping.
| Property | Description |
|---|---|
| MainTex | The main sprite texture |
Use Case: Ideal for simple 2D sprites that need to receive lighting but don't require advanced effects
RC-Sprite-Lit-WithNormal
This shader supports normal mapping for more detailed lighting effects on sprites.
| Property | Description |
|---|---|
| MainTex | The main sprite texture |
| NormalMap | The normal map |
| Distance | The height of the light above the surface |
Use Case: Best for detailed sprites where you want to simulate surface relief and more realistic lighting
Follow the default Unity "Secondary Textures" approach to attach a normal map to your sprite.
The Distance parameter controls how high above the surface the virtual lights from the lightmap are, when computing the lighting. Higher values lead to softer, more uniform lighting, lower values lead to more dramatic lighting with more emphasis on the direction the light is coming from.
| Note |
|---|
| Be careful with extra-low values. The lightmaps only capture light from four cardinal directions. Which is enough for soft diffuse lighting when the lights are considered relatively far from the surface. However, when the lights are close and are supposed to come at grazing angles, you may get noticeable artifacts due to the lack of angular resolution. See examples below. |
Examples
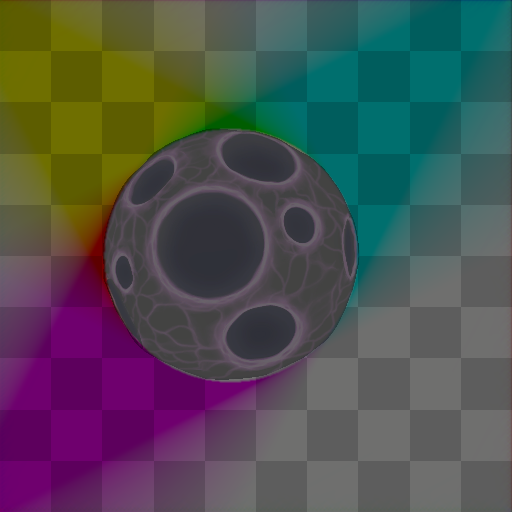 | 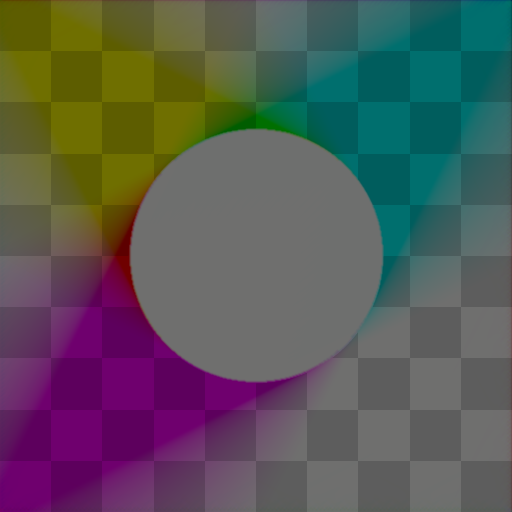 |
RC-Sprite-Lit-Flat | RC-Sprite-Lit-Flat |
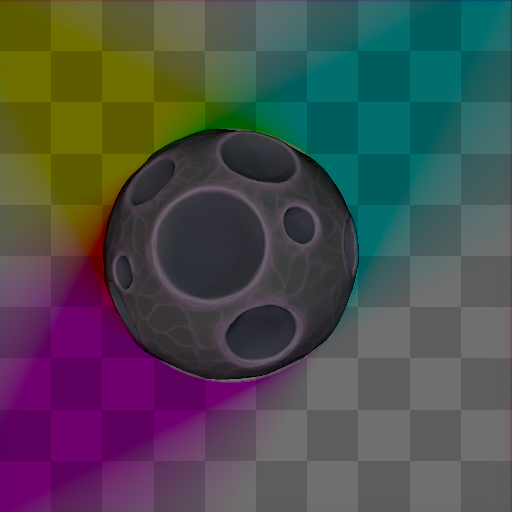 | 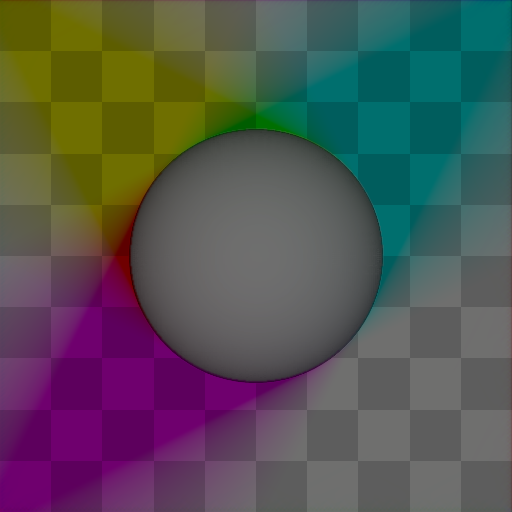 |
RC-Sprite-Lit-WithNormal, Distance 20 | RC-Sprite-Lit-WithNormal, Distance 20 |
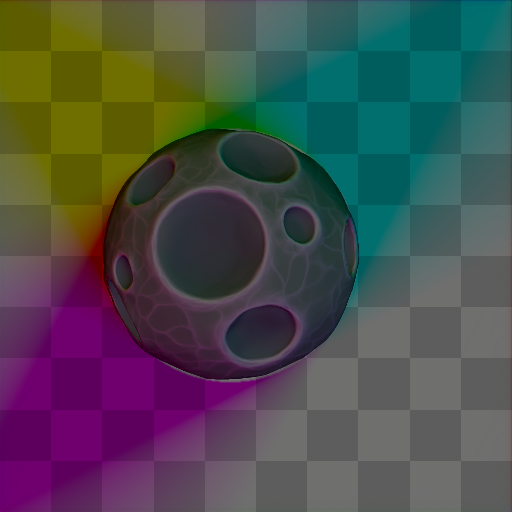 | 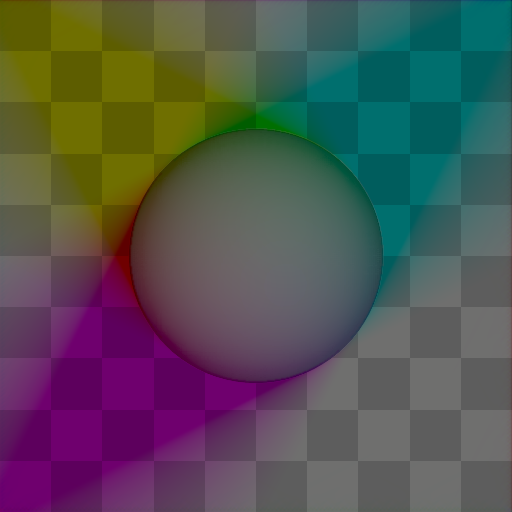 |
RC-Sprite-Lit-WithNormal, Distance 2 | RC-Sprite-Lit-WithNormal, Distance 2 |
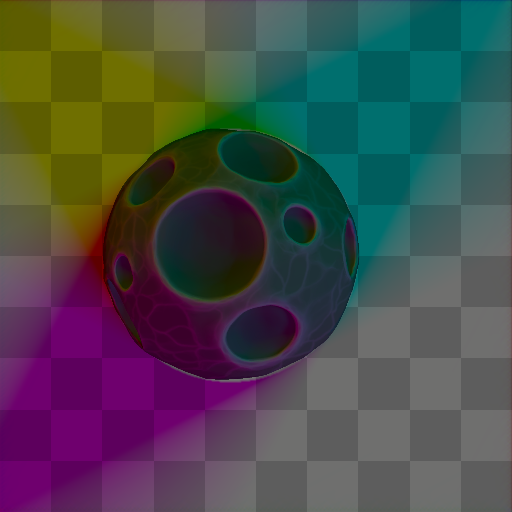 | 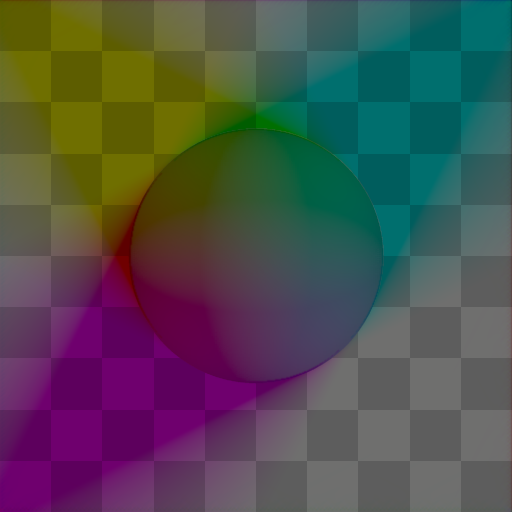 |
RC-Sprite-Lit-WithNormal, Distance 0.5 | RC-Sprite-Lit-WithNormal, Distance 0.5 |
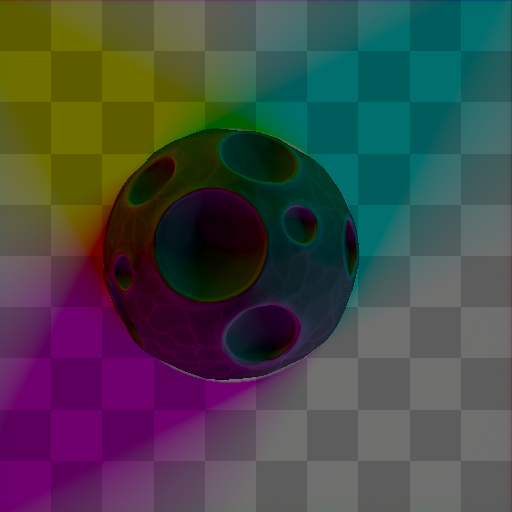 | 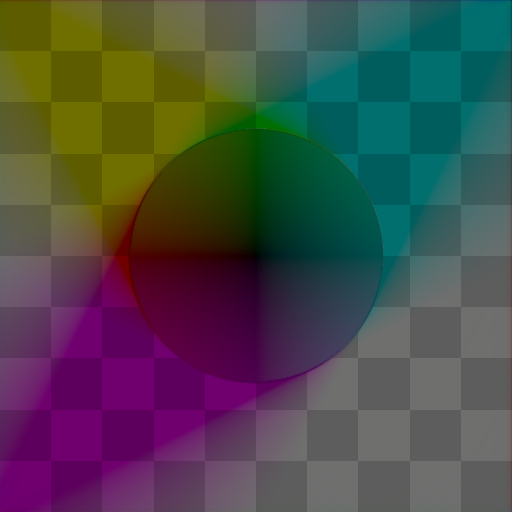 |
RC-Sprite-Lit-WithNormal, Distance 0 | RC-Sprite-Lit-WithNormal, Distance 0 |