2D Radiance Cascades
Overview
The 2D Radiance Cascades package provides a high-quality global illumination solution for 2D games in Unity.
Requirements
- Unity 6.0 or newer
- Universal Render Pipeline (URP) 17.0 or newer
- Burst 1.8.0 or newer
Quick Start
- Install the package from the asset store
- Add the
RadianceCascadesRendererFeatureto your URP Renderer - Configure basic quality settings
- Add lights to your scene
- Assign the preconfigured
Radiance Cascades/RC-Sprite-Lit-Flatmaterial to your sprites.
For detailed instructions, see the Getting Started guide.
Documentation Structure
Getting Started with 2D Radiance Cascades
Installation
The package is provided as a hybrid package. To install it, import the .unitypackage file into your project or install it from the Unity Asset Store. The package contents will appear under Packages/com.dim0v.radiance-cascades-2d and it will generally work as a local UPM package.
Samples
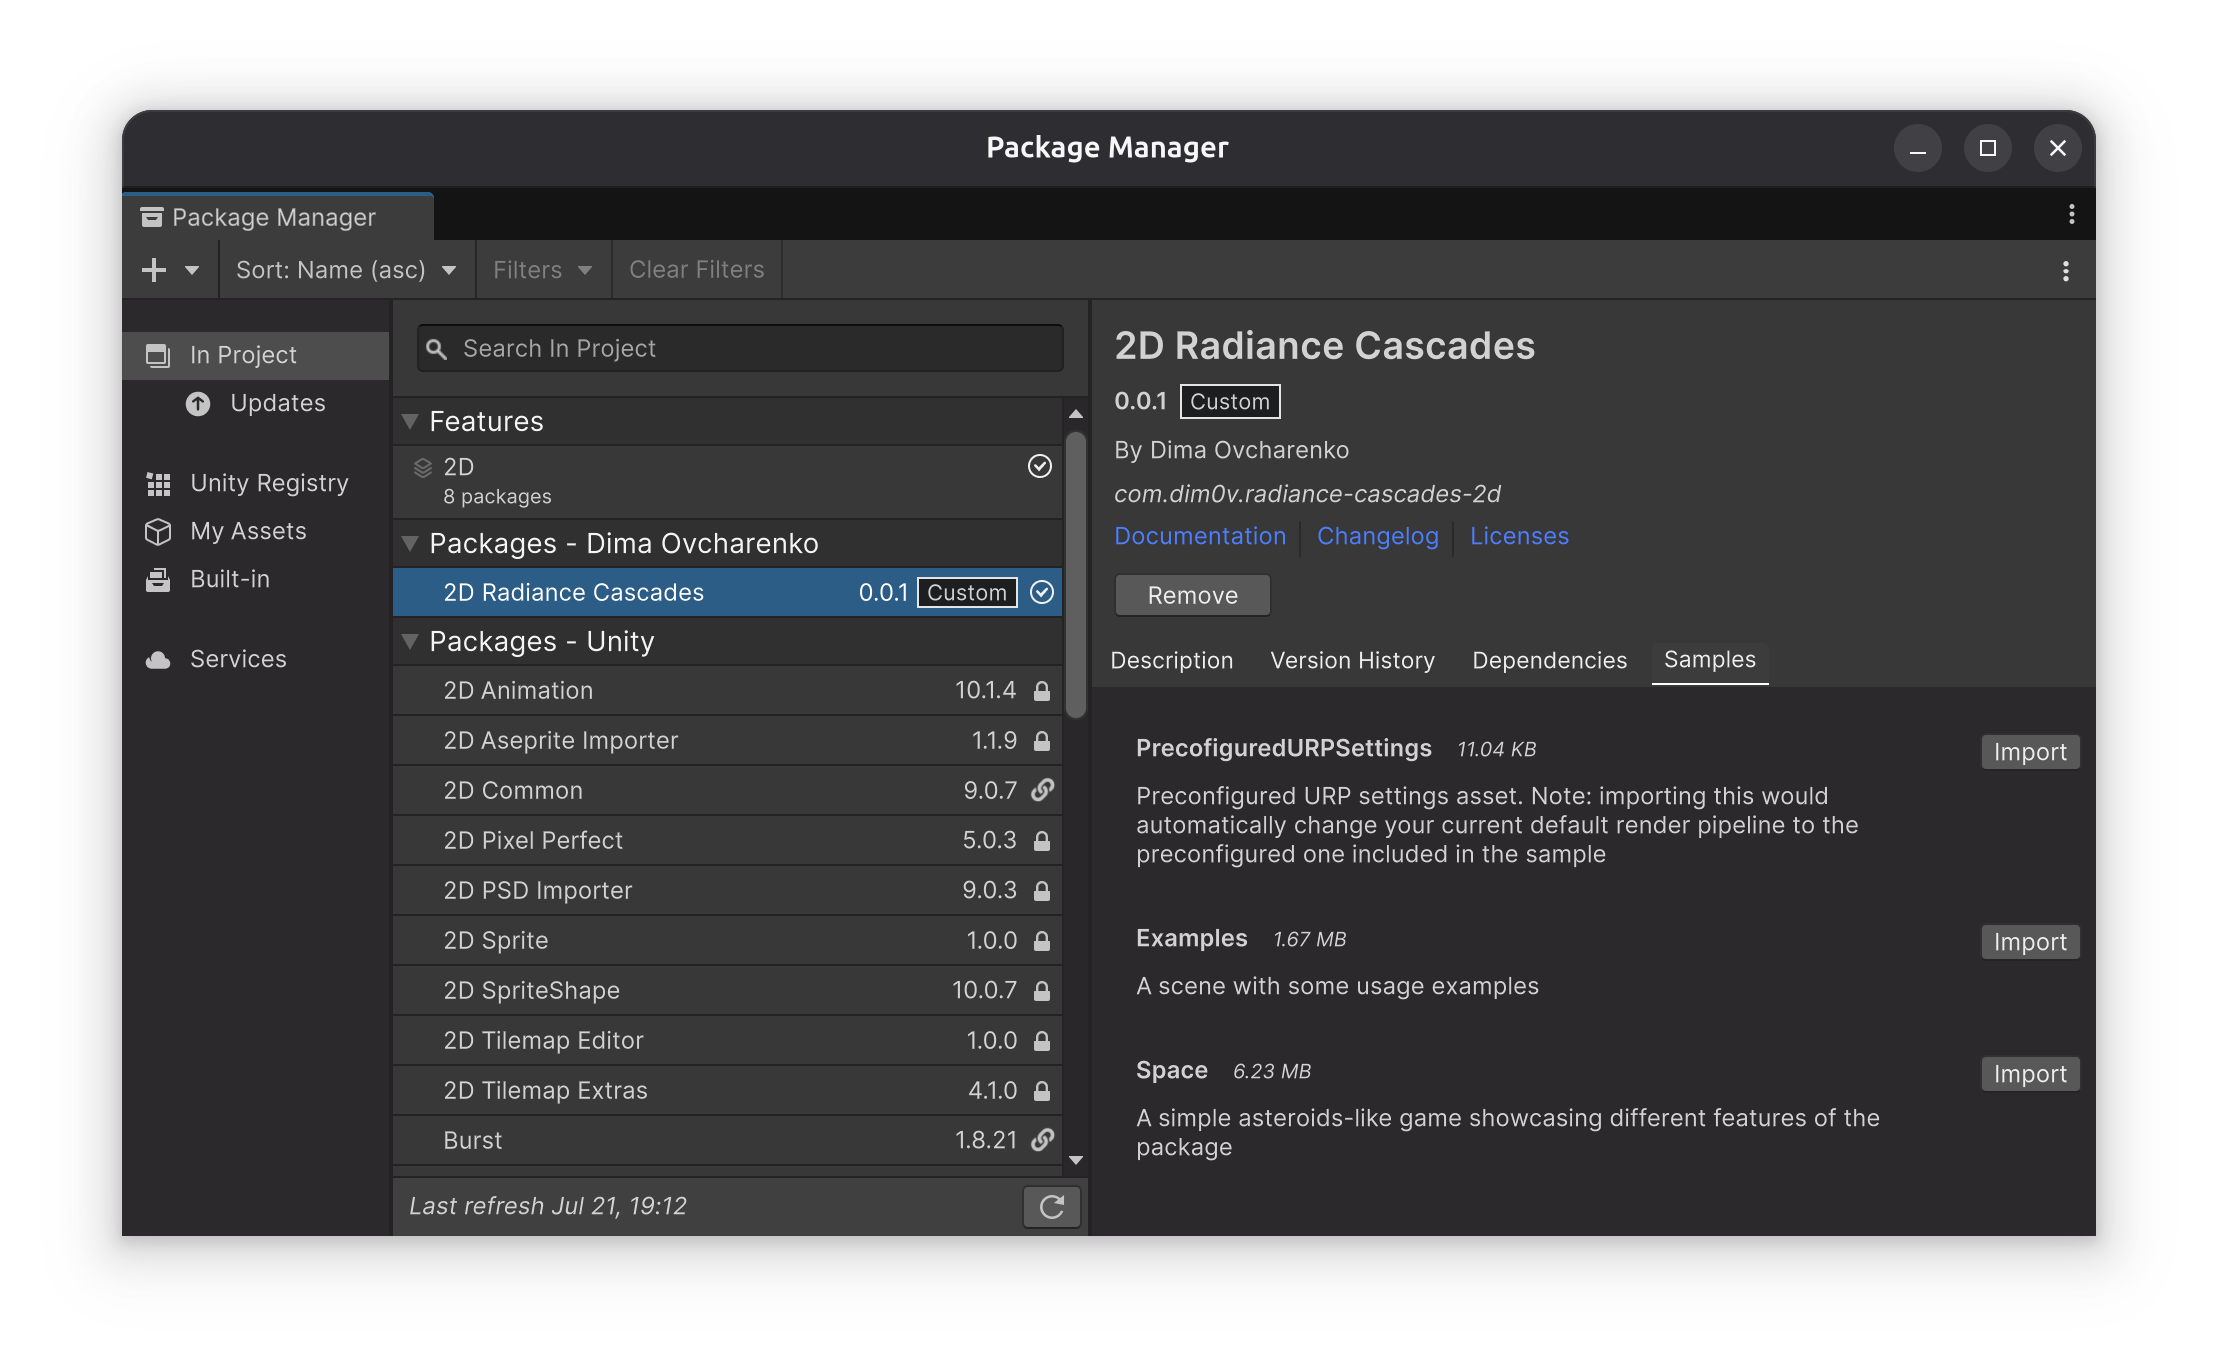
The package comes with a sample Space game. To import it, use the standard Unity Package Manager UI:
- Open the package manager through
Window -> Package Manager - Select "2D Radiance Cascades" from the list
- Go to the Samples tab and click "Import"
Basic Setup
Adding and Configuring the Renderer Feature
-
Set up the URP renderer. Both 2D and 3D renderers are supported
-
Select your Renderer 2D Data (or Universal Renderer Data) asset in your project
-
In the Inspector, click "Add Renderer Feature"
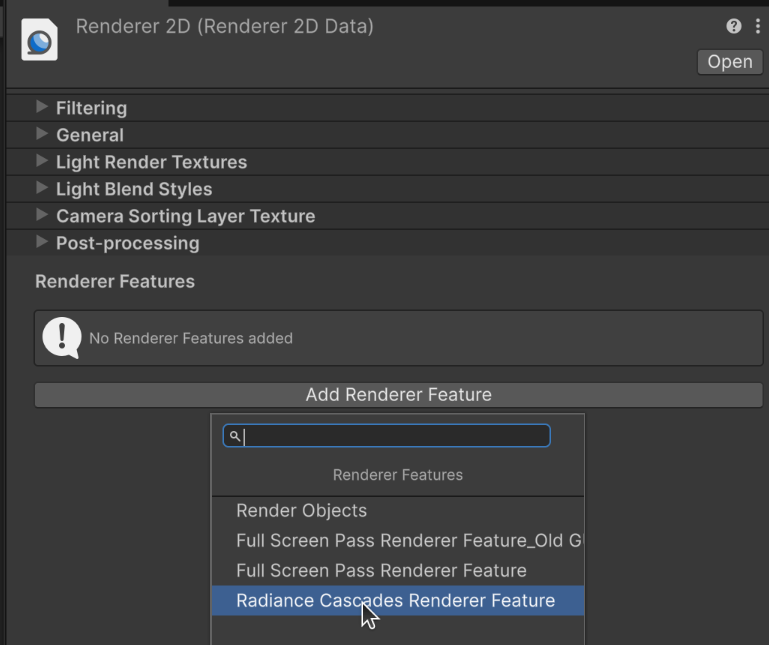
- (optional) This is where you can tweak the Quality Settings in the inspector of the renderer feature
-
(optional) In the "General" section of the Renderer 2D change the "Default Material Type" to
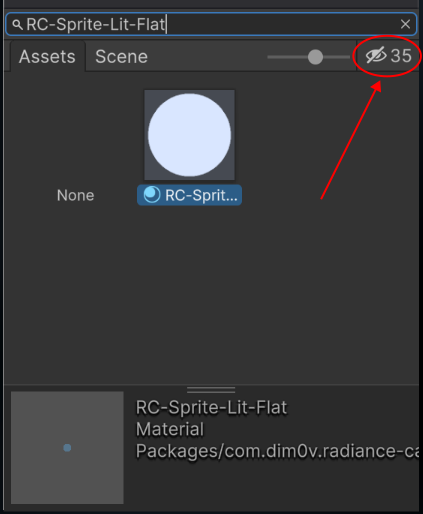
Customand assign theRC-Sprite-Lit-Flatmaterial to "Default Custom Material" so your sprites are lit by default.-
Note: you may need to show hidden packages in the material picker:
-
Creating A Lit Scene
- Create a new 2D scene
- Add light sources and obstacles using either of the options:
GameObject -> Radiance Cascades 2Dmenu- manually adding the "Light Contributor" component to an arbitrary GameObject
- Add some sprites to your scene
- Assign the preconfigured
Radiance Cascades/RC-Sprite-Lit-Flatmaterial to the sprites that should be affected by the lighting.- If your sprites have normal maps, you may want to use
Radiance Cascades/RC-Sprite-Lit-WithNormalmaterial to enable diffuse shading
- If your sprites have normal maps, you may want to use
Demos and Samples
Installation
- Open the Unity Package Manager (
Window→Package Manager) - Select the
2D Radiance Cascadespackage - Go to the
Samplestab Importthe sample you're interested in- The assets will appear under
Assets/Samples/2D Radiance Cascades/{version}/{demo name}with a scene file at the sample root (if applicable)
Preconfigured URP Asset
This sample has a pre-configured URP asset with the Radiance Cascades 2D renderer feature added and set up. You can import it to skip the manual setup.
| Note |
|---|
| Importing this sample would automatically assign the included SRP render asset as your default renderer, overriding the previous one. |
Examples
A scene featuring different light setups showcasing various package features and usage examples.
Space Demo
A simple Asteroids-like game featuring various features of the lighting system.
The gameplay: Fly around and shoot at asteroids.
Controls:
- Thrust:
- Keyboard: Up/Down arrow keys or W/S
- Gamepad: Right trigger to accelerate, left trigger to decelerate.
- Rotation:
- Keyboard: Left/Right arrow keys or A/D
- Gamepad: Left stick
- Shoot:
- Keyboard: Control or Space
- Gamepad: South action button (A on Xbox controller)
Explore the demo
- Check out the light sources:
- Global lights under the
Global Lightsgame object in the game scene - Asteroid debris light source in
Prefabs/Debris - Bullet in
Prefabs/Bullet. Note how an unlit sprite is drawn on top of the light source to preserve the sharp light source shape even when the light map is downscaled - The rocket thruster light in the
Prefabs/Playerprefab underPlayer/Thruster/Light
- Global lights under the
- Check out the shadow casters:
- The asteroid in
Prefabs/Asteroid - The rocket in
Prefabs/Player
- The asteroid in
- Check out the light receivers and their materials:
- The asteroid and the rocket.
- Note how their sprites have normal maps attached through the standard Unity "Secondary Textures" mechanism.
- Check out the
Materials/SpriteWithNormal.matmaterial. It uses the package-provided shader for diffuse lighting with normals with the customized distance parameter.
- The nebula background in
Main Camera/Background- Note how it uses the lightmap information in a fully custom material with a custom shader.
- Check out the material shader graph in
Materials/Shaders/NebulaBG.shadergraphand the usage of theGetRCLightMapColornode.
- The asteroid and the rocket.
Next Steps
- Learn about General Concepts
- Set up the Quality Settings according to your needs
- Explore the detailed Usage Guide
General Concepts and Light Types
Core Concepts
Radiance Cascades
Radiance Cascades is a novel lighting technique that accurately approximates global illumination in 2D. The system uses a series of lighting probe cascades to capture the lighting information in the scene. Each cascade gradually trades spatial resolution for angular resolution (placing fewer probes making each probe capture more directions), efficiently consolidating the global lighting information.
Variants
A high-level overview of the provided radiance cascades variants. Check out the links in the References section for more details.
Vanilla Radiance Cascades
The original Radiance Cascades implementation. In many cases it's the most performant option. However, it's also the most prone to light leaks and ringing artifacts.
Bilinear Fix
Bilinear fix is a slight modification of the original radiance cascades intended to address the artifacts in the vanilla version. It is achieved by precisely matching the ray ends of the lower probe cascades to the ray starts of the higher cascades. It requires 4x as many rays traced for each probe, so the fix comes with a substantial performance hit.
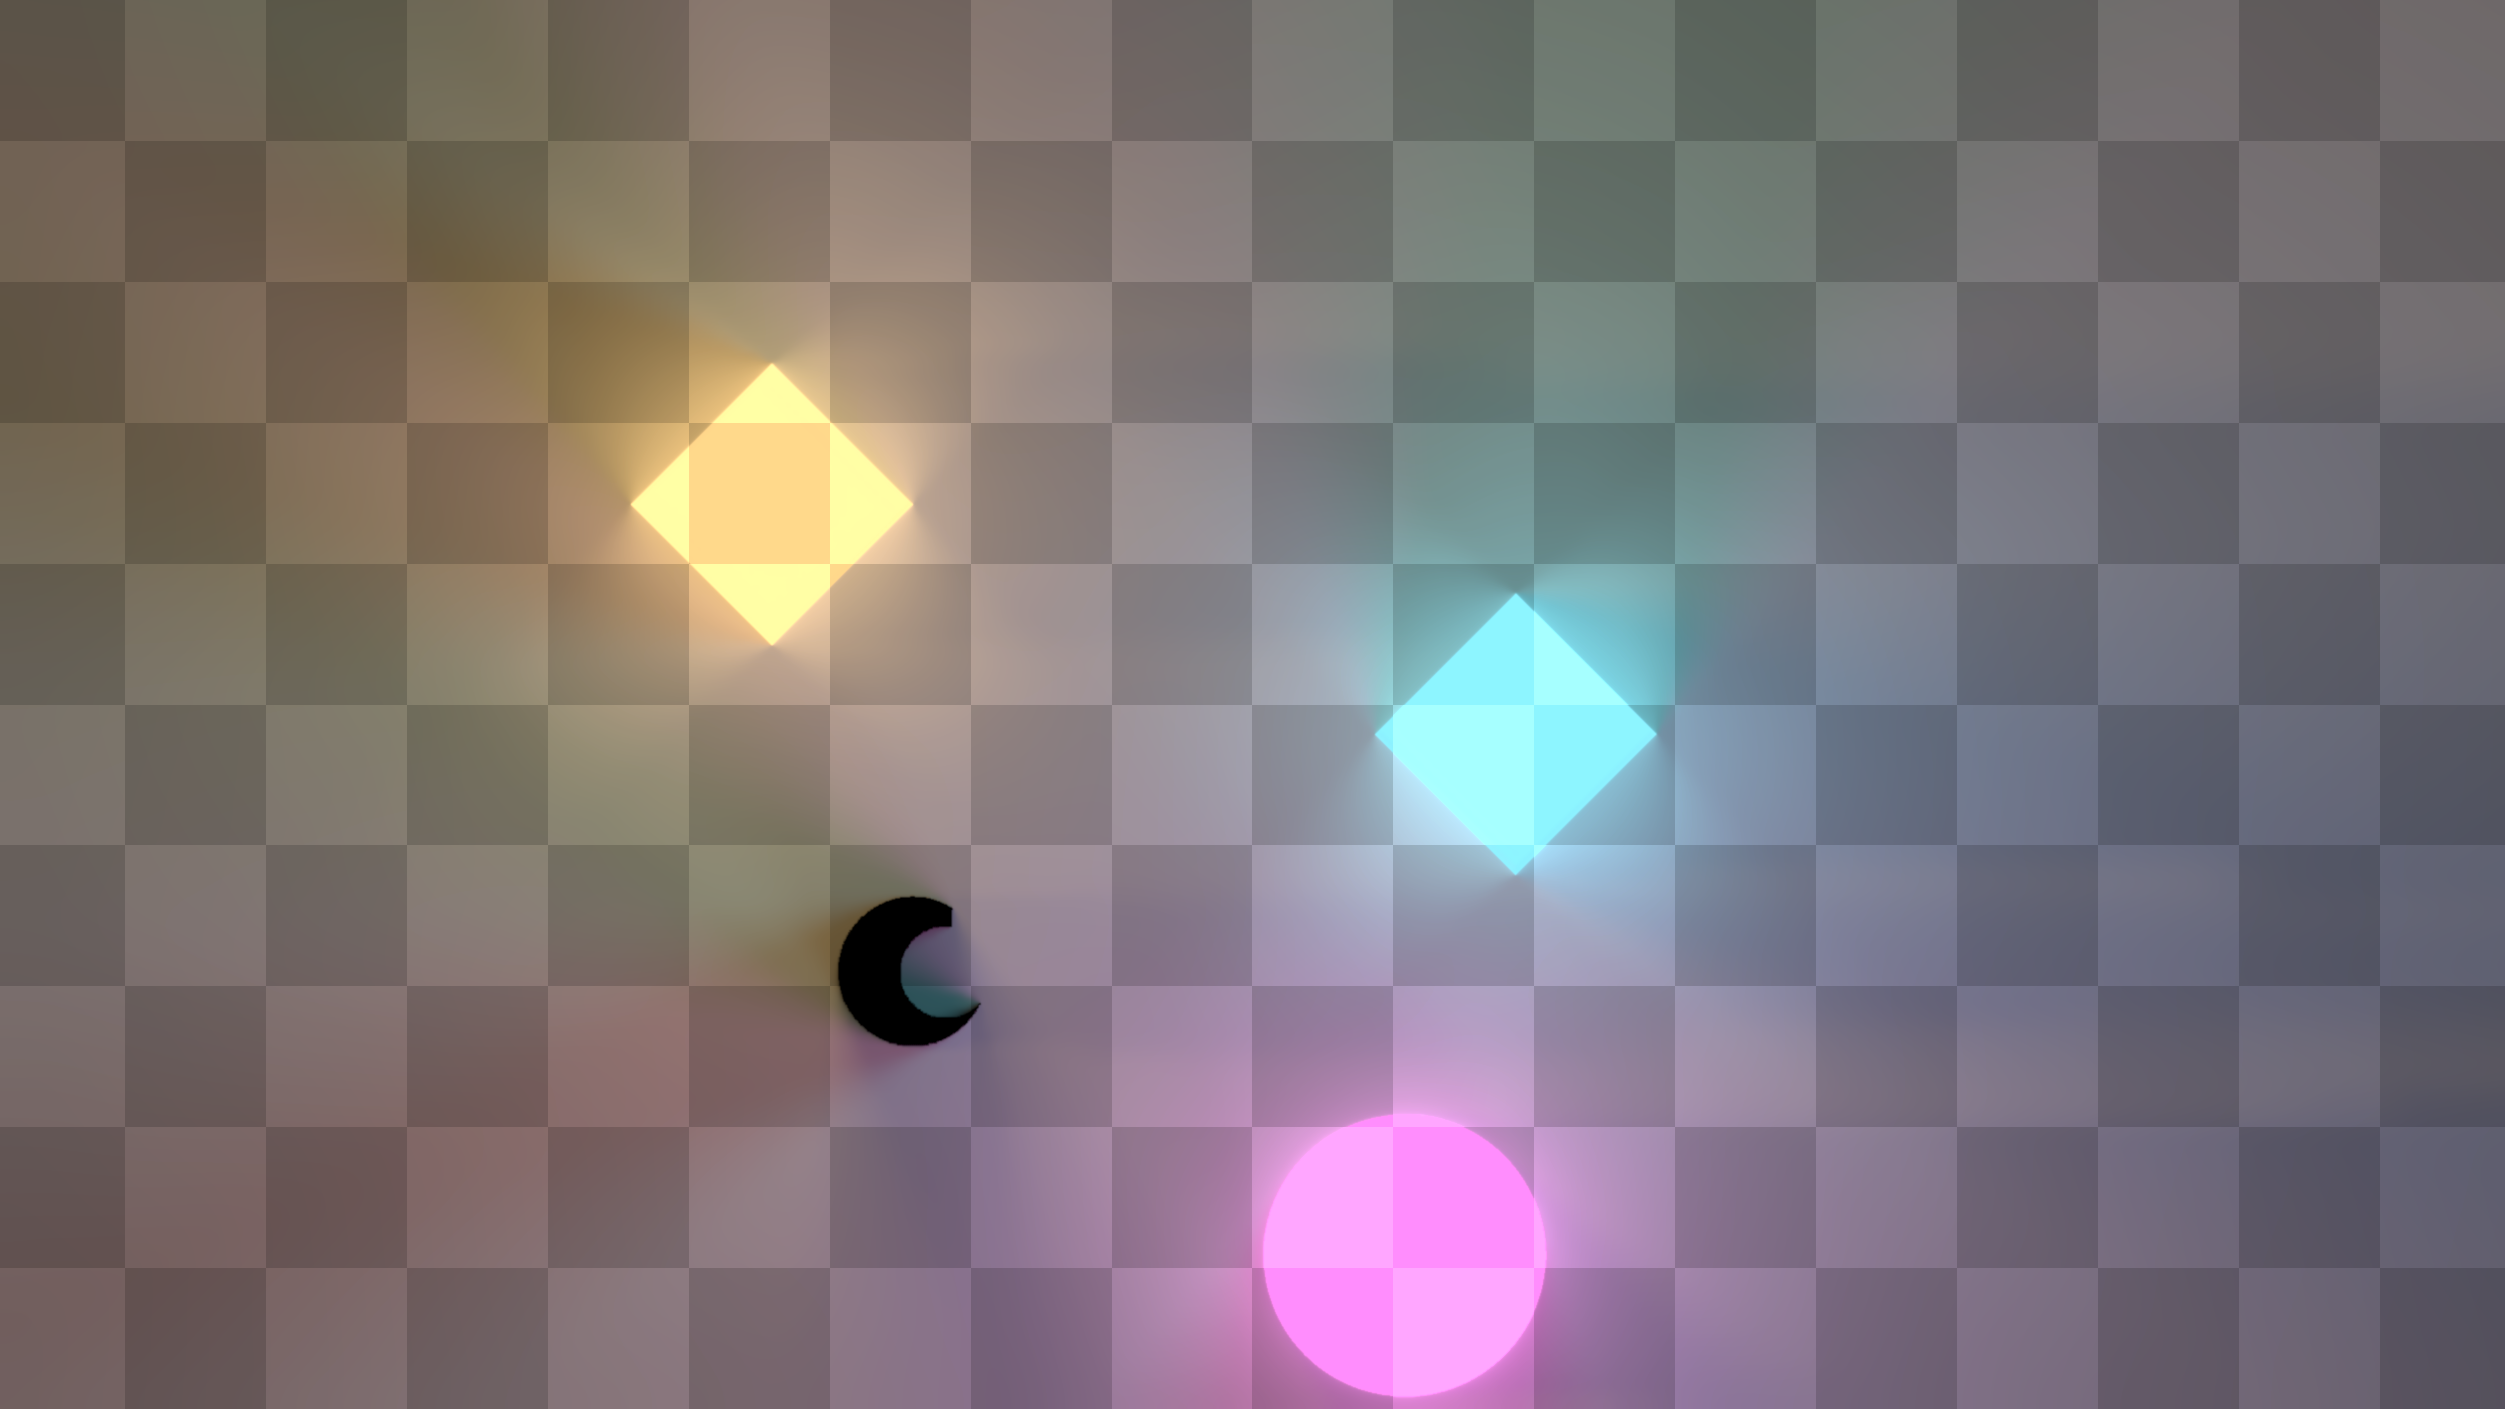
Holographic Radiance Cascades
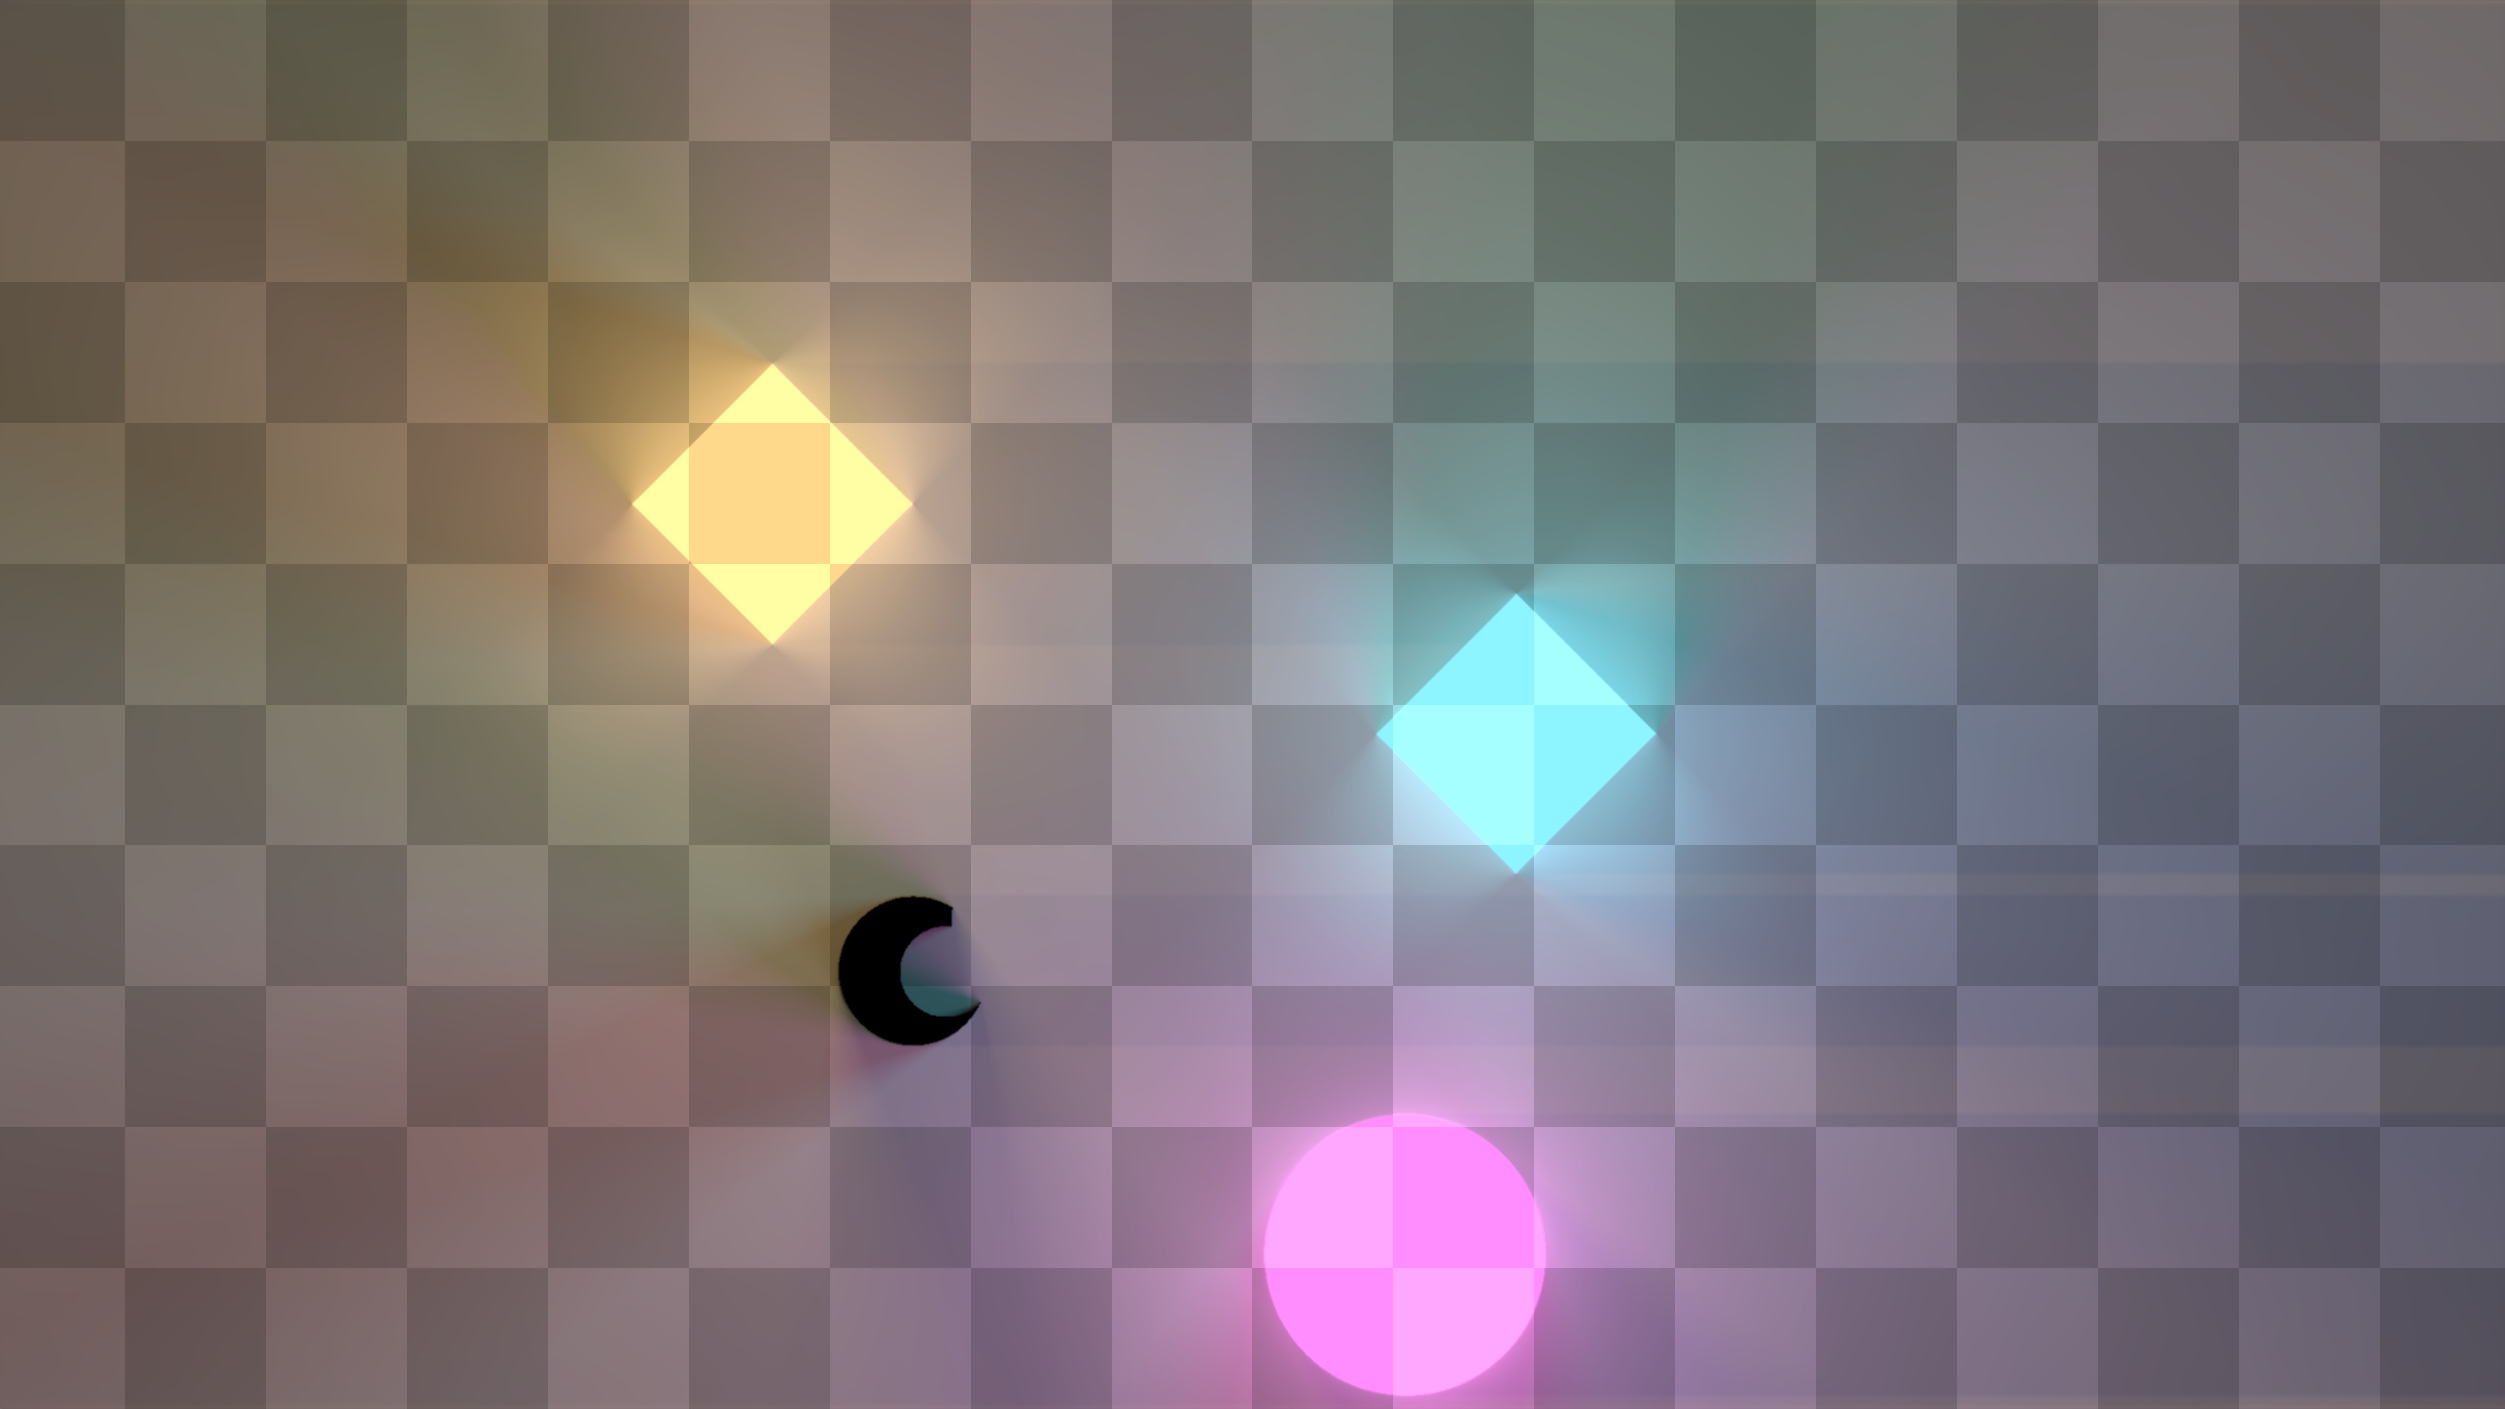
Holographic Radiance Cascades is the latest development of the original idea. It uses a different approach to probe placement achieving perfect tiling of the areas covered by light probes. In contrast, the probes in both the vanilla and the bilinear fix approaches partially overlap and might even have gaps between them (in the vanilla version). Also, the alternative probe placement enables more precise capturing of penumbras, producing sharper, more physically correct shadows.
And finally, it enables the use of an acceleration structure that makes the effect performance cost mostly independent of the scene complexity. Check out the Usage Guide and [Performance Tips] for more details.
This is the recommended variant for most cases.
| Note the subtle hard horizontal shadows extending to the right. They are coming from the directional light source. The former two variants are unable to capture such hard shadows |
Lightmap
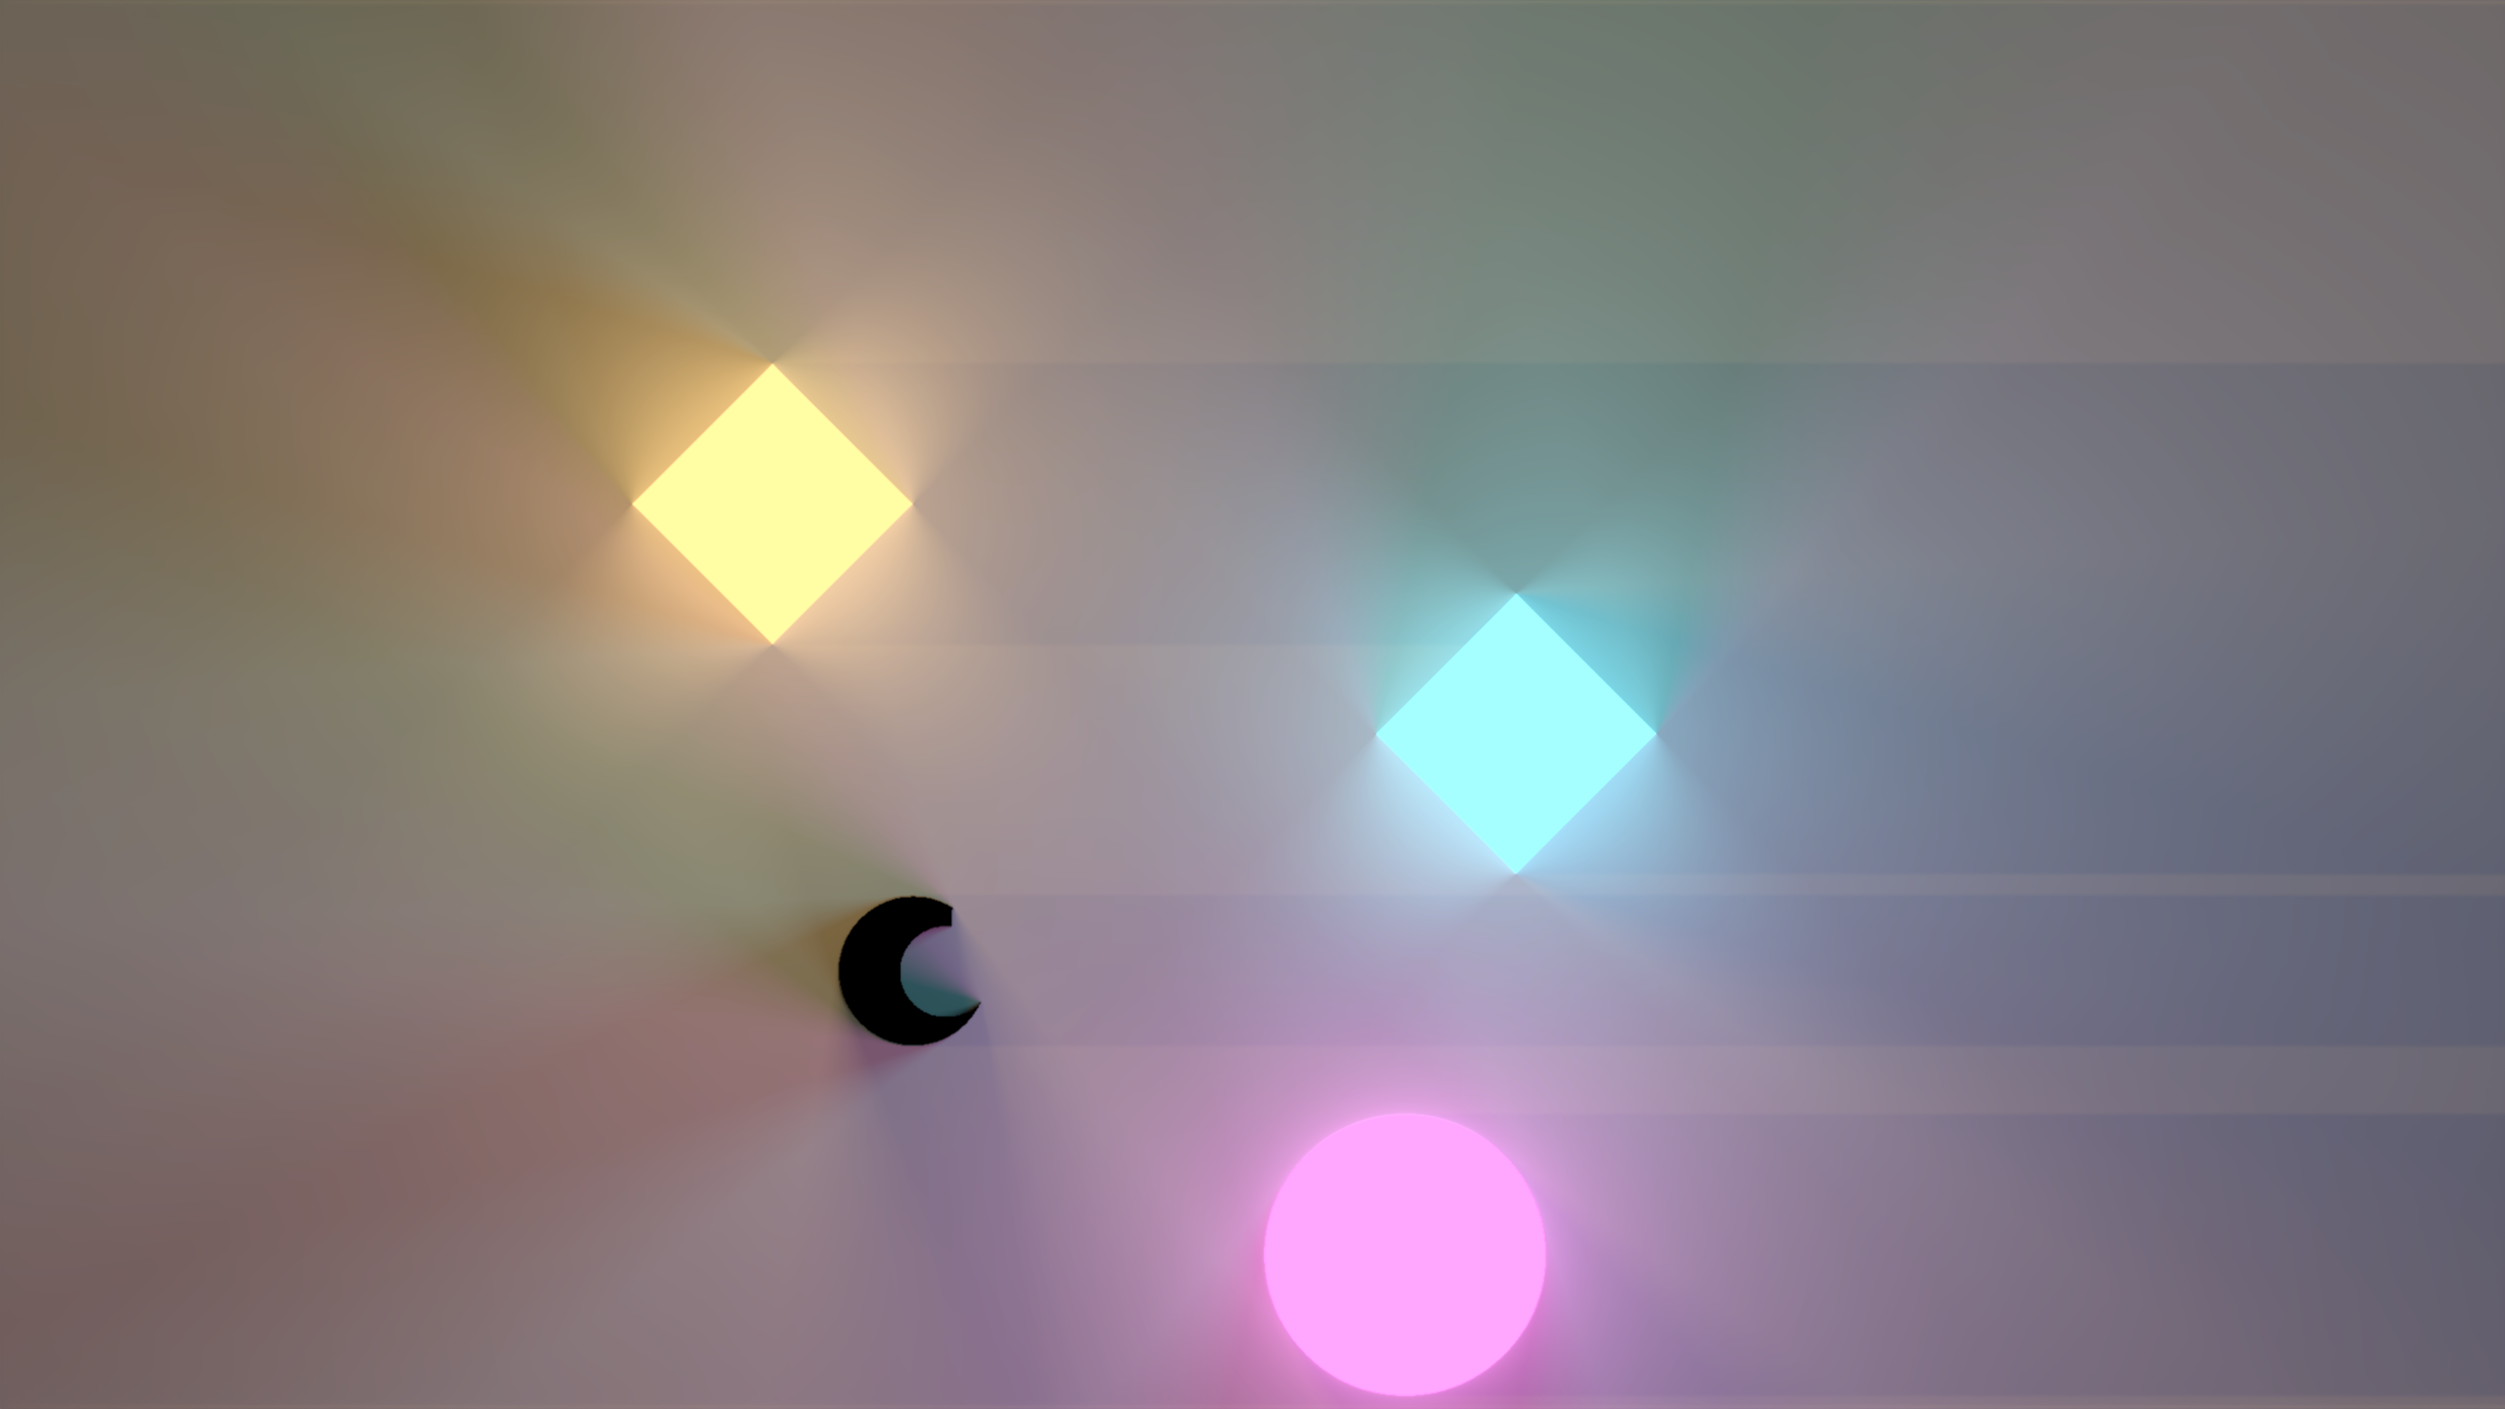
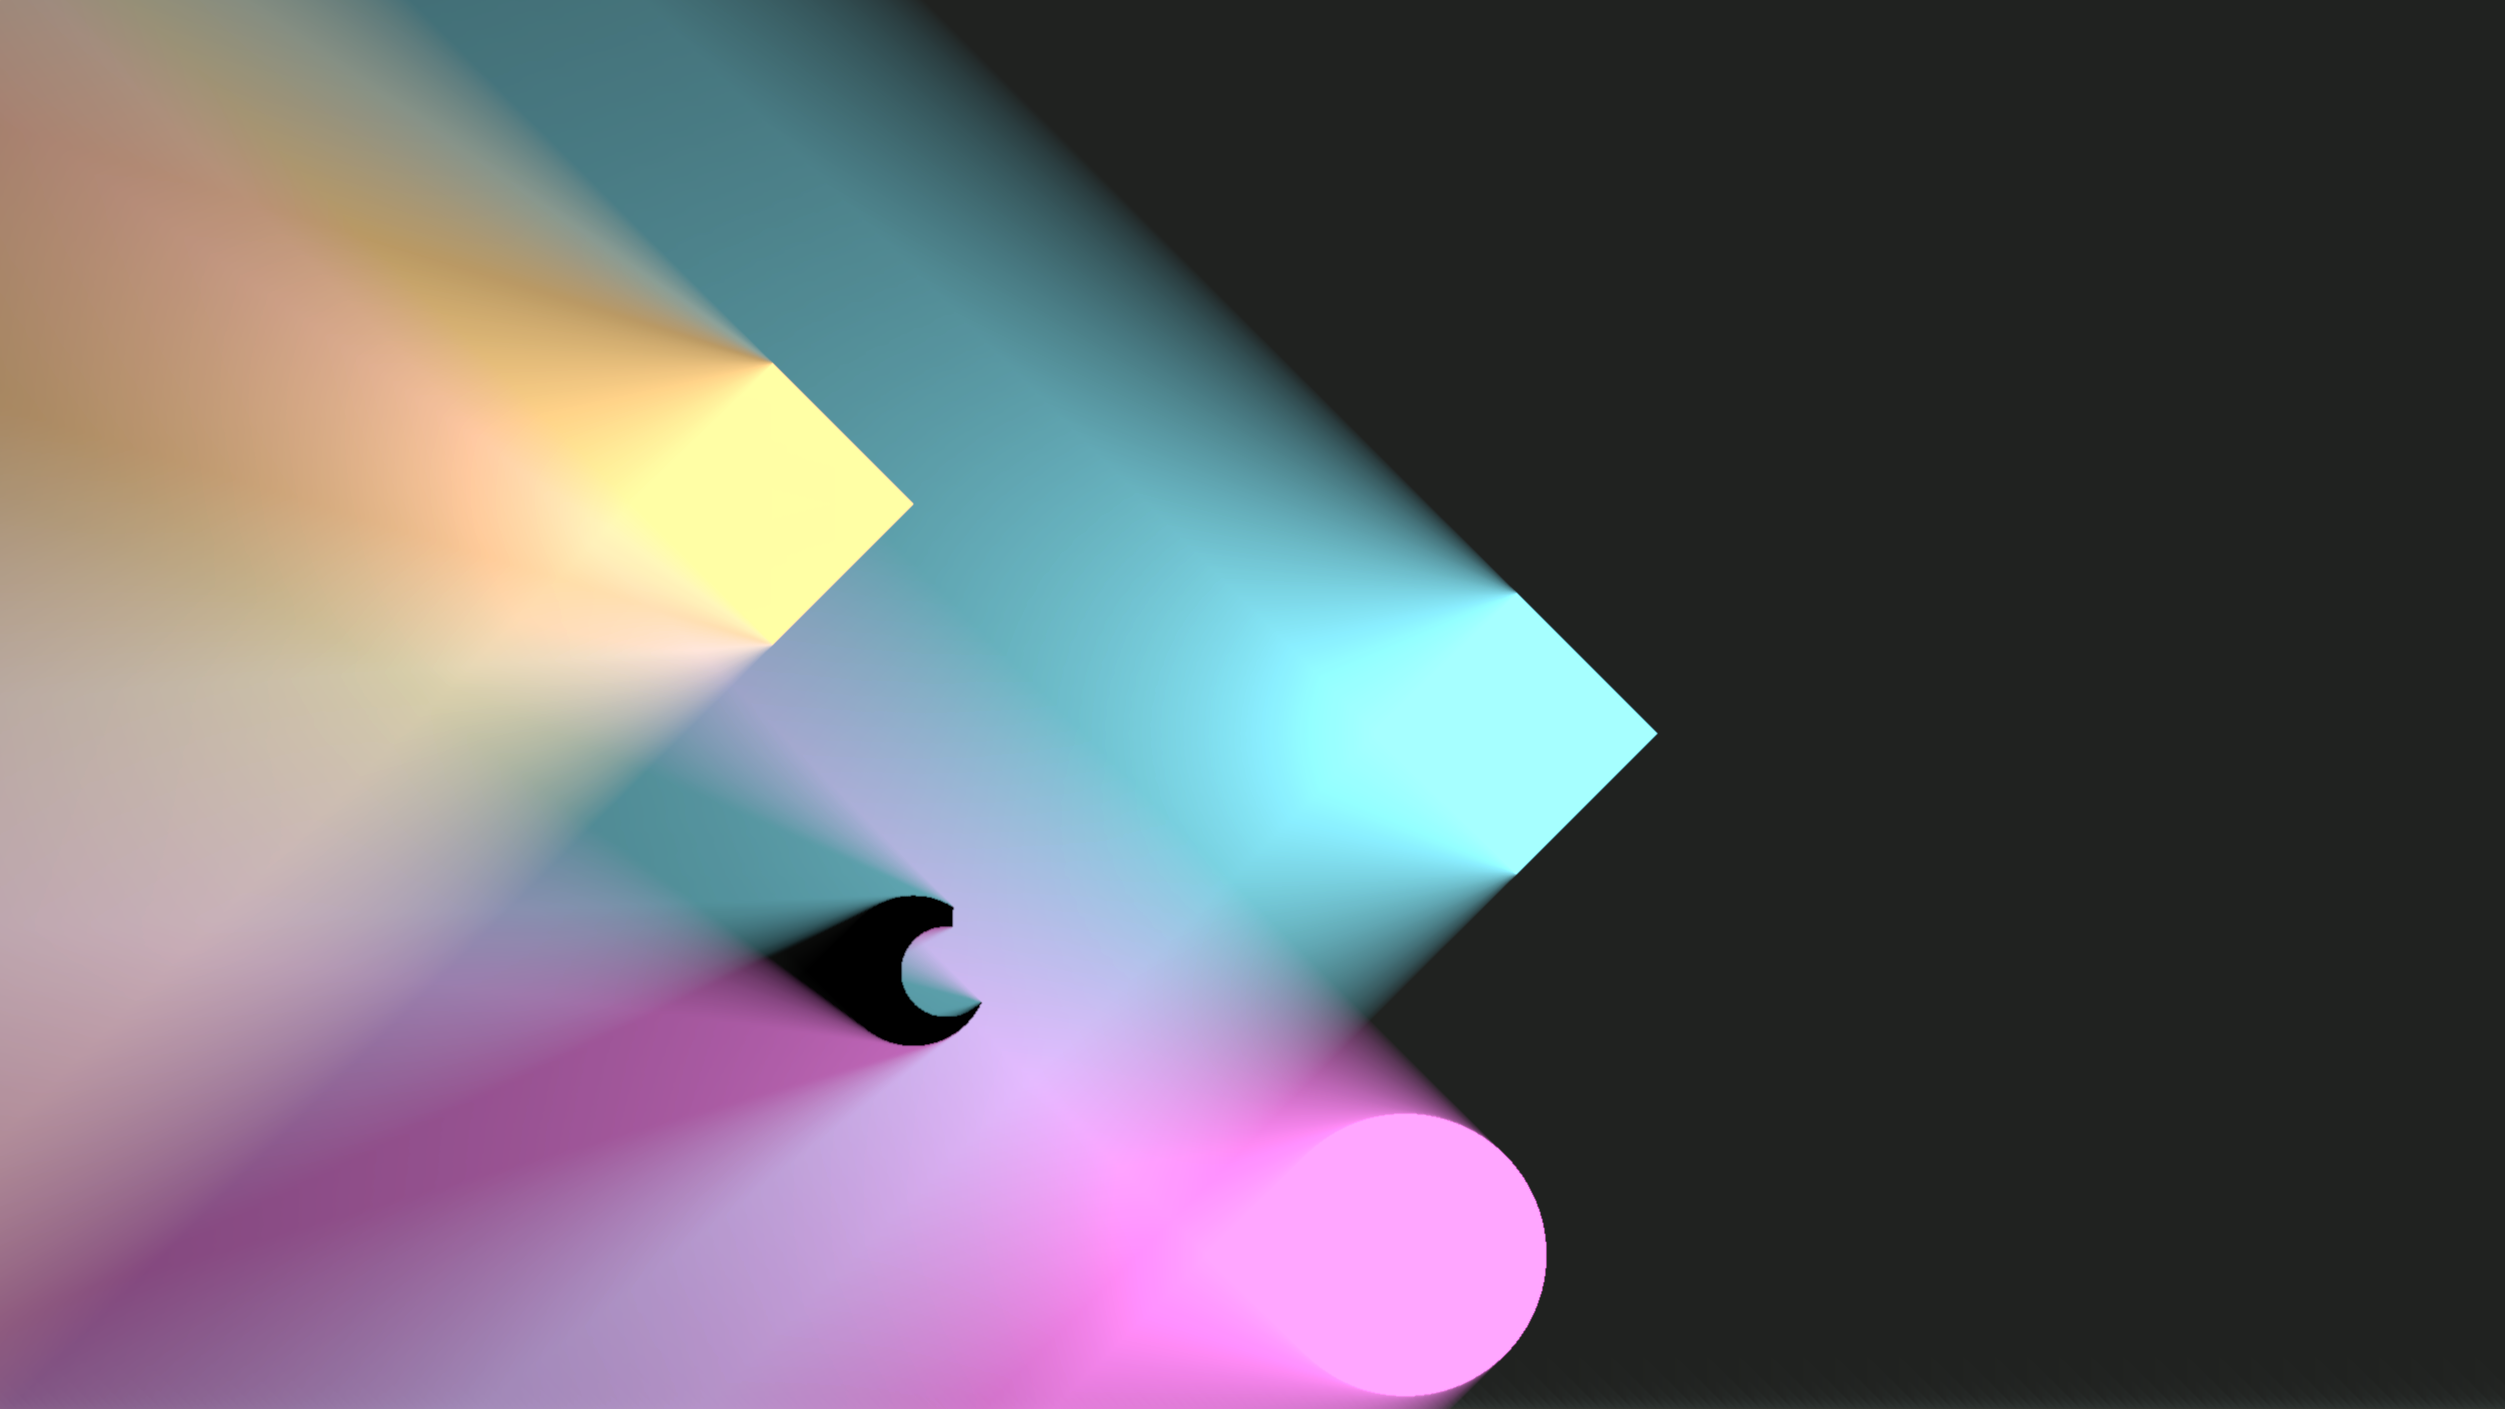
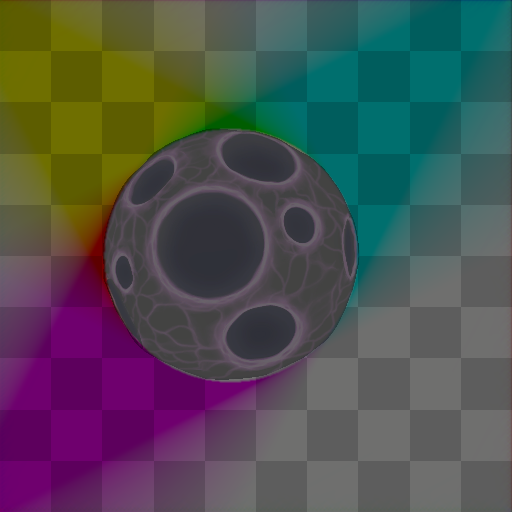
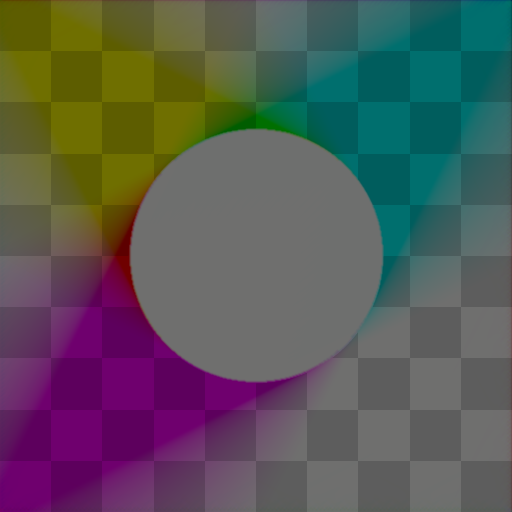
The result of the radiance cascades pass (regardless of the variant) is a set of screen-space lightmaps. The light map is a texture that stores light fluence data at each texel. All variants of radiance cascades produce five light maps: one main light map, storing the combined fluence data, and four directional light maps storing fluence coming from four cardinal directions separately.
The light maps are used by the built-in standard shaders (Radiance Cascades/RC-Sprite-Lit-Flat and Radiance Cascades/RC-Sprite-Lit-WithNormal). But they are also exposed as global textures and can be used by custom shaders.
See Usage Guide and the Nebula material in the Space demo.
Example light maps for the scene above
Main lightmap:
Directional lightmaps:
Light Types and Occluders
Both lights and occluders/shadow casters are represented by a unified "Light Contributor" class. Thus, an occluder is just a light which intensity equals zero. Note that all light sources support negative intensities, turning them into a sort of "light sinks." This is not physically correct, but it can be used for various artistic effects.
The system provides multiple classes of light contributors.
Global Lights
Global lights don't have a specific location and light the entire scene. There are two types of global lights.
Sky Light
Sky light represents a constant amount of light coming from all directions. Note that the sky light can still be occluded if there is a fully enclosed area.
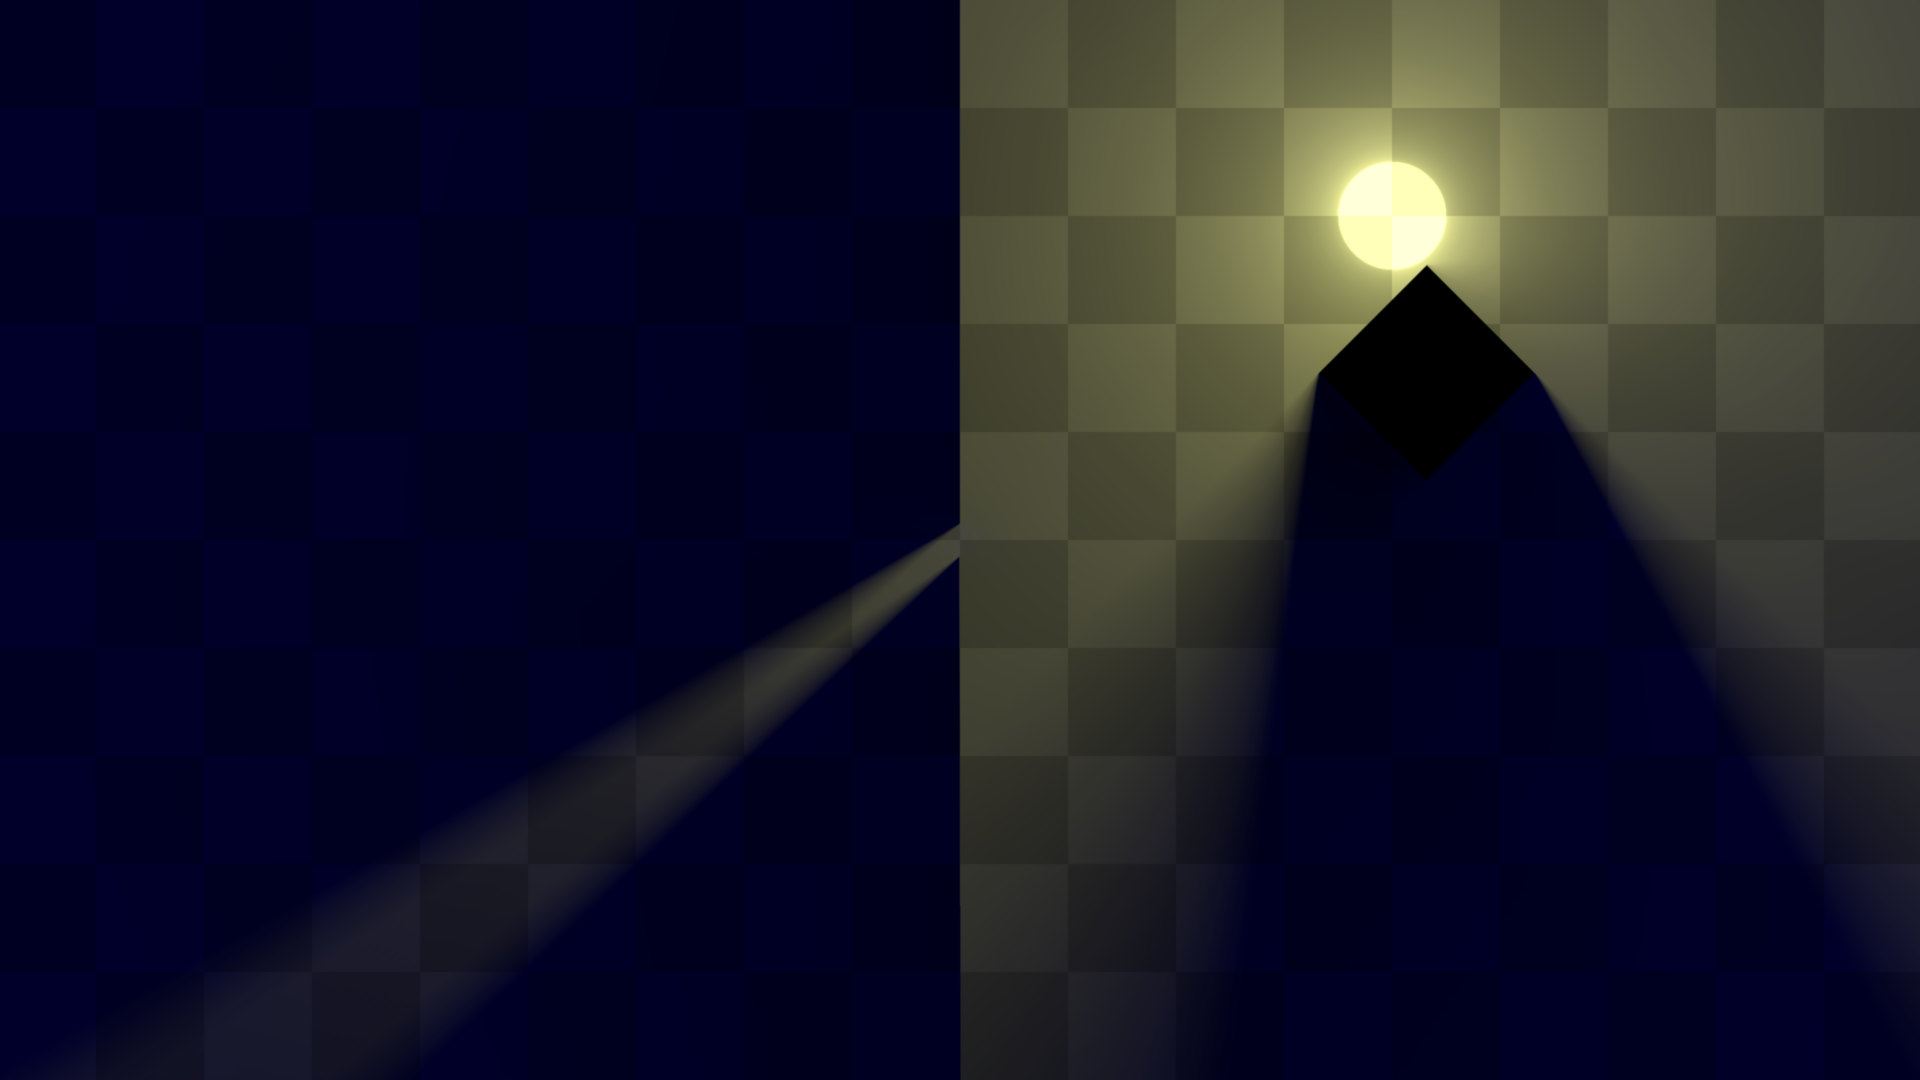 A dim blue sky light with two line occluders, a diamond-shaped freeform occluder, and a circle light source. Note that the sky light does not light the insides of the diamond occluder.
Directional Lights
Directional lights represent the constant amount of light coming from a specific direction with controllable softness. It effectively represents a light source at an infinite distance. The softness controls the size of such a light source (0 is a point light, 1 is a light that spans the entire semicircle)
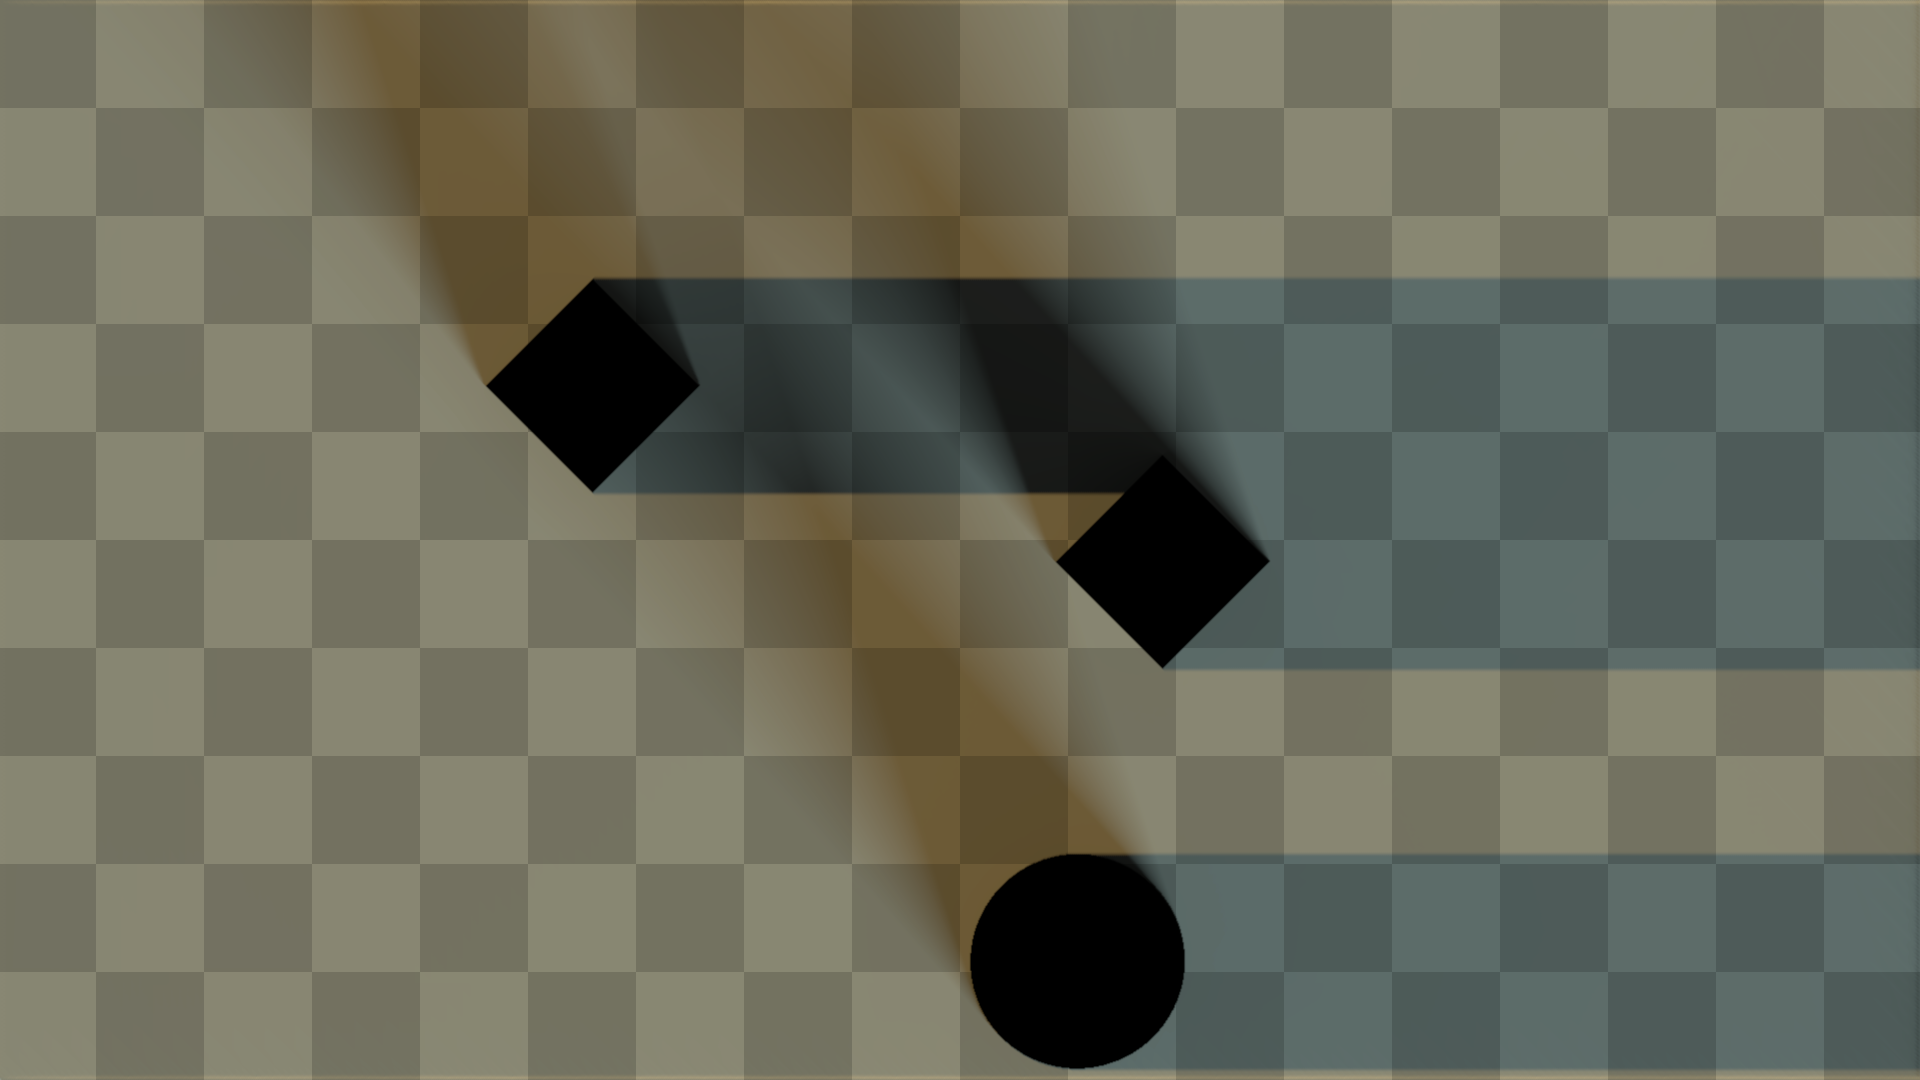 A subtle greenish skylight and two directional lights with some occluders. The first directional light shines a warm orange light to the right and has the softness of
 0, the second light shines cold blueish color in the upper-left direction (120°) and has the softness of 0.135.
Analytical Lights
Analytical lights are made of ideal mathematical shapes. Currently, the two basic shapes supported are a circle and a line. One notable property of analytical lights is their ability to act as one-sided lights or occluders. In this mode only one side of their surface interacts with the light, while the other is completely transparent. This can be especially handy if you're using diffuse shading with normals and need to make your game objects act as obstacles or light sources while receiving the lighting themselves.
Check out the Usage Guide and the Space demo for more info.
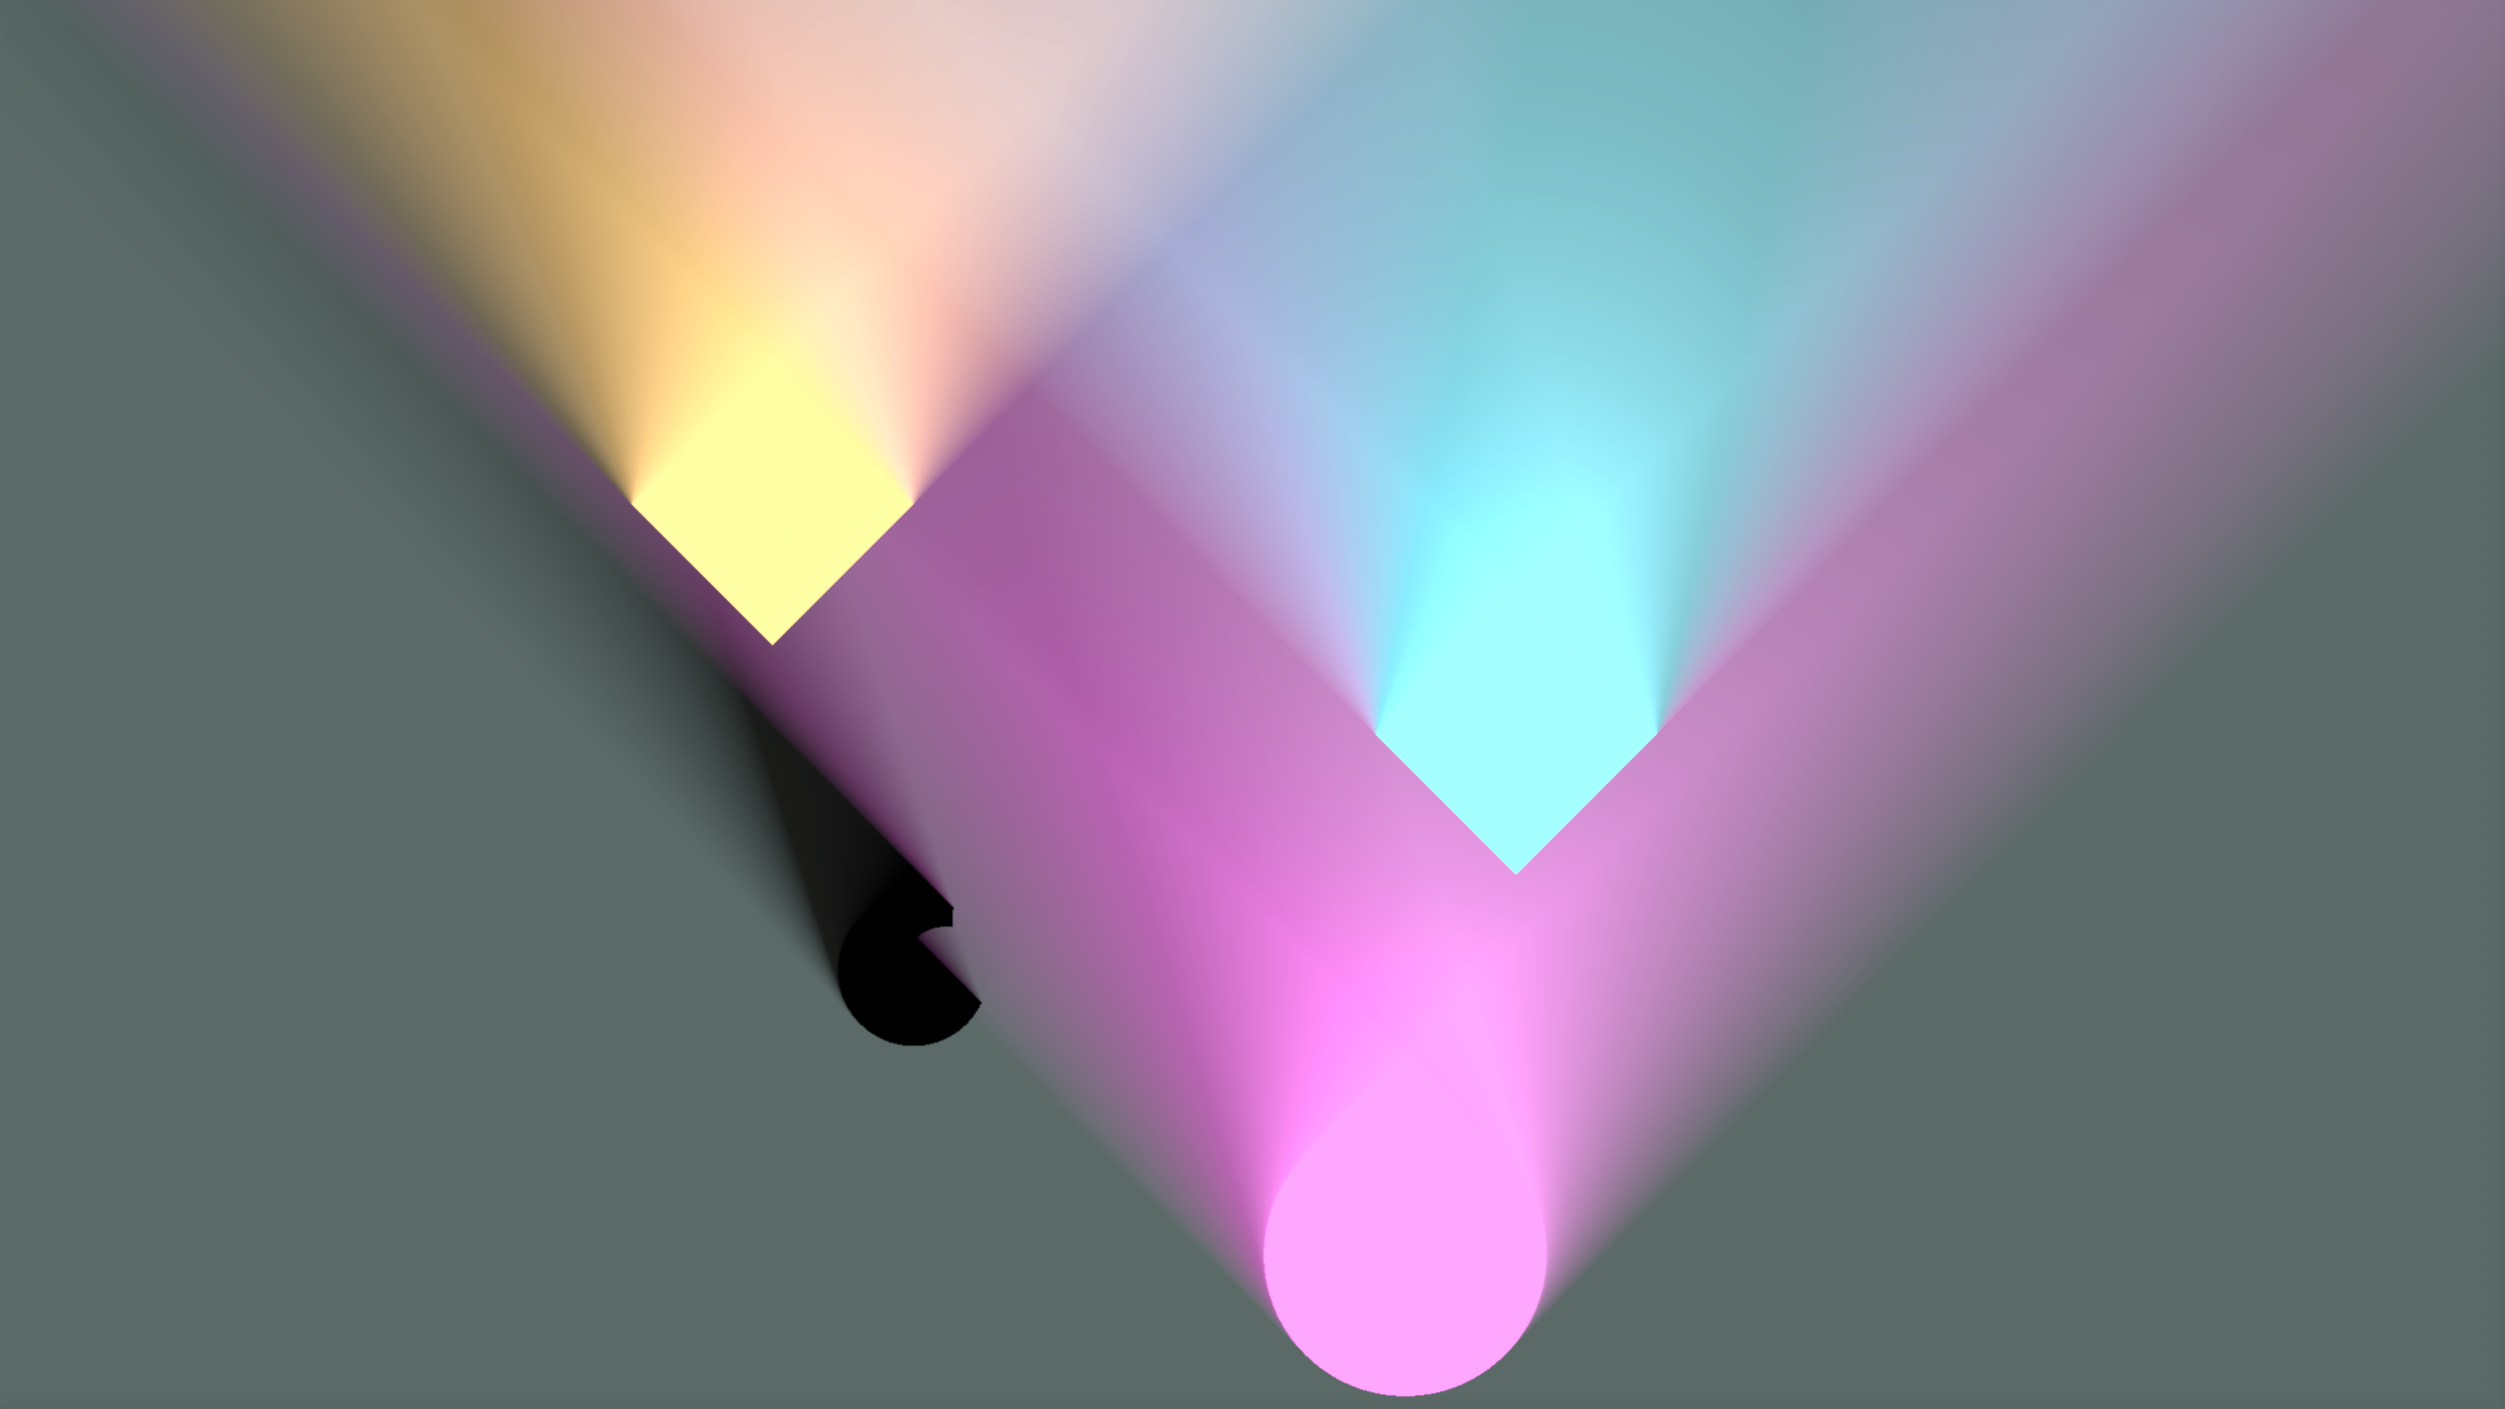
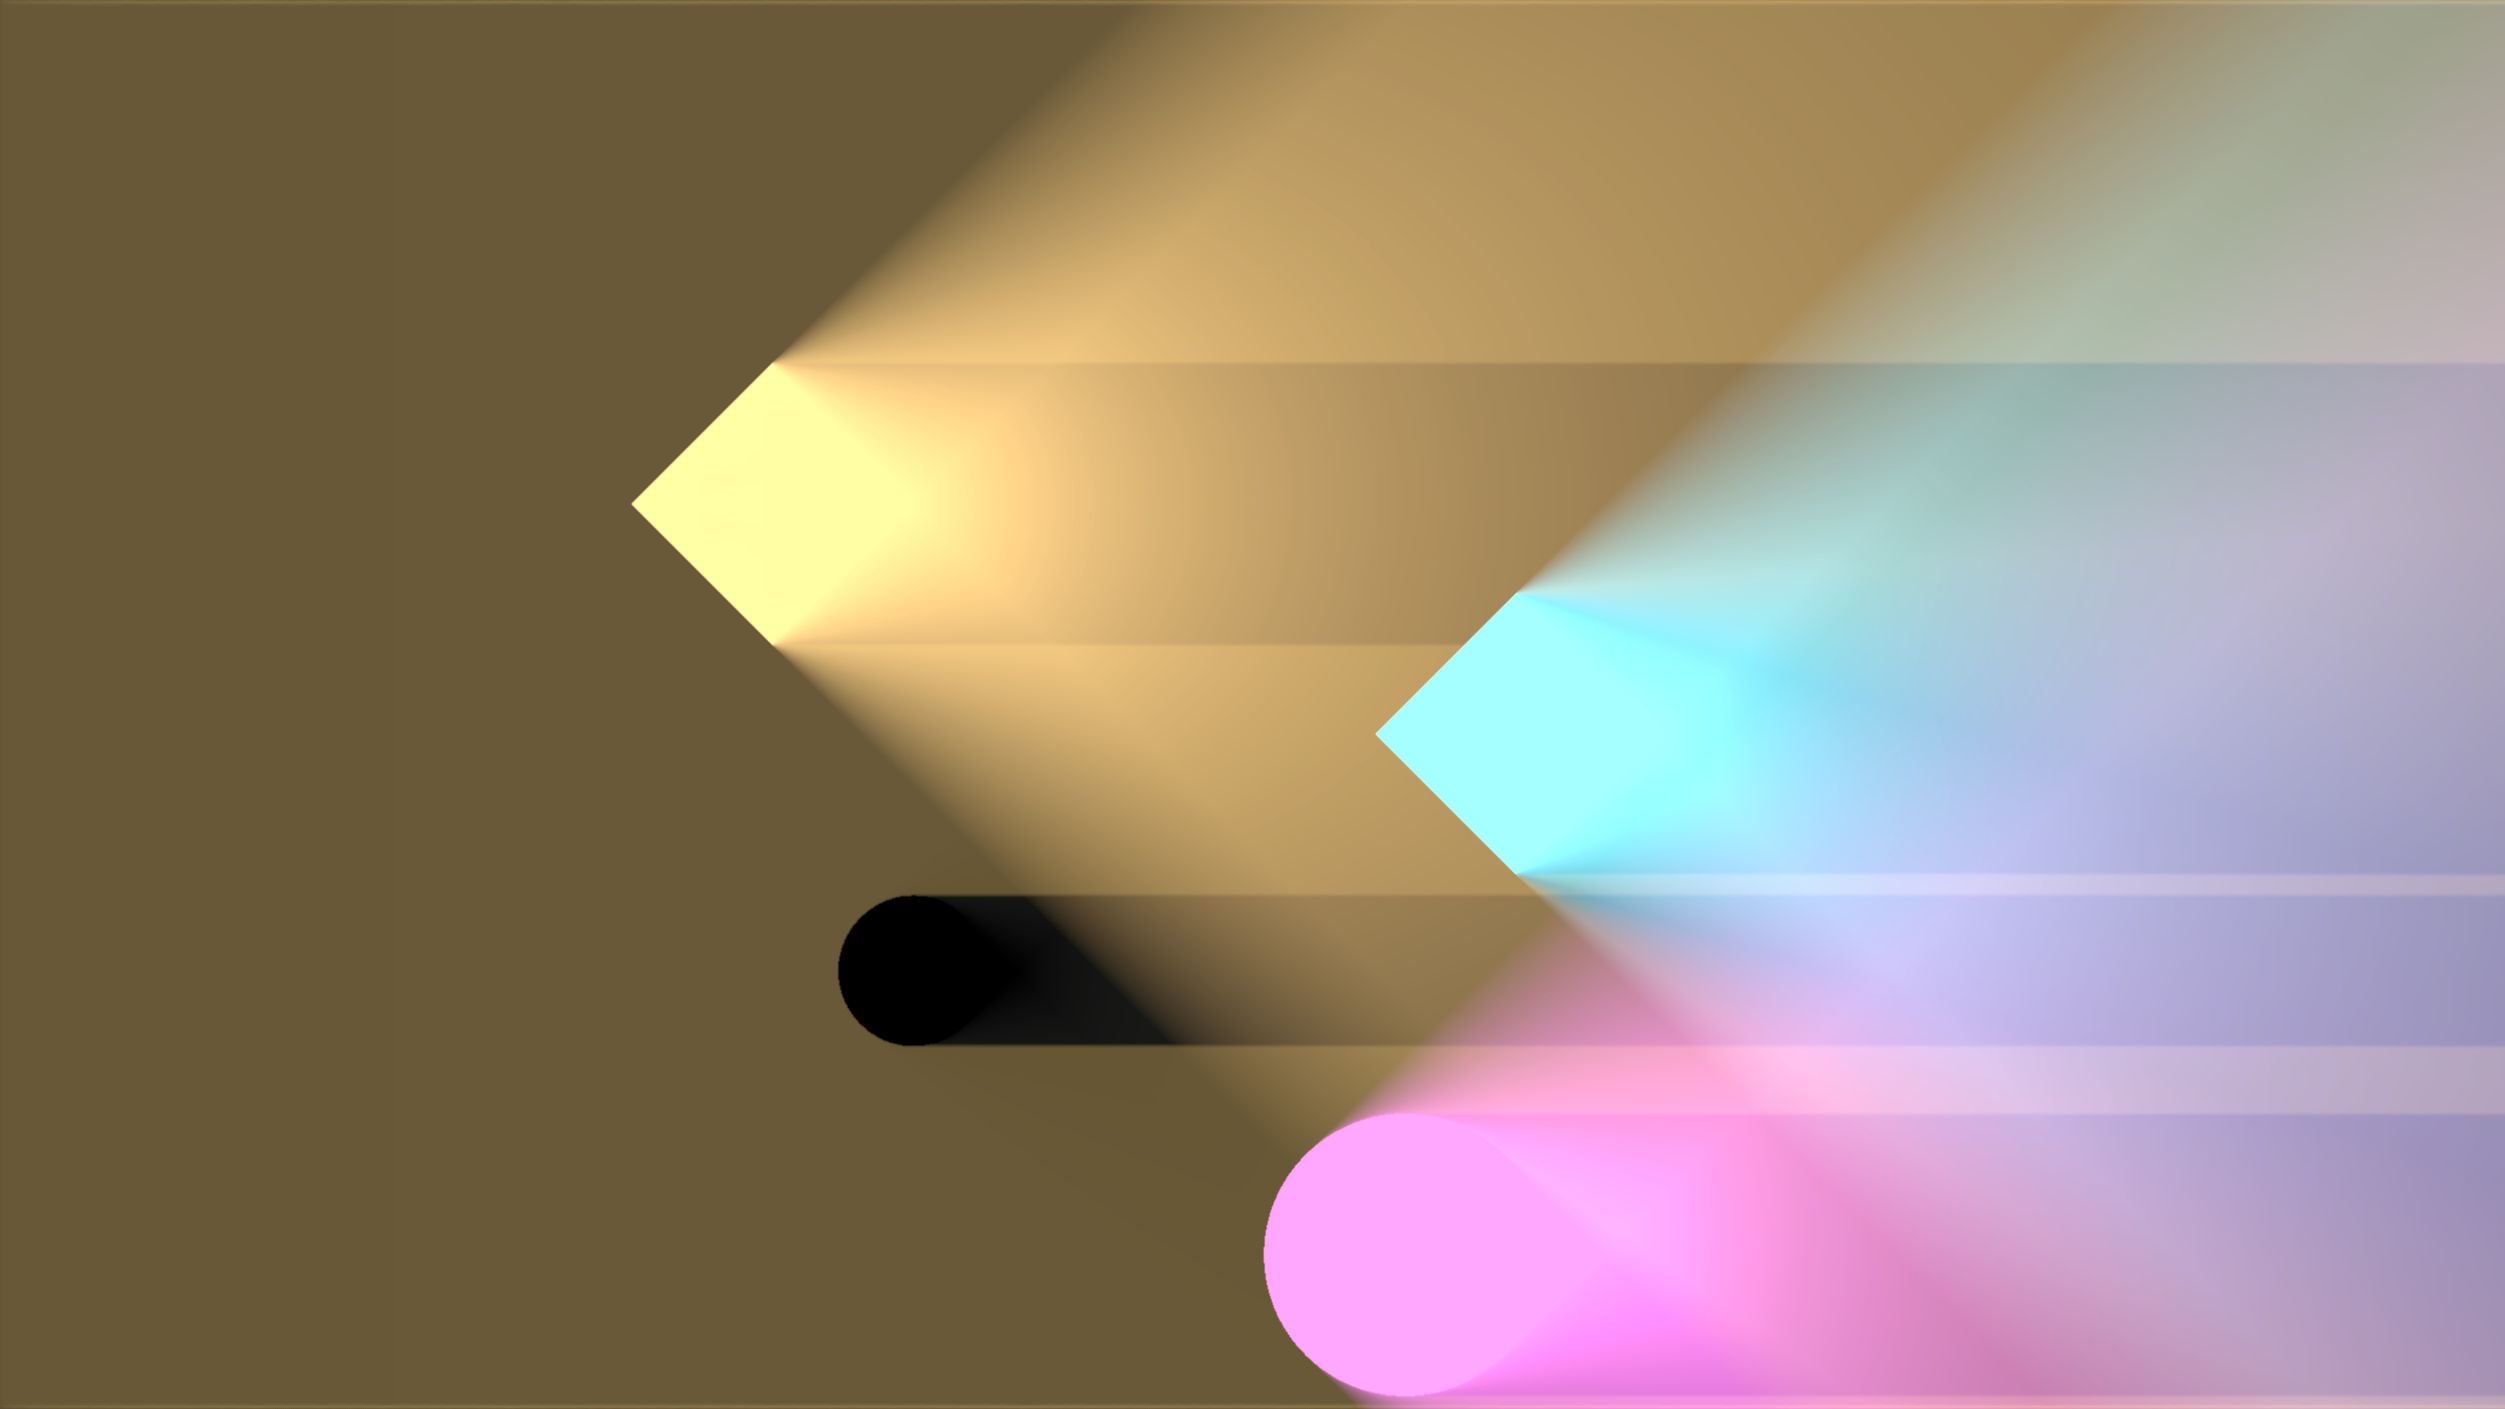
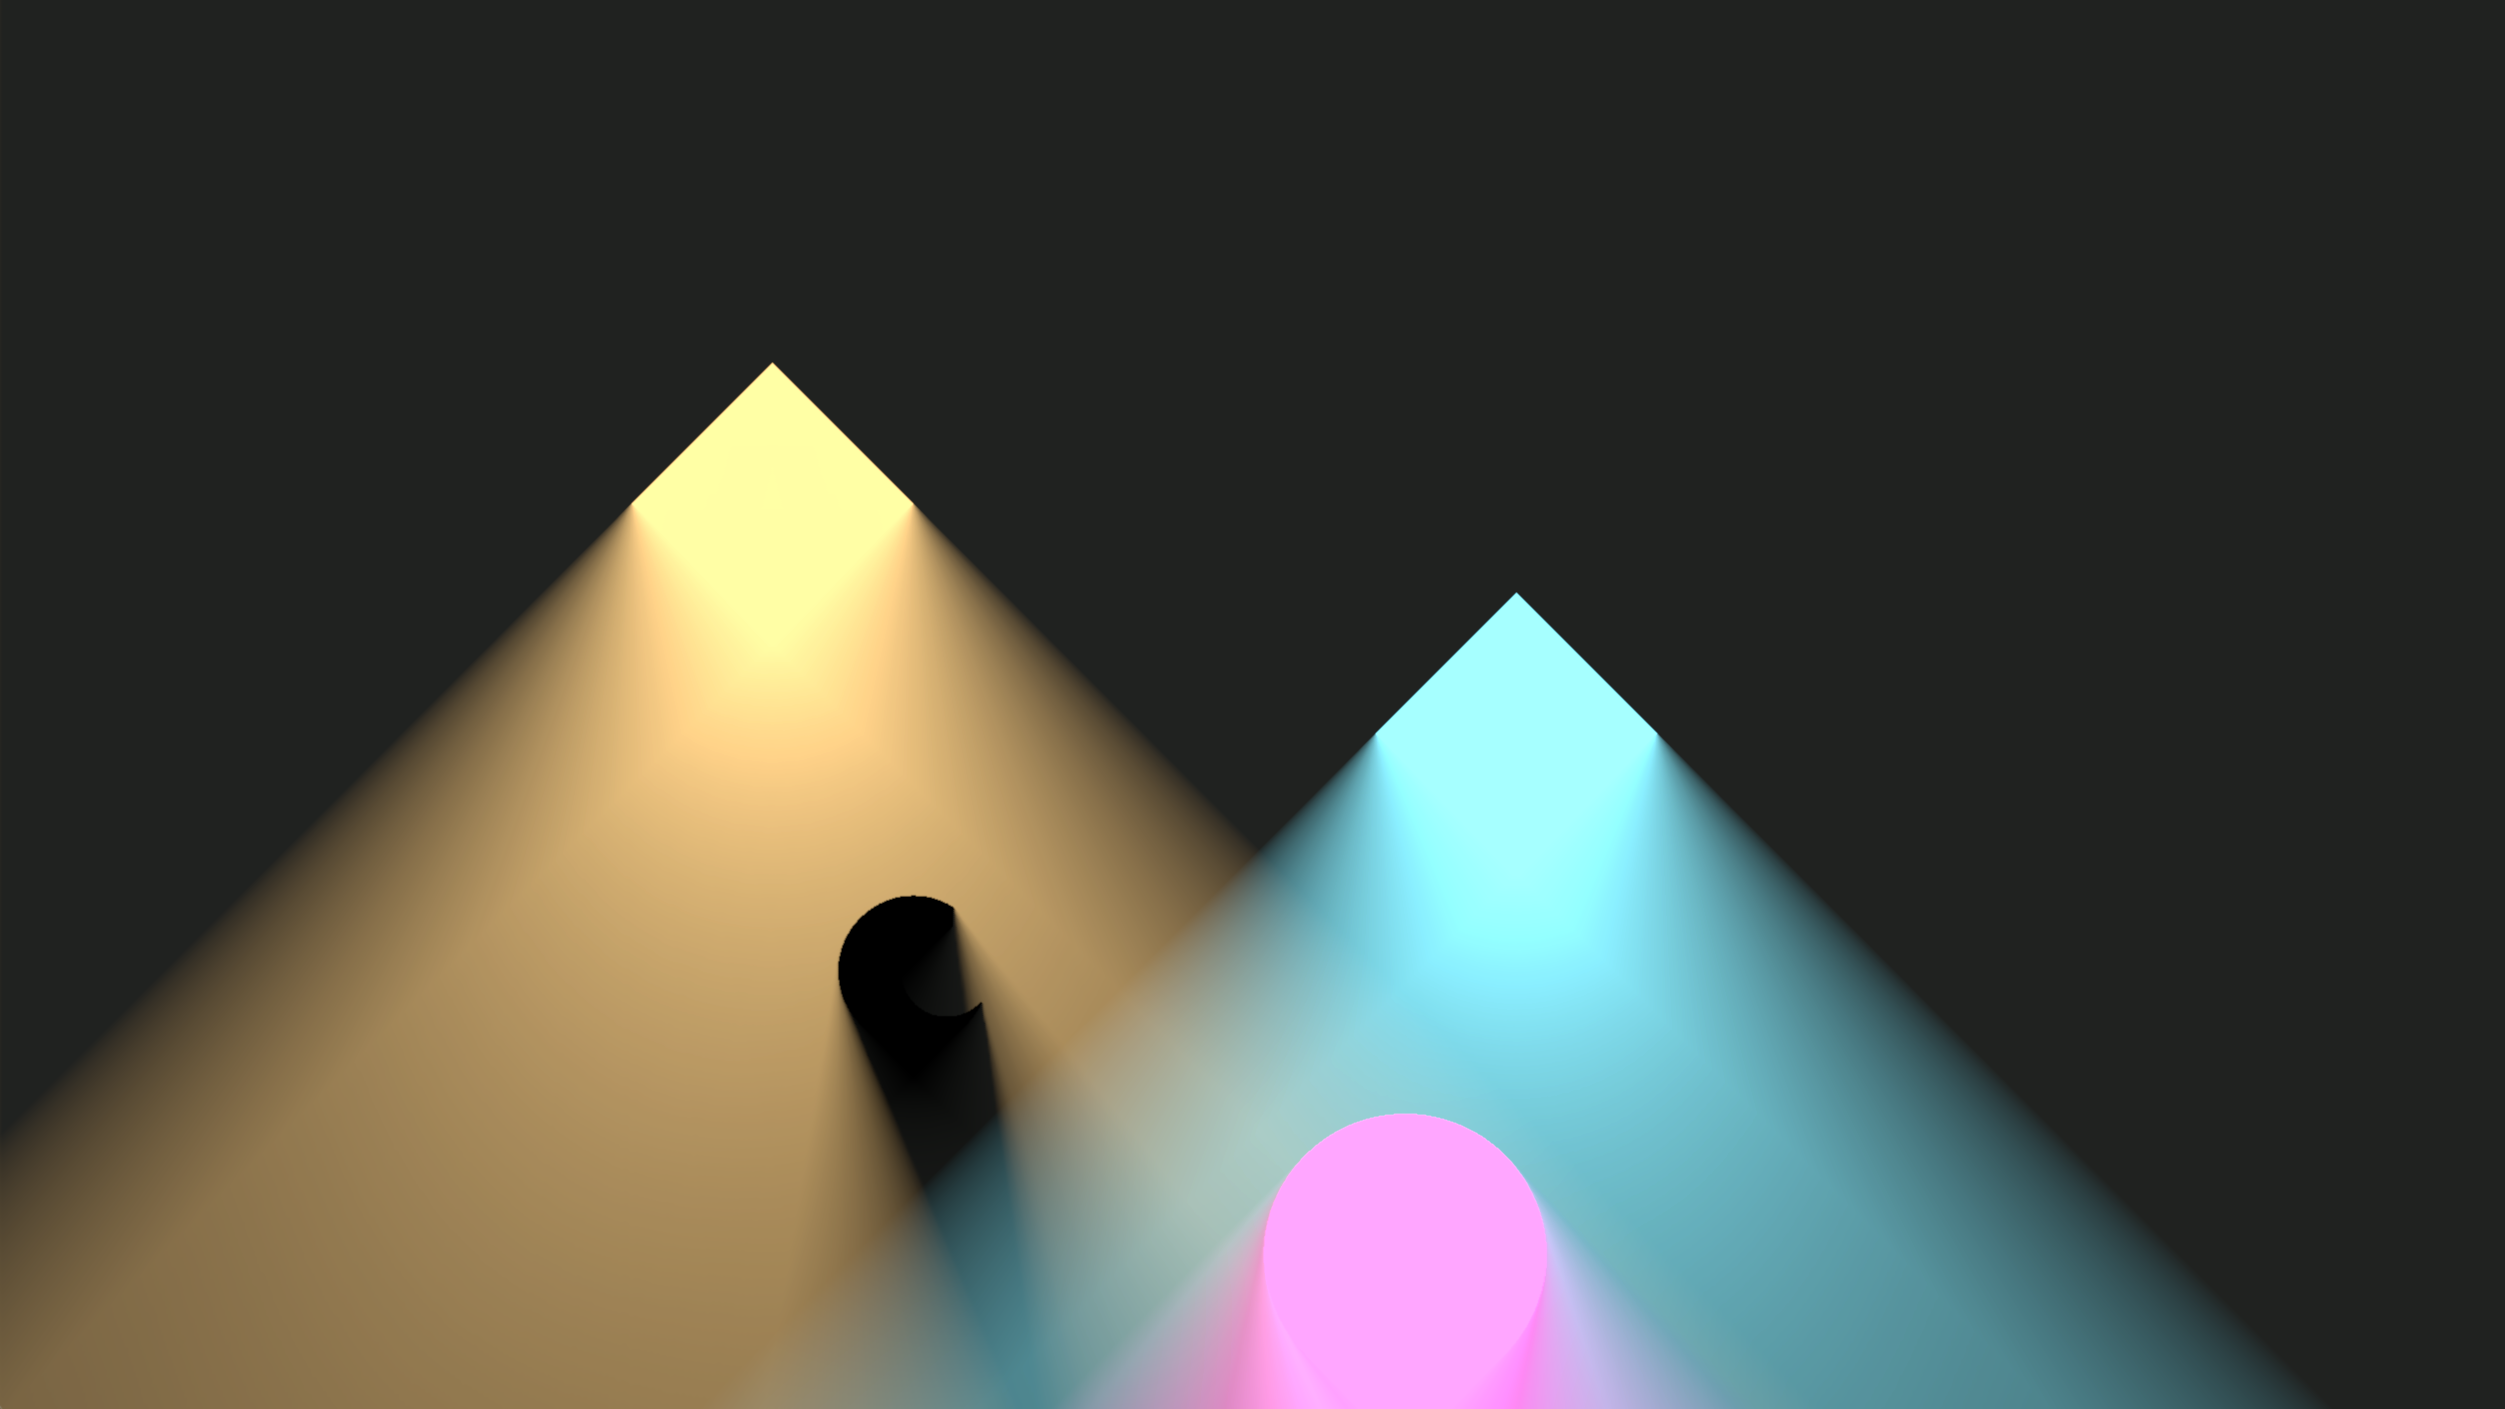
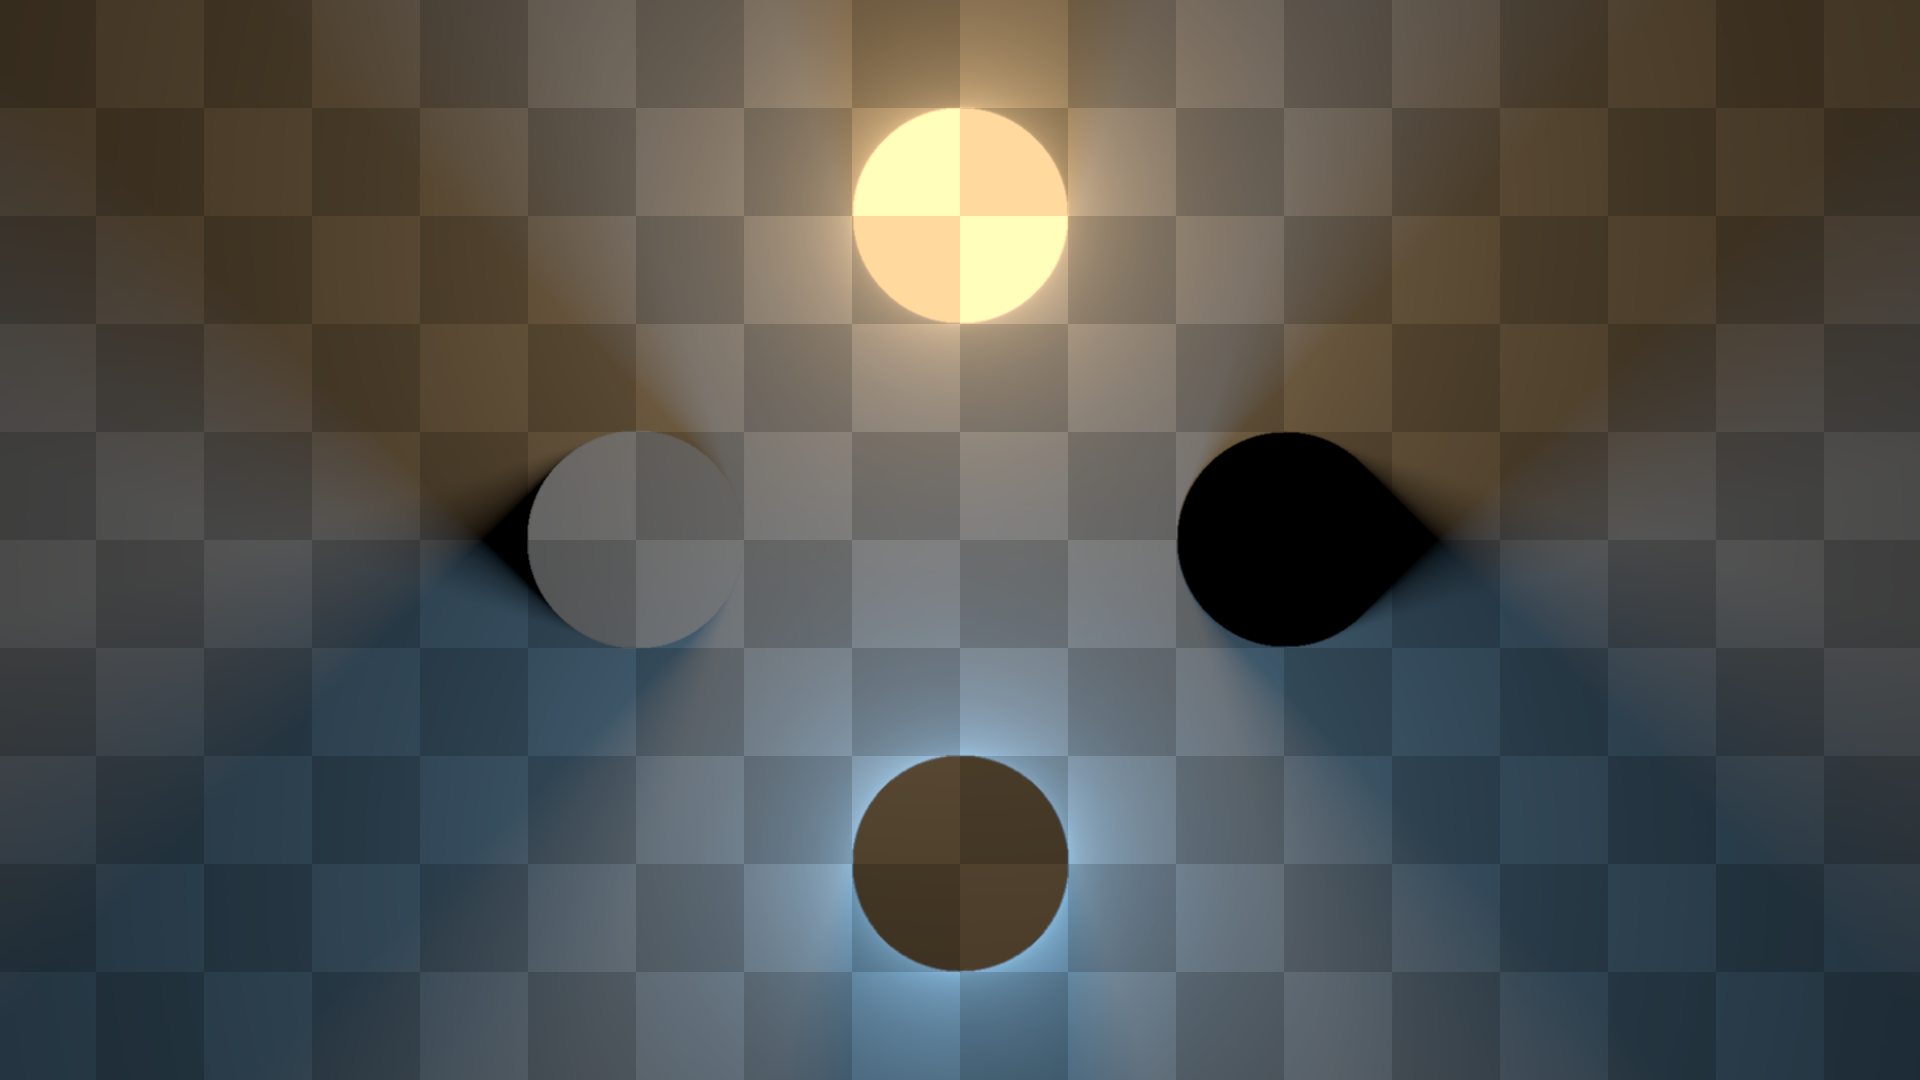
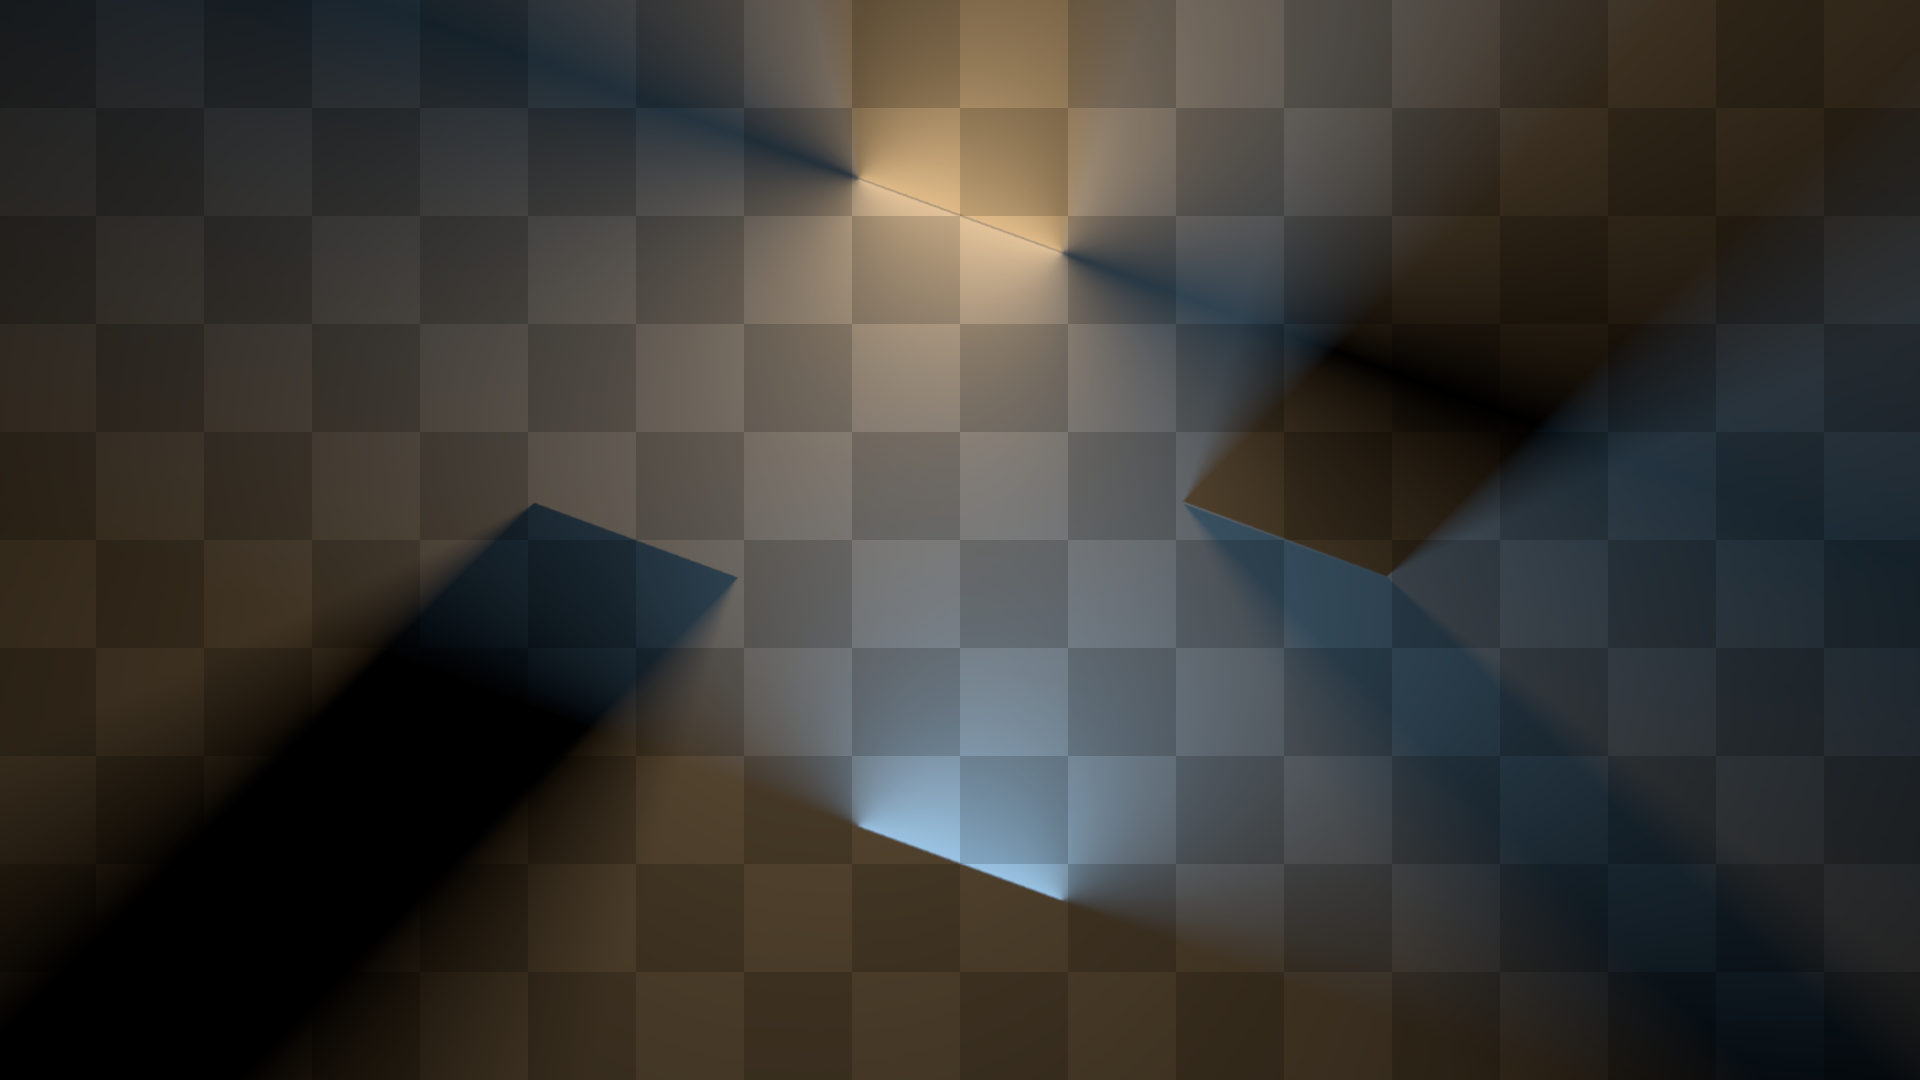
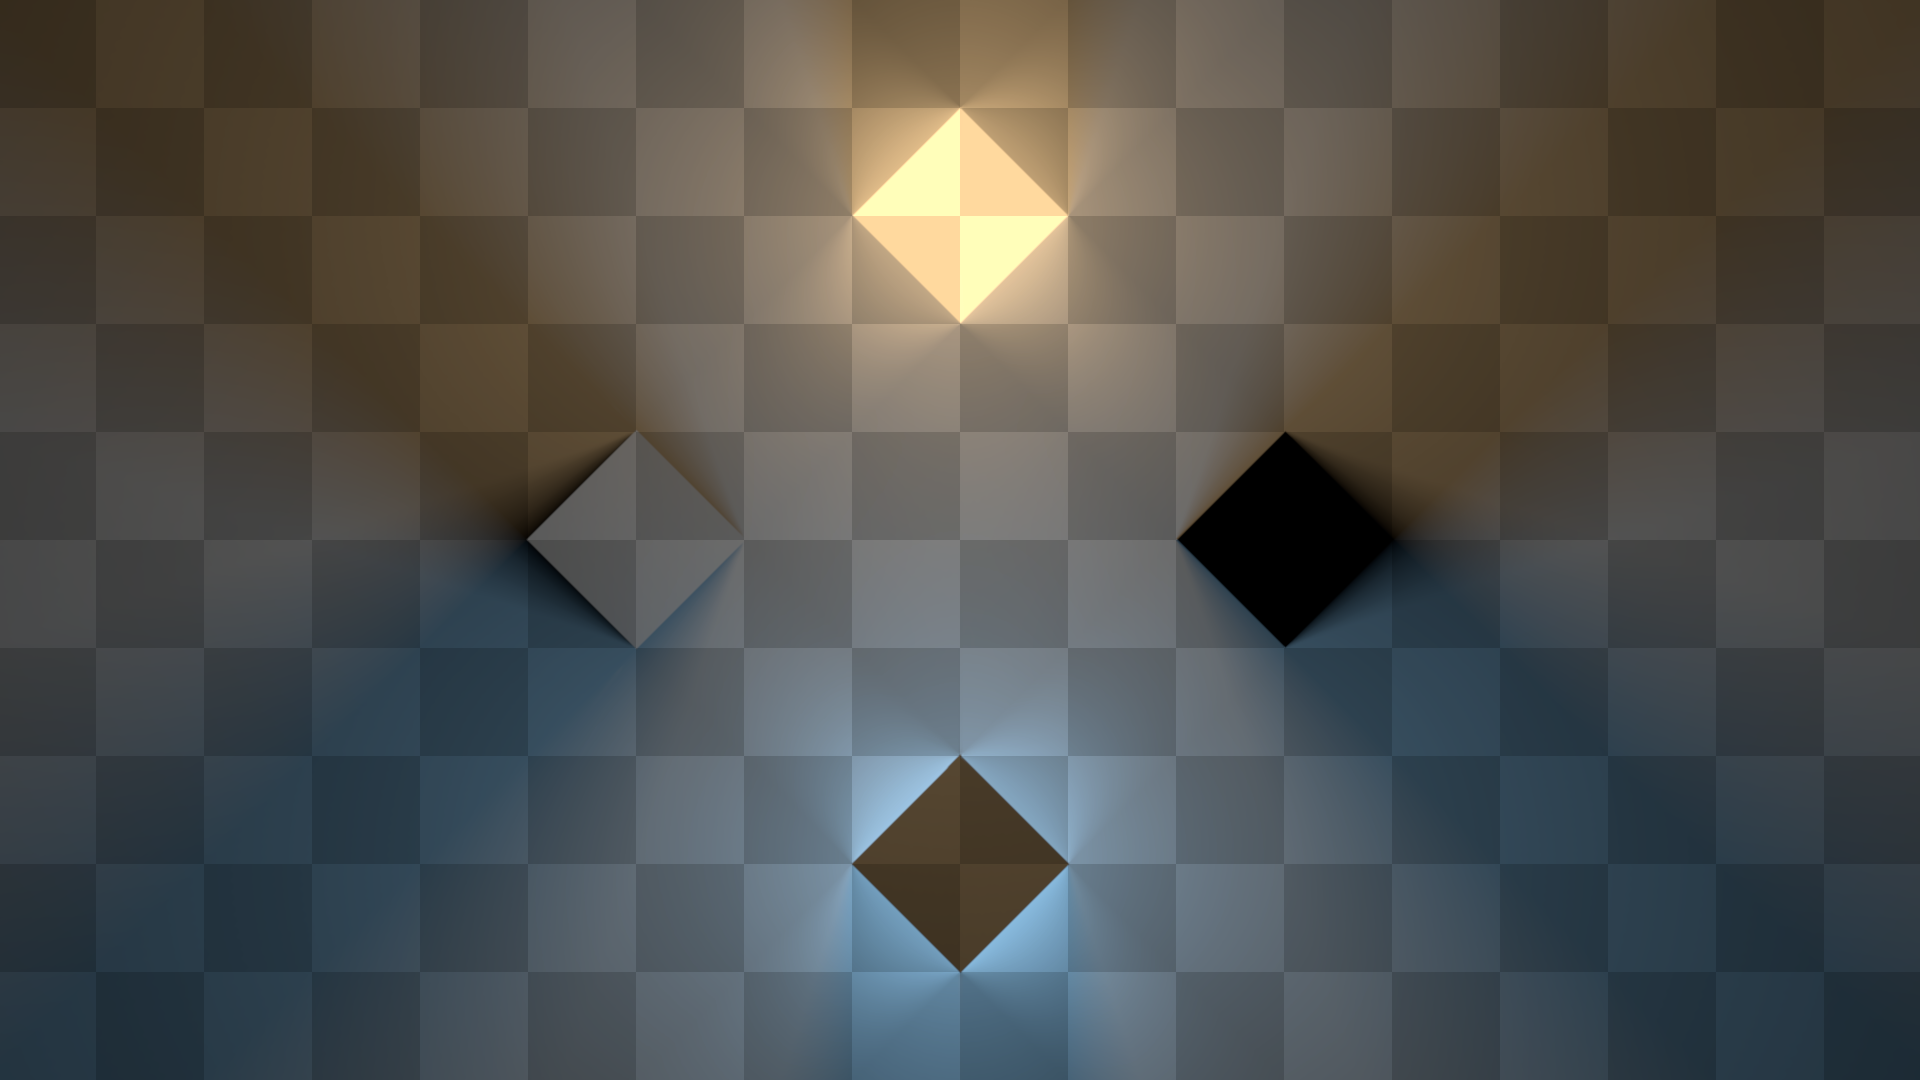
In all the images below, the top shape is a normal double-sided orange light, the right shape is a normal double-sided occluder, the bottom shape is a single-sided blueish light, and the left shape is a single-sided occluder.
Circle Lights
Circle lights represent circular lights and occluders.
Line Lights
Line lights represent lights and occluders in the shape of straight linear segments.
Freeform Lights
Freeform lights allow defining arbitrary shapes with connected straight lines. The diamonds in the following image are freeform lights.
Sprite Lights
Sprite lights are light sources and occluders represented by sprites. To determine the final light color, the sprite color is multiplied by the light color and the intensity. Note that the sprites are considered opaque. Thus, only the outer surface of the sprite is going to radiate light into the scene. Internal pixels will effectively illuminate only the area they cover.
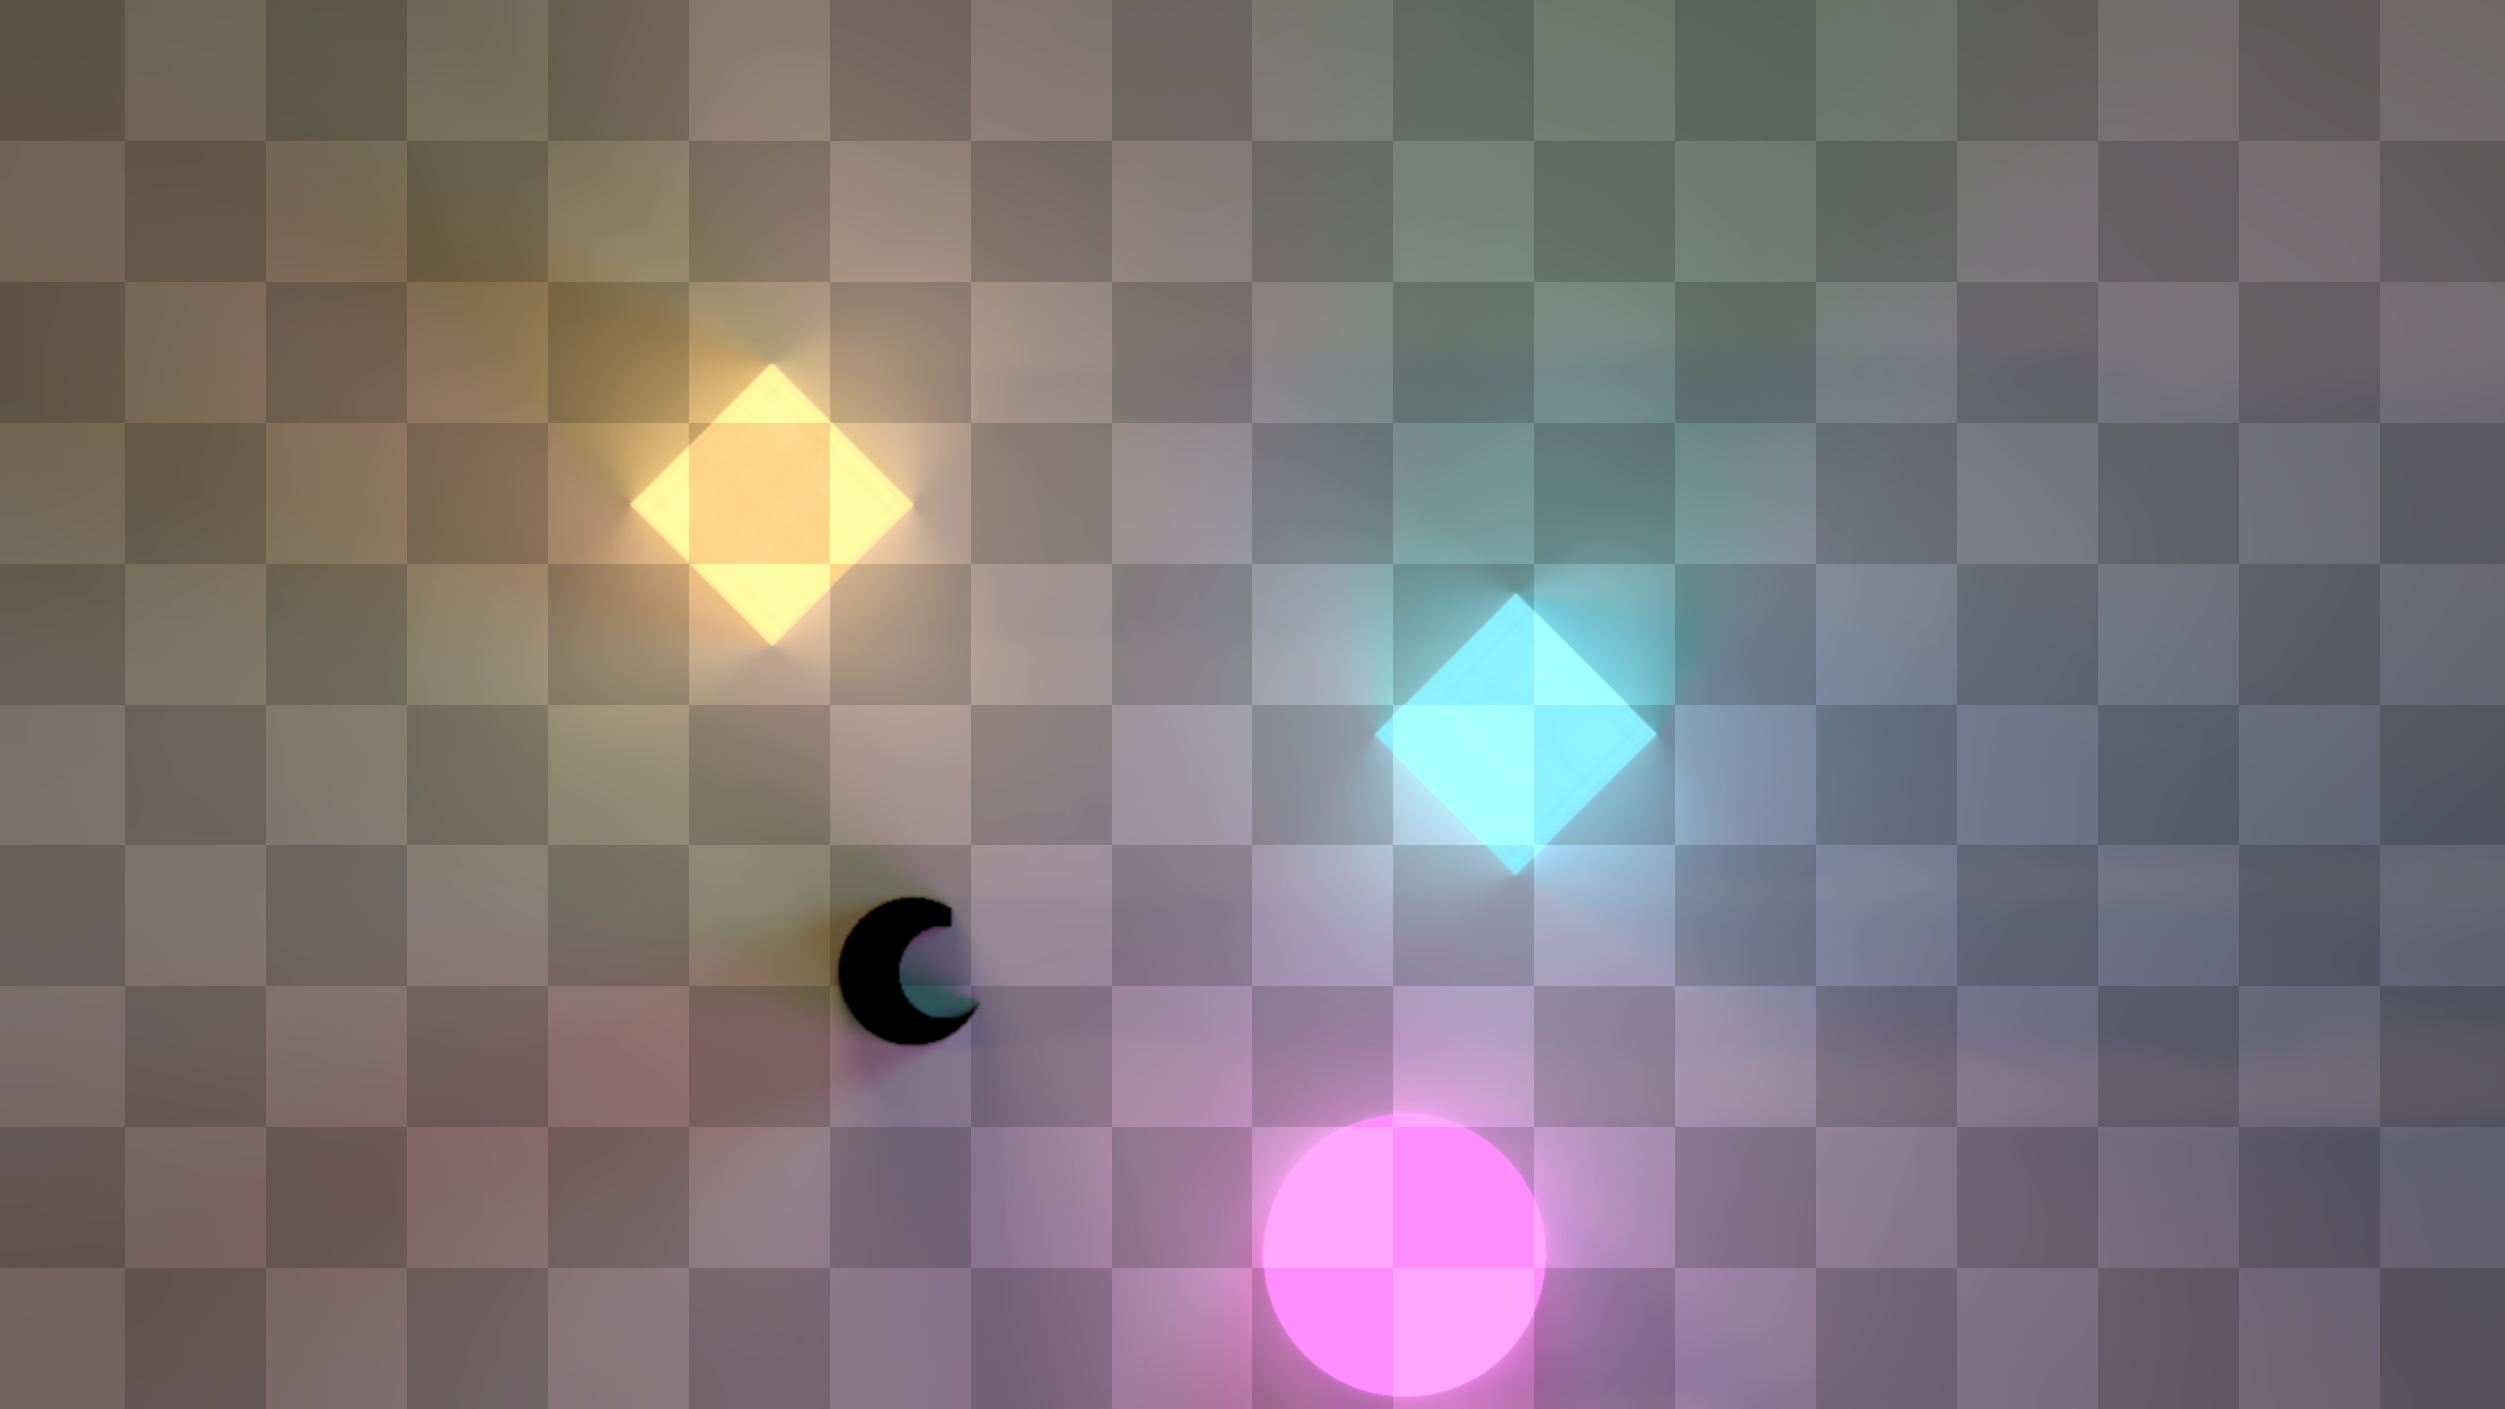
The image below is lit by three sprite lights sources using the same sprite: 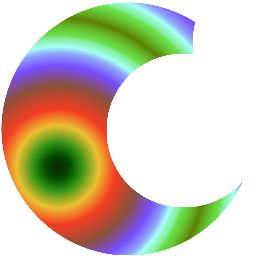
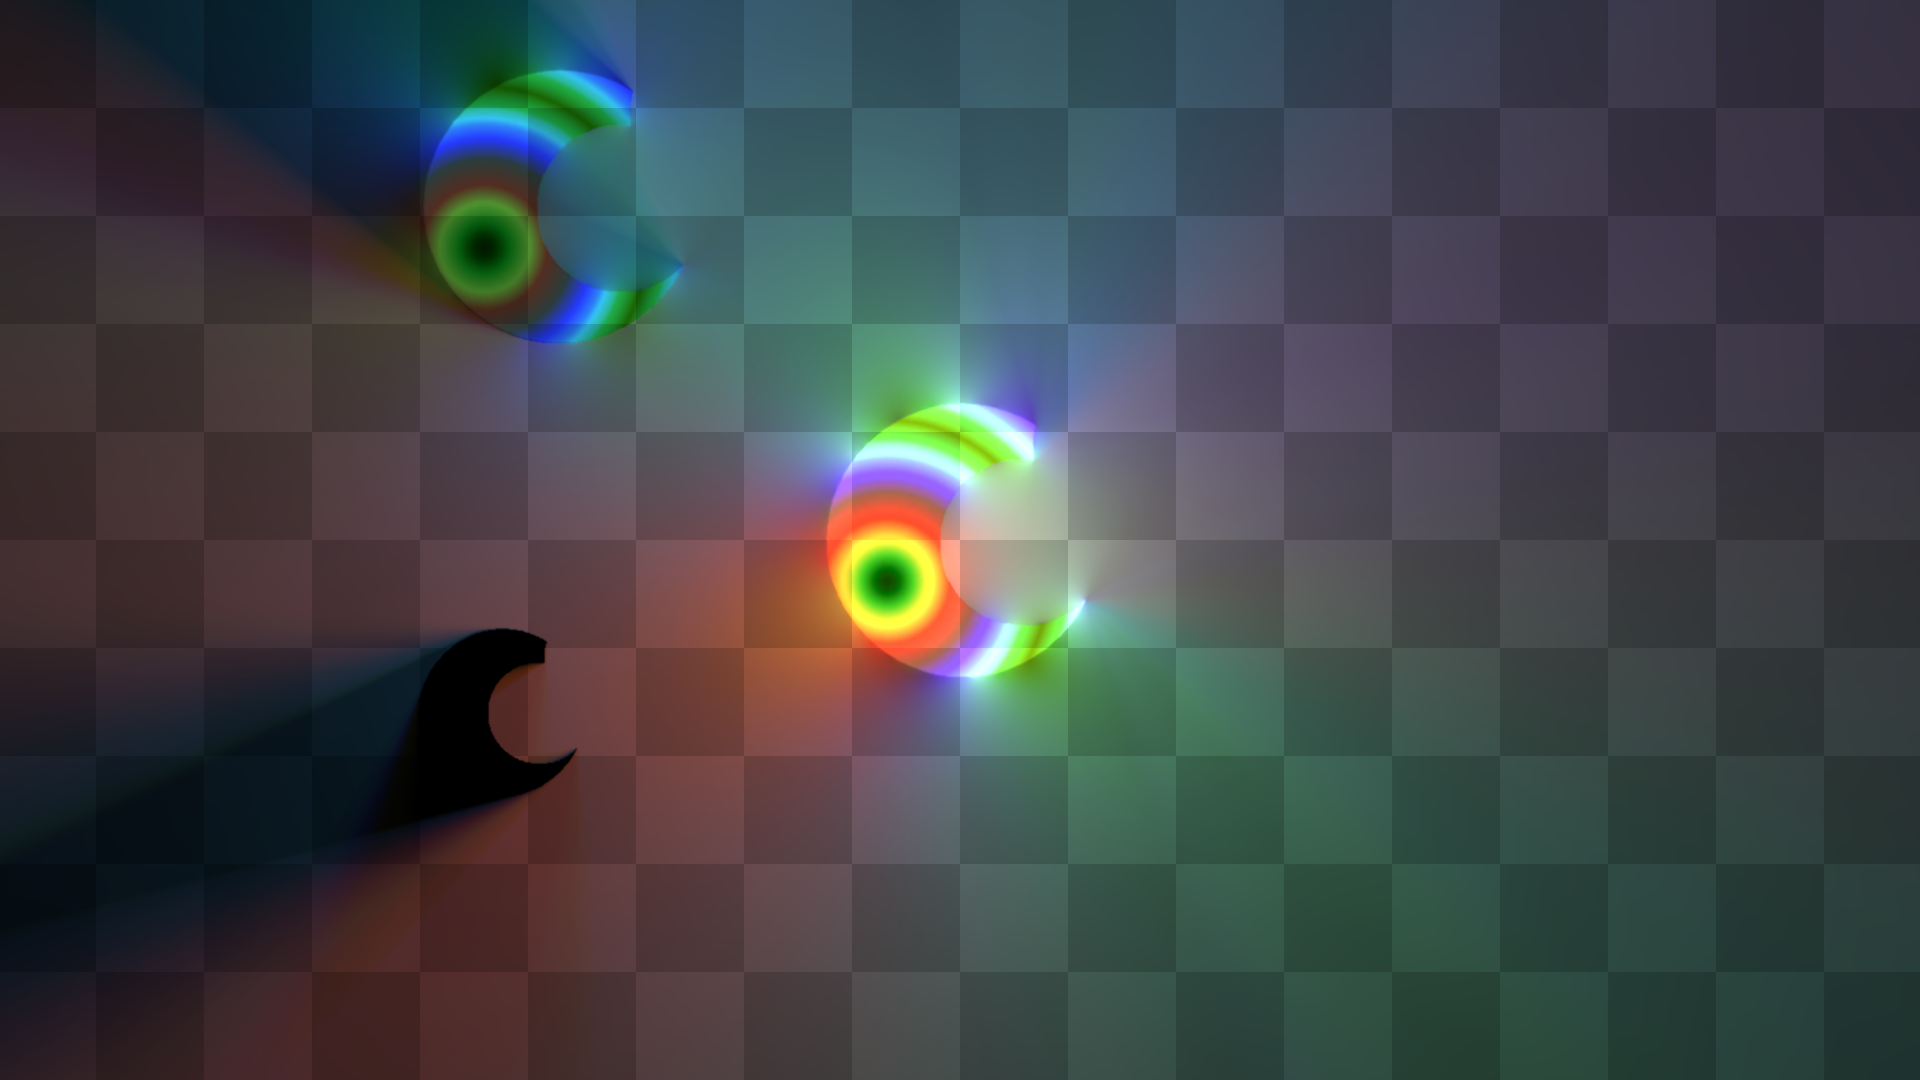
The right light has white color with intensity 2, the top one is blueish with intensity 1, and the bottom one has intensity 0, making it an occluder.
References
See Also
2D Radiance Cascades Usage Guide
This guide provides detailed information on how to effectively use the 2D Radiance Cascades lighting system in your Unity projects. It covers light contributor settings, built-in shaders, and custom shader integration.
Light Contributor Usage
The LightContributor component is the core element for adding lights to your 2D scenes. Different light types are available for various lighting scenarios.
Make sure to read about the different available light types in the General Concepts document.
Common Settings And Usage Tips
All light sources have a color controlled by these two settings:
| Setting | Description |
|---|---|
| Color | Sets the base color of the light source |
| Intensity | Controls the intensity of the light |
The resulting light source color is obtained by multiplying the Color RGB components by Intensity. The two settings are provided for convenience, as a separate Intensity slider is generally more intuitive to use than a unified HDR color picker.
Setting either the Intensity to zero, or the Color to black turns the light into an occluder.
The intensity can be set to a negative value. This will turn a light source into a sort of "light sink." Which is not physically correct, but may be used for achieving various artistic effects.
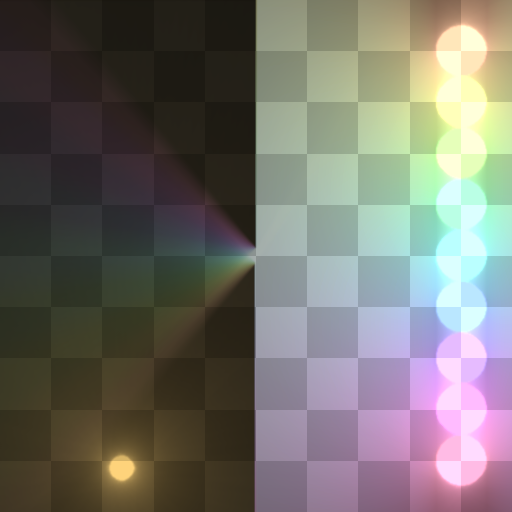 | 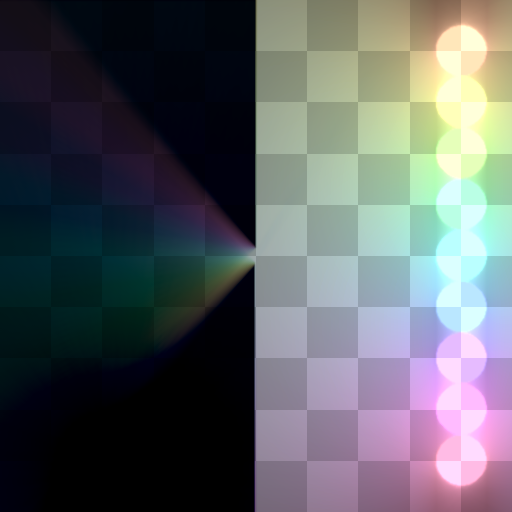 |
| normal orange circle light | negative orange circle light |
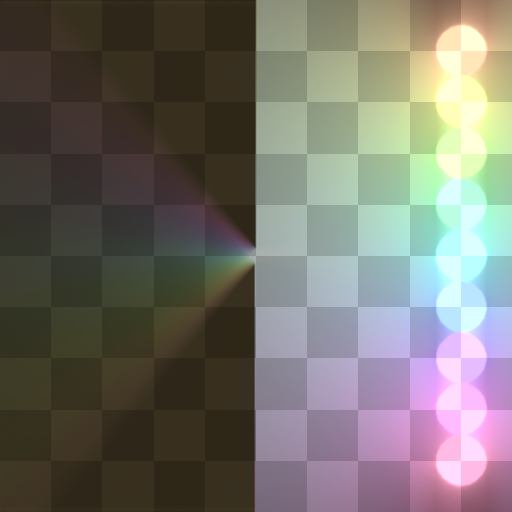 | 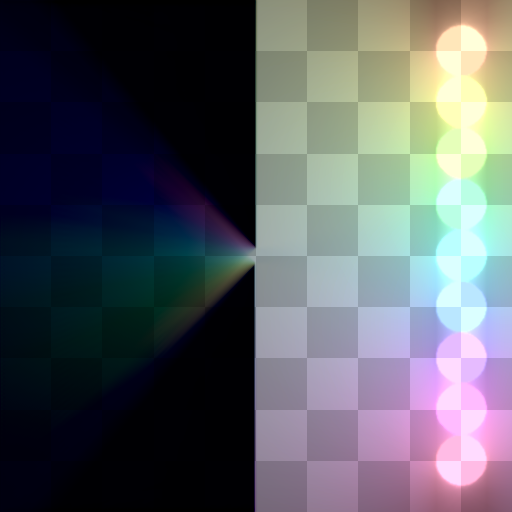 |
| normal orange directional light (shining directly left-to-right) | negative orange directional light |
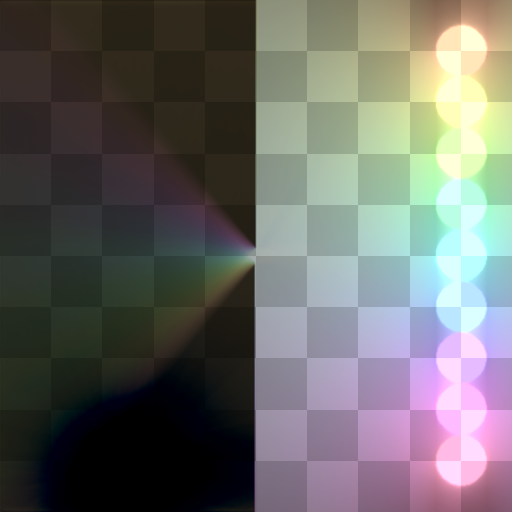 | 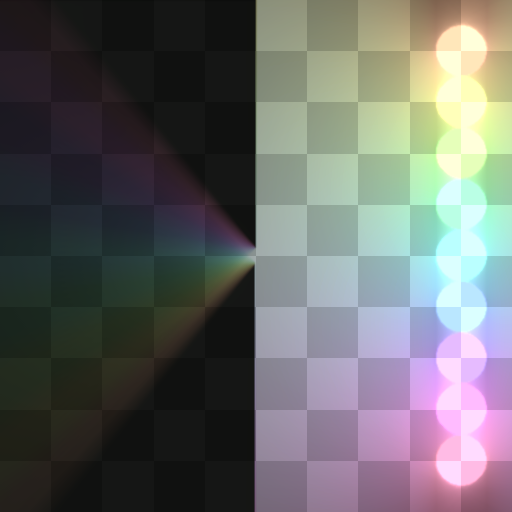 |
| normal directional light and negative circle light | base image |
Global Lights
Global lights (the Sky Light and the Directional lights) provide the ambient lighting. They are the most useful in outdoor scenes when no occluders or other light sources block them. The positioning of their transforms has no effect on how they work as lights.
Sky Light
The Sky Light type provides ambient illumination across your entire scene.
Directional Light
Directional lights simulate light coming from a specific direction, similar to sunlight. Effectively representing the light that is infinitely far away.
| Setting | Description |
|---|---|
| Transform | Use the standard GameObject's transform rotation to set the light direction |
| Softness | Controls the softness of the light source, or the size of the infinitely-far-away light. The range is 0–1, where 0 is a point light, and 1 is a light spanning across the hemisphere. |
Tips
Be careful with sharp directional lights (softness close to zero). Being point light sources, they are easily missable when the lighting algorithm samples the environment light. Which may lead to various artifacts. There are some configurations that provide good results, though. E.g., the HRC variant when the lights are axis-aligned. See the examples below.
Examples
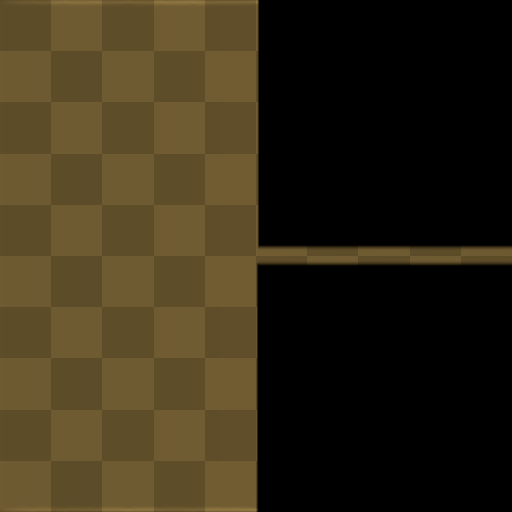 | 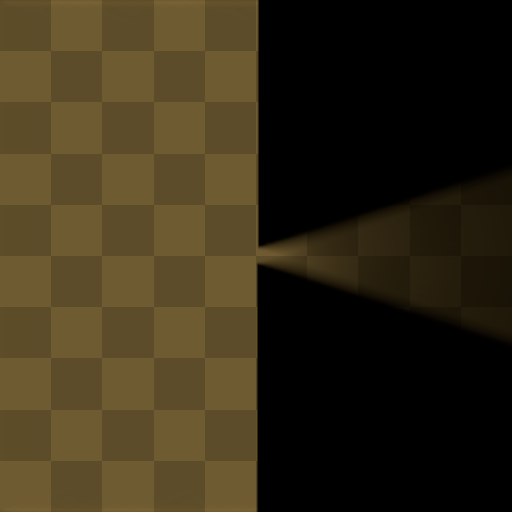 |
| Softness 0 | Softness 0.2 |
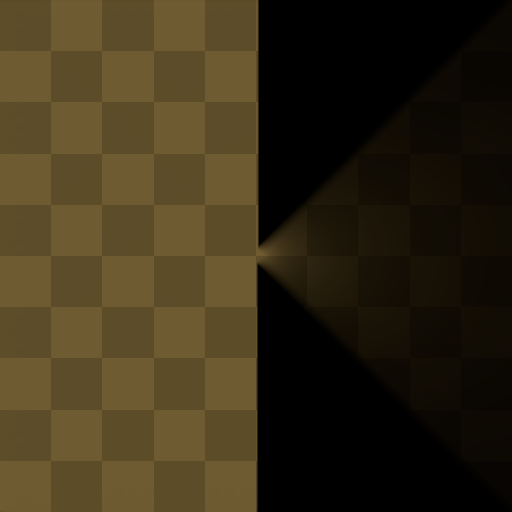 | 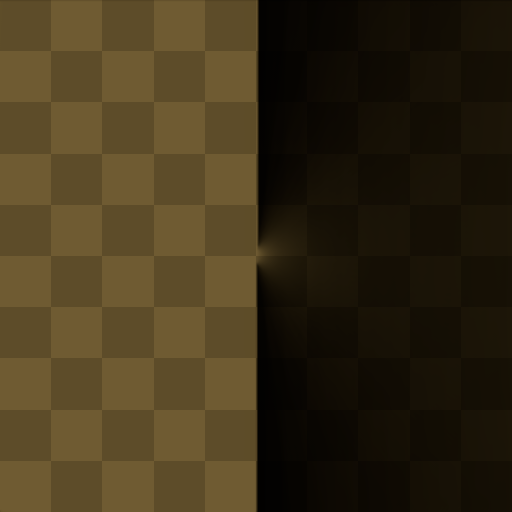 |
| Softness 0.5 | Softness 1 |
Artifacts examples
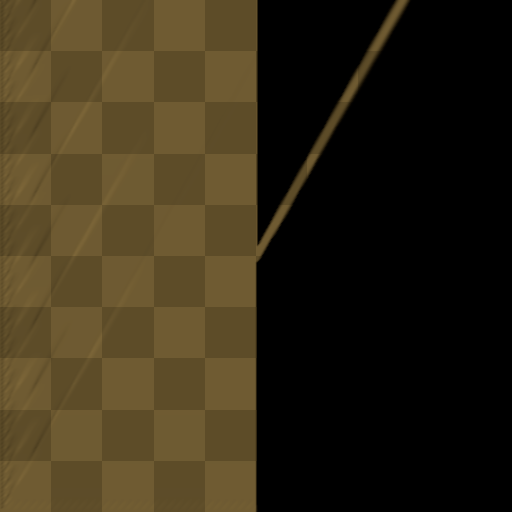 | 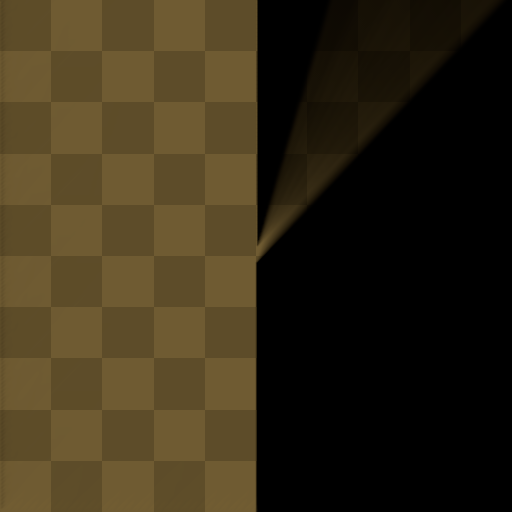 |
| HRC, Softness 0 (note the "hairy" border) | Softness 0.15 |
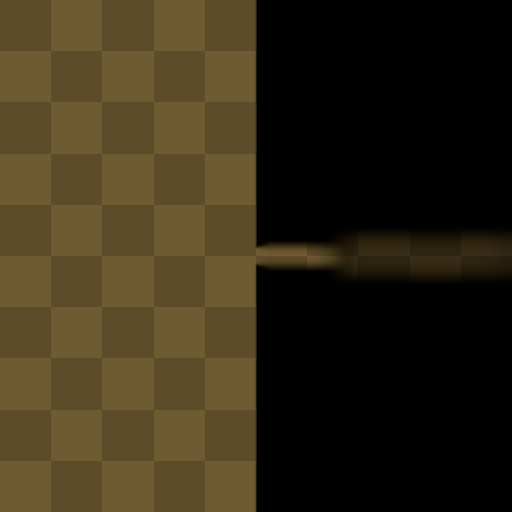 | 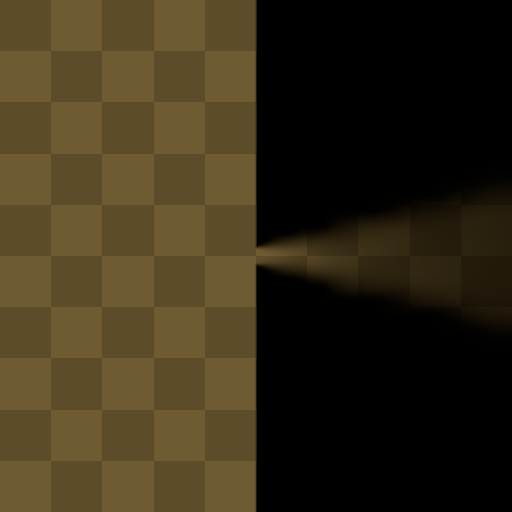 |
| Bilinear fix, Softness 0 (note the blocky shadow appearance) | Softness 0.15 |
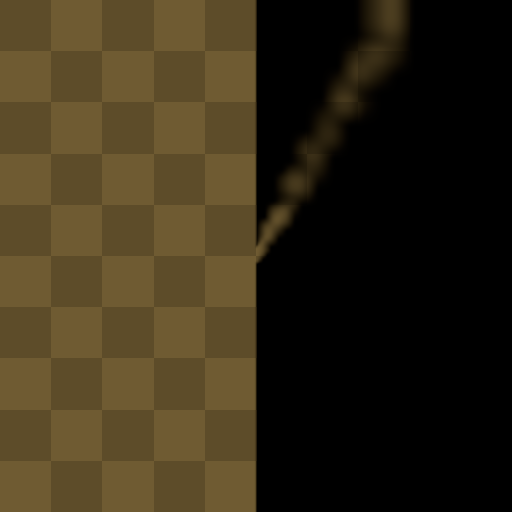 | 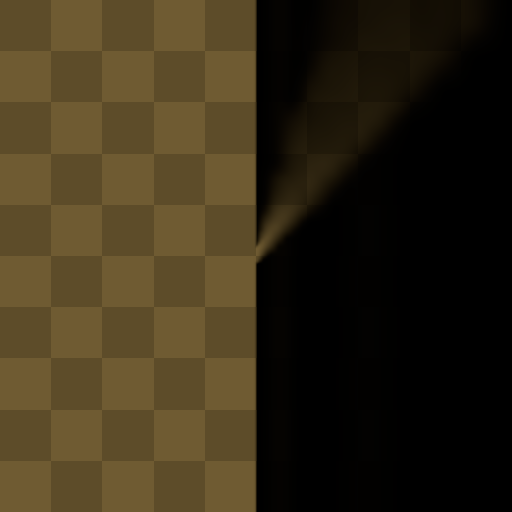 |
| Bilinear fix, Softness 0 (note the blocky shadow appearance) | Softness 0.15 |
Analytical Lights
Analytical lights (circle, line, and freeform lights) represent light contributors made out of geometric primitives. Unlike Sprite lights, analytical lights can affect the scene even when they are outside the camera view.
All analytical lights provide the following properties:
| Setting | Description |
|---|---|
| Single Sided | When enabled, only one side of the primitive's surface interacts with the light. The opposite side is transparent |
| Cullable | When enabled, allows the light to be culled when outside the camera view |
| Cull Distance | Maximum distance (in world space units) at which the light affects the scene when cullable |
Circle Light
Circle lights emit light from the surface of a circle.
| Setting | Description |
|---|---|
| Radius | Defines the radius of the light source |
Line Light
Line lights emit light along a line segment.
| Setting | Description |
|---|---|
| Length | Defines the length of the light source |
Freeform Light
Freeform lights allow for custom shapes defined by multiple control points. Effectively a chain of line lights stitched together and treated as a single object (i.e., all lines share the same properties, getting culled or not culled together, etc.).
| Setting | Description |
|---|---|
| Control Points | A list of control point locations. Each point is a location where one line ends and the next one starts |
Examples
In all the images below, the top shape is a normal double-sided orange light, the right shape is a normal double-sided occluder, the bottom shape is a single-sided blueish light, and the left shape is a single-sided occluder.
| |
| Circle lights | Line lights |
| |
| Freeform lights |
Analytical Lights Editing Tools
Line And Circle Lights
Line and Circle lights provide handles for intuitive visual alignment of the lights:
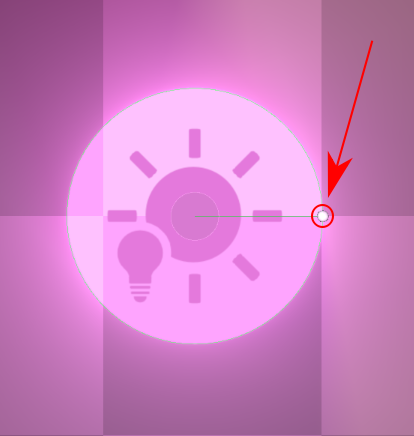 |
| Drag the handle to change the circle light radius |
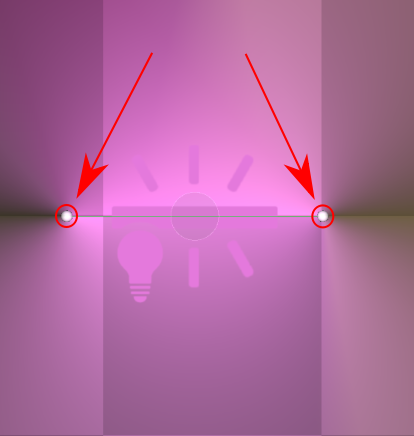 |
| Drag the handles to position the line light |
You can also manually edit the Radius/Length properties for precise control.
Freeform Lights
To edit the freeform light, enter the edit mode in the editor window. The edit mode enables the following tools:
- Scene handles: Interactive handles and buttons in the scene view allowing to visually inspect and modify the shape
- Editable control points: Ability to manually modify the shape control points coordinates (in the local object space)
- Helper editor tools:
| Tool | Description |
|---|---|
| Close shape | Closes the shape by copying the first control point to the end. Inactive if the shape is already closed |
| Flip shape | Flips the shape from clockwise to counter-clockwise and vice versa. Inactive if the shape is double-sided |
| Load default | Loads the default diamond shape instead of the current shape. Handy to start from scratch if something went wrong |
| Load Collider2D shape | Loads the shape from the Collider2D component attached to the same GameObject. Inactive if there is no Collider2D attached |
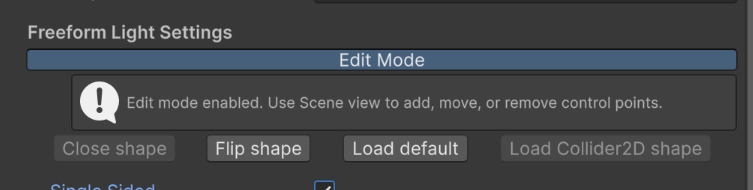 |
| Editor tools |
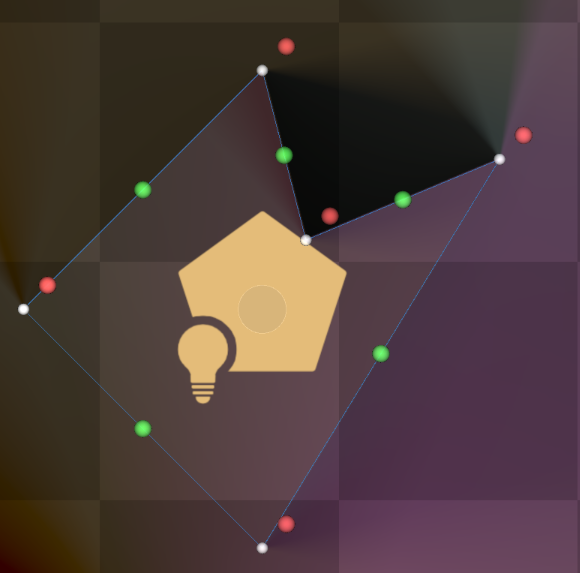 |
| Scene tools |
Scene tools:
- Use white handles to drag the existing control points
- Use the red button to remove the nearby control point
- Use the green button to place a new control point in the middle of the segment
Sprite Light
Sprite lights use a sprite texture to define the light shape and properties. Unlike other light contributors, sprite lights do not work outside the camera view.
| Setting | Description |
|---|---|
| Light Source Sprite | The sprite to be used as the light source |
Note that the sprite's natural color is multiplied by the light contributor color and intensity.
Light Configuration Tips
- Avoid tiny lights, as they are more prone to producing various visual artifacts.
- Don't neglect the culling options for the analytical lights, especially in bigger scenes with lots of light contributors.
- When possible, prefer analytical lights (Circle, Line, Freeform) over Sprite lights. As they are generally more versatile and provide more flexibility.
- In performance-critical scenarios, consider sticking to a single kind of lights in a scene. Both sprite-lights-only and analytical-lights-only setups will perform better than a mix of both kinds in a single scene.
Built-in Shaders and Materials Guide
The 2D Radiance Cascades system includes several built-in shaders designed to work with the lighting system.
Standard Lit Sprites
RC-Sprite-Lit-Flat
This shader provides basic lighting for flat sprites without normal mapping.
| Property | Description |
|---|---|
| MainTex | The main sprite texture |
Use Case: Ideal for simple 2D sprites that need to receive lighting but don't require advanced effects
RC-Sprite-Lit-WithNormal
This shader supports normal mapping for more detailed lighting effects on sprites.
| Property | Description |
|---|---|
| MainTex | The main sprite texture |
| NormalMap | The normal map |
| Distance | The height of the light above the surface |
Use Case: Best for detailed sprites where you want to simulate surface relief and more realistic lighting
Follow the default Unity "Secondary Textures" approach to attach a normal map to your sprite.
The Distance parameter controls how high above the surface the virtual lights from the lightmap are, when computing the lighting. Higher values lead to softer, more uniform lighting, lower values lead to more dramatic lighting with more emphasis on the direction the light is coming from.
| Note |
|---|
| Be careful with extra-low values. The lightmaps only capture light from four cardinal directions. Which is enough for soft diffuse lighting when the lights are considered relatively far from the surface. However, when the lights are close and are supposed to come at grazing angles, you may get noticeable artifacts due to the lack of angular resolution. See examples below. |
Examples
 |  |
RC-Sprite-Lit-Flat | RC-Sprite-Lit-Flat |
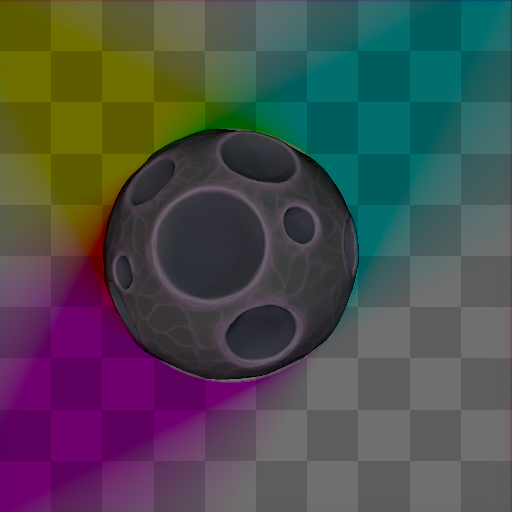 | 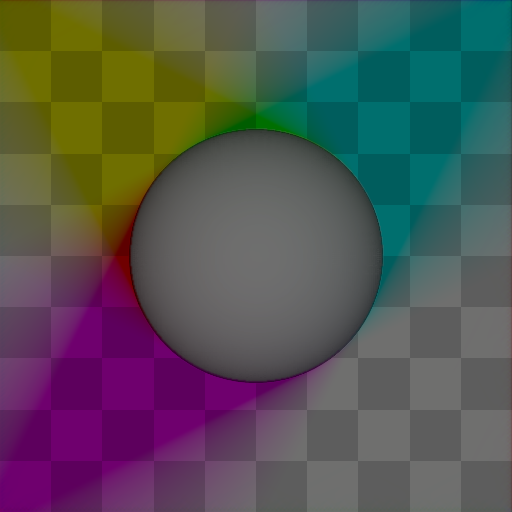 |
RC-Sprite-Lit-WithNormal, Distance 20 | RC-Sprite-Lit-WithNormal, Distance 20 |
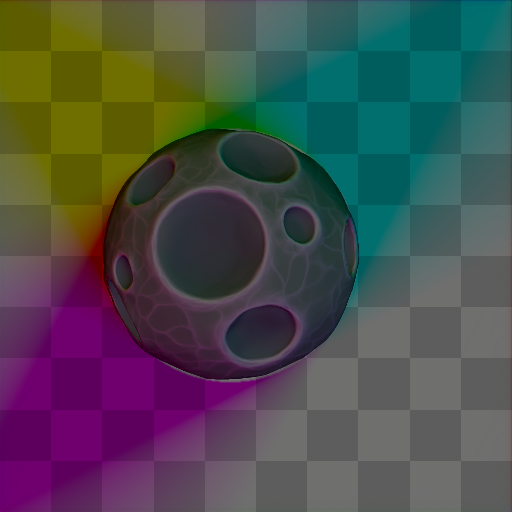 | 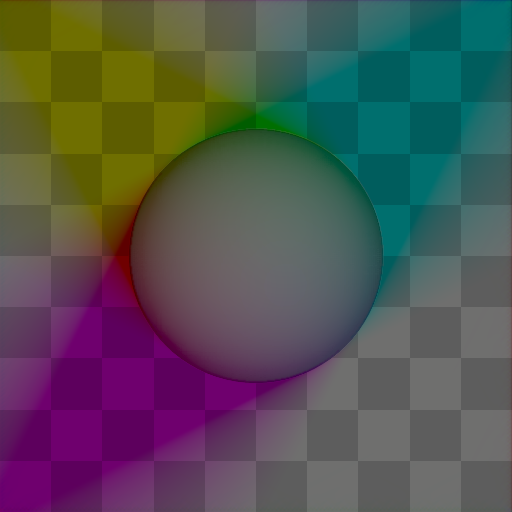 |
RC-Sprite-Lit-WithNormal, Distance 2 | RC-Sprite-Lit-WithNormal, Distance 2 |
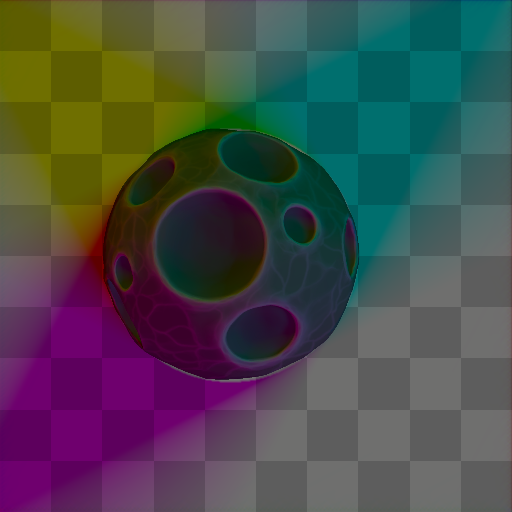 | 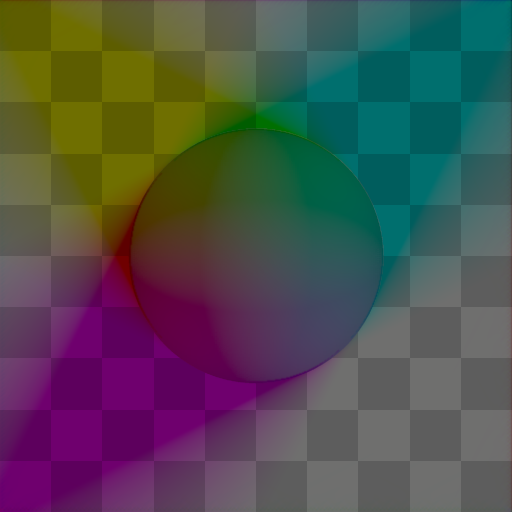 |
RC-Sprite-Lit-WithNormal, Distance 0.5 | RC-Sprite-Lit-WithNormal, Distance 0.5 |
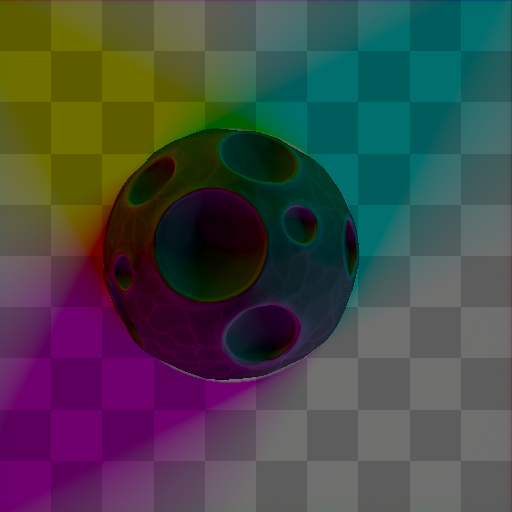 | 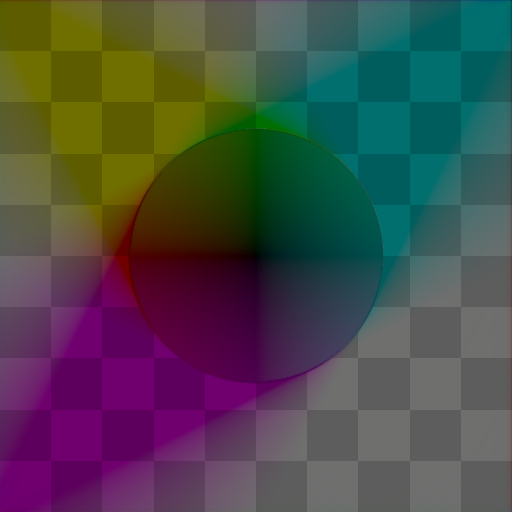 |
RC-Sprite-Lit-WithNormal, Distance 0 | RC-Sprite-Lit-WithNormal, Distance 0 |
See Also
Custom Material Integration
It is possible to integrate 2D Radiance Cascades lighting system with your custom materials and shaders. Both ShaderGraph and HLSL integrations are available.
Shader Graph Integration
To use 2D Radiance Cascades lighting in Shader Graph:
- Open or create a new shader graph.
- In Unity Editor, go to
Packages/2D Radiance Cascades/Shaders/ShaderGraph. - See the three pre-configured subgraphs:
GetRCLightMapColor- provides the main lightmap color,GetRCDirectionalColor- provides the directional lightmap color for a specified directionGetRCPhongDiffuse- Provides Phong diffuse shading term using the directional lightmaps, and the surface normal
- Drag and drop the subgraph you need into your shader graph
- Connect inputs and outputs to your needs
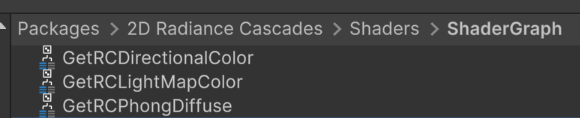 | Pre-configured subgraphs location |
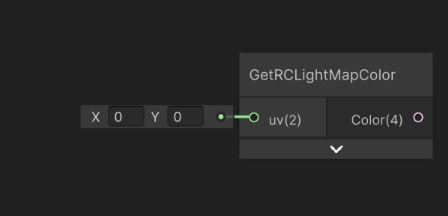 | GetRCLightMapColorInputs: - UV: Lightmap UV location. Most likely you'd want to pass Screen Position hereOutputs: - Color: The sampled lightmap color |
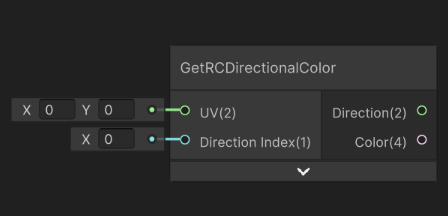 | GetRCDirectionalColorInputs: - UV: Lightmap UV location. Most likely you'd want to pass Screen Position here- Direction Index: integer index of the direction to sample the color from. Should be an integer in the range [0; 3] Outputs: - Direction: a vector representing the direction the sampled light is coming from - Color: The sampled lightmap color |
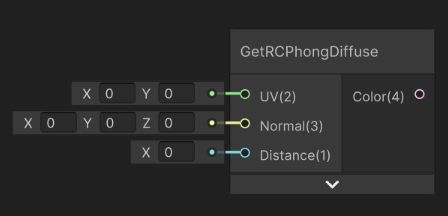 | GetRCPhongDiffuseInputs: - UV: Lightmap UV location. Most likely you'd want to pass Screen Position here- Normal: surface normal - Distance: Distance from the light to the surface Outputs: - Color: Computed diffuse color value |
Advanced Manual Integration
For a completely manual integration, you can access the lightmaps directly as global textures and use them however you like.
The Main Lightmap:
- In the shader graph add a Texture 2D parameter
- Set it's
ScopetoGlobal - Set the
Referenceto_RCLightmap
The Directional Lightmaps:
- In the shader graph add a Texture 2D Array parameter
- Set it's
ScopetoGlobal - Set the
Referenceto_RCLightmapDirectional - Directional lightmaps are stored in four slices of the Texture 2D Array.
HLSL Shader Integration
To access the lightmaps in a custom HLSL shader:
// Include the required headers
#include "Packages/com.unity.render-pipelines.universal/ShaderLibrary/Core.hlsl"
#include "Packages/com.dim0v.radiance-cascades-2d/Shaders/Common.hlsl"

struct appdata
{
    float3 pos : POSITION;
    float2 uv : TEXCOORD0;
};

struct v2f
{
    float4 pos : SV_POSITION;
    float2 uv : TEXCOORD0;
};

// Vertex shader
v2f vert(appdata i) {
    v2f o;

    o.uv = i.uv;
    o.pos = GetNormalizedScreenSpaceUV(i.pos);

    return o;
}

// Fragment shader
float4 frag(v2f i) : SV_Target
{
    // ...

    // Sample main lightmap
    float3 main_light = GetRCLightmapColor(i.pos);

    // Sample directional lightmaps
    float3 directional_lights[RC_DIRECTION_COUNT];
    for (int i = 0; i < RC_DIRECTION_COUNT; ++i) {
      float2 dir;
      directional_lights[i] = GetRCDirectionalColor(i.pos, i, dir);
    }

    // Compute Phong diffuse term
    float3 lighting = GetRCPhongDiffuse(i.pos, my_normal, my_distance);

    // ...
}
Key points:
- Include
Packages/com.unity.render-pipelines.universal/ShaderLibrary/Core.hlslfor convenience. - There are tree functions for accessing the lightmap data:
GetRCLightmapColor- Accessing the main lightmapGetRCDirectionalColor- Accessing the directional lightmapsGetRCPhongDiffuse- Computing the Phong Diffuse shading using the directional lightmaps
- You need to sample using screen-space coordinates (normalized)
- The lightmap contains RGB values representing the accumulated lighting
RC_DIRECTION_COUNTcontains the number of directional lightmaps availableGetRCDirectionalColorhas an out parameter for the direction the light is coming from for convenience- For shortcut functions used in the example to exist, you need to include (directly or indirectly)
Packages/com.unity.render-pipelines.core/ShaderLibrary/Common.hlslbefore thePackages/com.unity.render-pipelines.universal/ShaderLibrary/Core.hlsl. Otherwise, use more verbose explicitly typed alternatives (e.g.,GetRCLightmapColor_floatorGetRCLightmapColor_halfinstead ofGetRCLightmapColor)
Advanced Manual Integration
For a completely manual integration, you can access the lightmaps directly as global textures and use them however you like.
You can either still include the Packages/com.unity.render-pipelines.universal/ShaderLibrary/Core.hlsl, or manually declare the following 2 globals:
Texture2D<half4> _RCLightmap- the main lightmap.Texture2DArray<half4> _RCLightmapDirectional- directional lightmaps. Individual lightmaps for different directions are stored in four slices of the Texture2DArray.
Quality Settings
Overview
The 2D Radiance Cascades system provides extensive quality settings to balance visual fidelity and performance. These settings can be configured through the RadianceCascadesRendererFeature inspector in your URP Renderer Asset.
Core Settings
Lightmap Scale Factor
Controls the resolution of the light map relative to the camera resolution:
- Range: 0 – 1 (where 1 is full camera resolution, 0 is a 1×1 texture)
- Default: 0.5
- Impact: The most impactful setting for both quality and performance.
Examples
All screenshots feature the same scene rendered at 512x512 resolution.
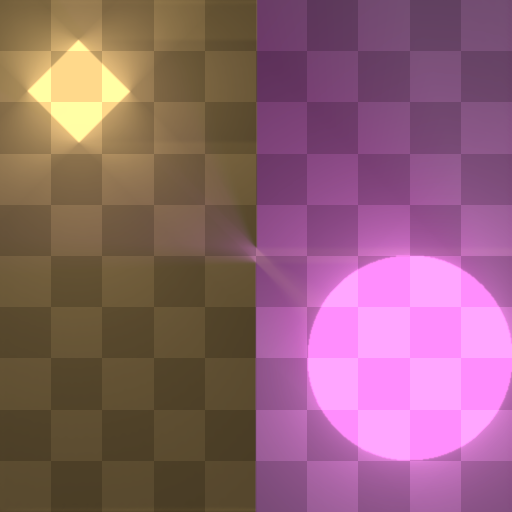 | 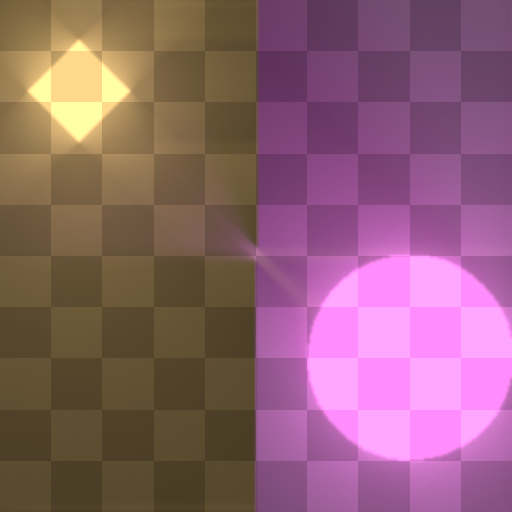 |
| Lightmap resolution 512 (1/1) | Lightmap resolution 256 (1/2) |
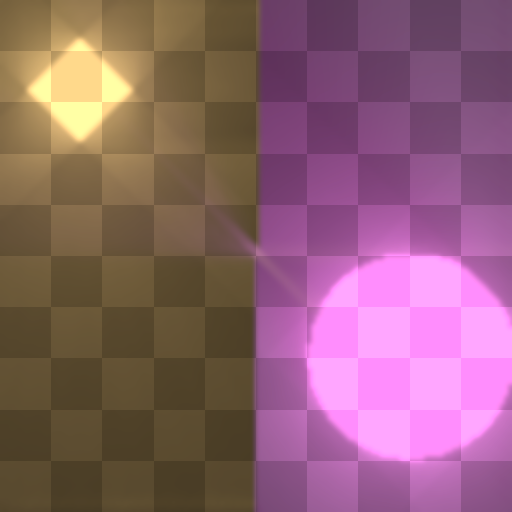 | 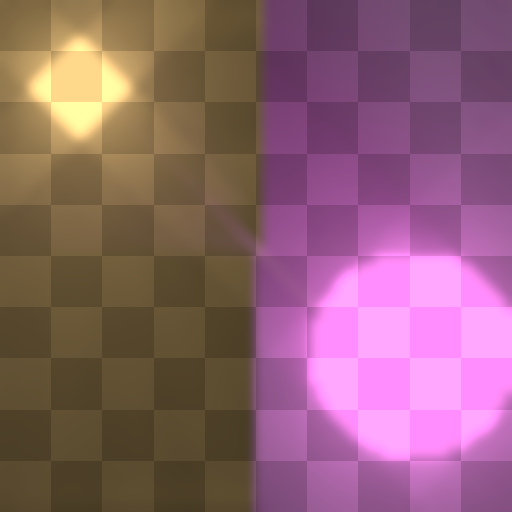 |
| Lightmap resolution 128 (1/4) | Lightmap resolution 64 (1/8) |
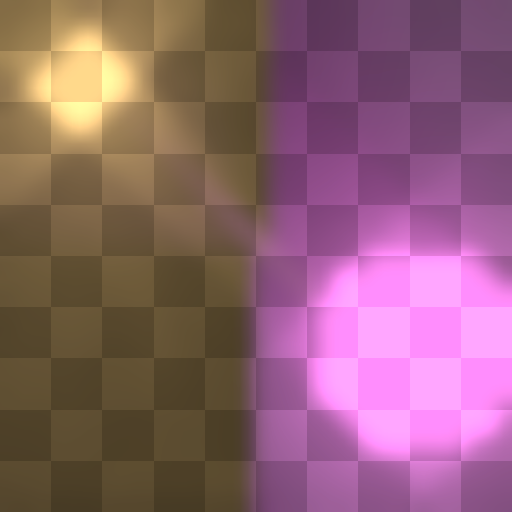 | 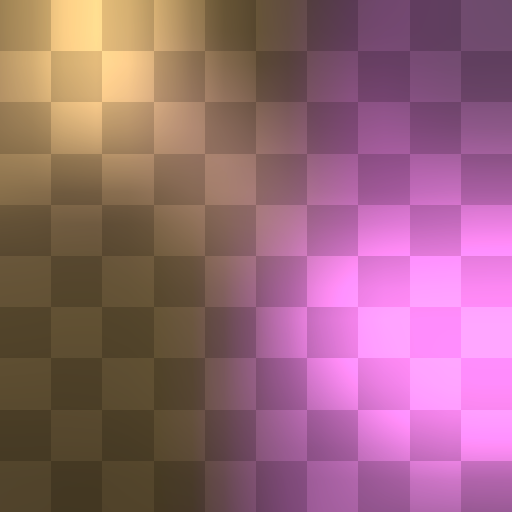 |
| Lightmap resolution 32 (1/16) | Lightmap resolution 8 (1/64) |
Radiance Cascade Variants
The system supports three implementation variants, each with different characteristics:
Vanilla
- The original implementation of radiance cascades
- Can be the fastest option in some scenarios
- Very prone to ringing artifacts
BilinearFix
- Modified version that addresses artifacts in the vanilla implementation
- Merges cascades more precisely by casting 4× more rays
- Better quality than Vanilla at a substantial performance cost
HolographicRC
- Uses alternative probe placement that perfectly tiles the screen with light probes (no overlapping and no gaps)
- Enables the use of ray extensions acceleration structure that makes the performance cost almost independent of the scene complexity
- Preserves sharp gradients much better than the other two variants
- Default: Recommended for most scenarios
Examples
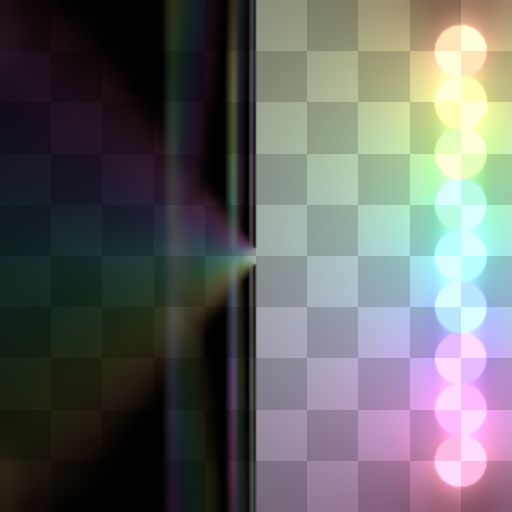 | 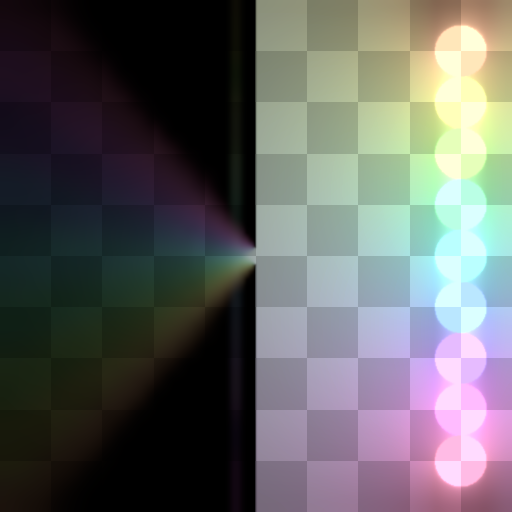 |
| Vanilla | Bilinear fix |
 | |
| Holographic RC |
Processing Options
Process Analytical Lights on GPU
- Type: Boolean
- Default: Disabled
- Description: Determines whether analytical light sources are processed on the GPU or the CPU
- Impact: Enabling can improve performance by offloading light processing to the GPU. Effectiveness depends on scene complexity and resolution. Has no effect on the visuals.
Ray Marching Settings
Ray marching is used for sprite lights handling.
Ray Marching Tolerance
- Range: 0-10 pixels
- Default: 1
- Description: Defines the tolerance level, as well as the minimum step size for ray marching when handling sprite lights
- Impact: Lower values increase precision at the cost of performance. Higher values blur the sprite lights features.
Examples
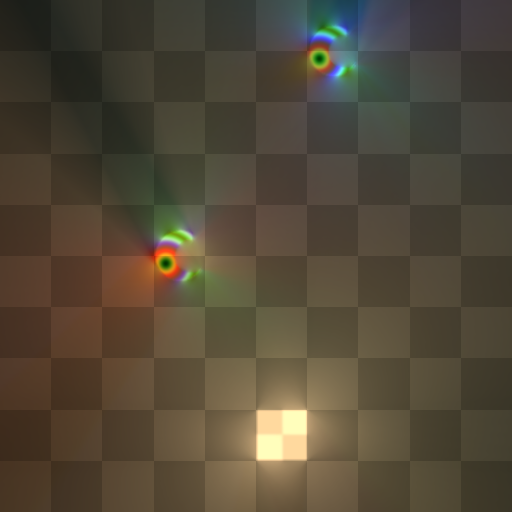 | 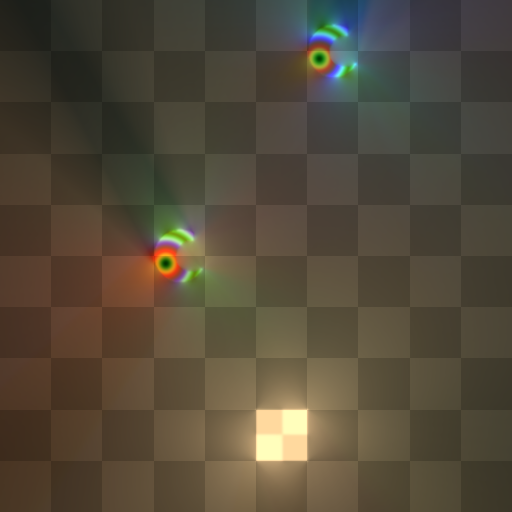 |
| Tolerance 0 | Tolerance 1 |
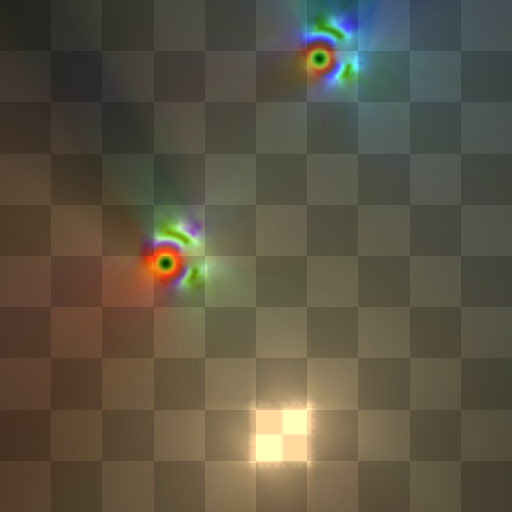 | |
| Tolerance 10 |
Max Ray Marching Steps
- Range: 1-100 steps
- Default: 30
- Description: Maximum number of iterations for ray marching
- Impact: Higher limit makes the ray marching more likely to converge. If the ray runs out of iterations before achieving the required tolerance, it is going to sample the color of the closest sprite light color. It helps to mask some of the divergence artifacts. But in scenes with high contrast sprite light colors it may still lead to glowy artifacts.
Examples
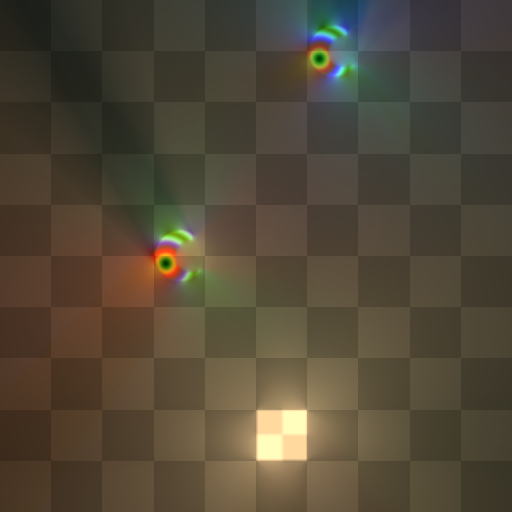 | 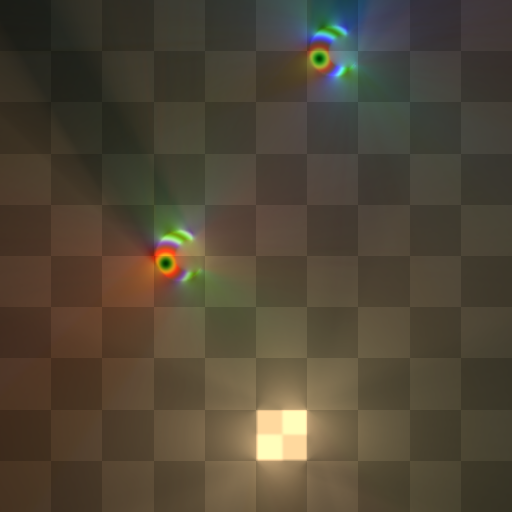 |
| 100 steps | 20 steps |
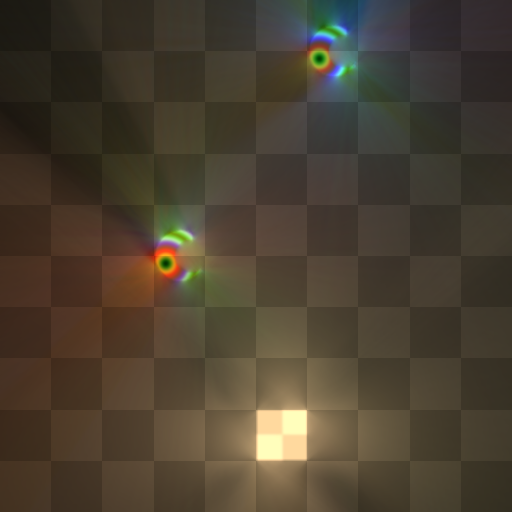 | 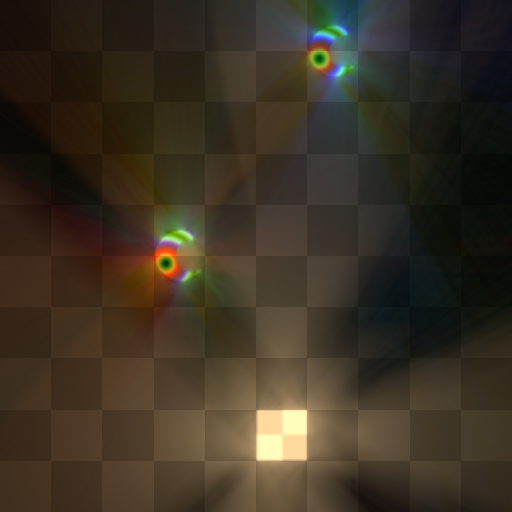 |
| 10 steps | 5 steps |
 | |
| 1 step |
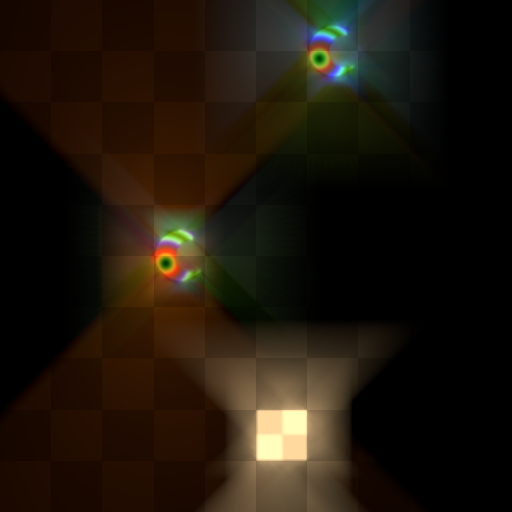
Ray Marching Settings co-relation
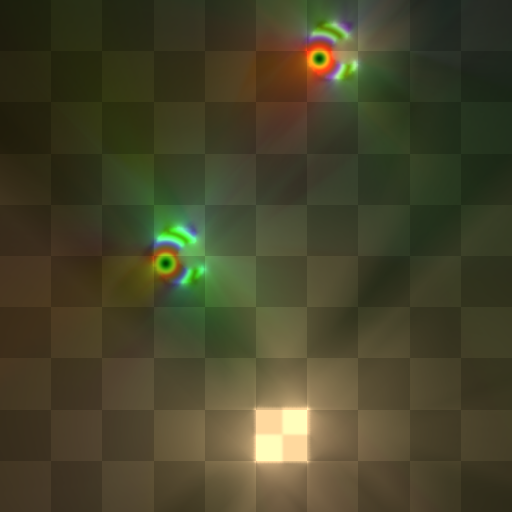
Note that these two settings are highly co-related, and they often need to be tweaked together to achieve the best quality and performance balance. For example, when lowering the step limit, it may be a good idea to raise the tolerance level to compensate for the low number of steps taken with larger steps.
In this example the step limit is set to 2 for different tolerance levels:
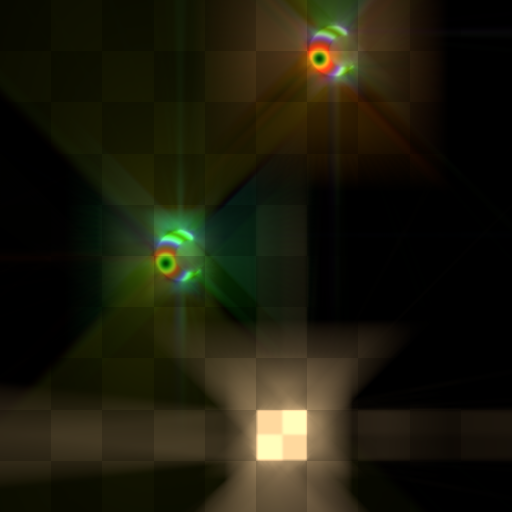 | 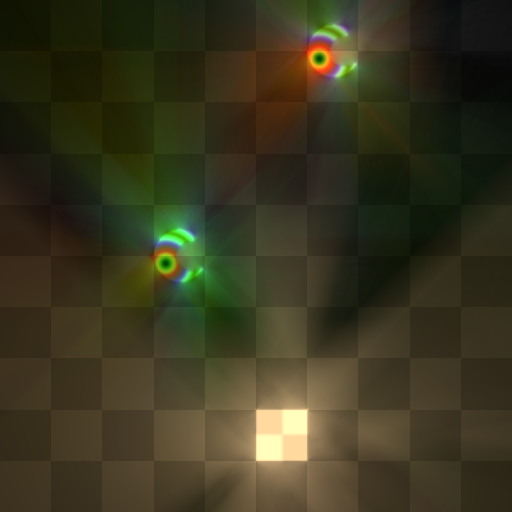 |
| Tolerance 0 | Tolerance 1 |
 |  |
| Tolerance 2 | Tolerance 8 |
Holographic RC Specific Settings
The following settings only affect the HolographicRC variant and have no effect when using other variants.
Ray Extensions Acceleration Structure
Ray extensions acceleration structure significantly improves performance, especially in complex scenes. Note, however, that it requires a lot of VRAM for higher resolutions. In the ballpark of 2 GB of peak VRAM usage for a 3840p lightmap, scaling roughly quadratically with the resolution (or linearly with the number of pixels). That is, a FullHD lightmap would need approximately 0.5 GB, and an 8K lightmap would need ~8 GB. Nevertheless, in most cases you are likely to get better quality/performance balance by keeping ray extensions enabled and balancing its drawbacks by other means (mostly the lightmap resolution)
Use Ray Extensions
- Type: Boolean
- Default: Enabled
- Description: Determines whether ray-extensions acceleration structure is used.
True Trace Threshold
- Range: 1-16 cascades
- Default: 3
- Description: When Ray Extensions is enabled, determines how many cascades will truly trace rays to determine the direct light contributors' influence. Higher cascades will extrapolate the data from lower cascades.
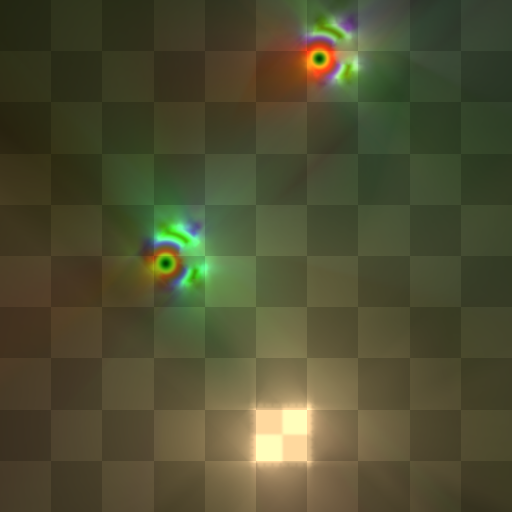
- Impact: Lower values greatly improve performance and make it much less dependent on the scene complexity. Extremely low values may lead to some artifacts (see below). Note that even high values that would not extrapolate any data may still lead to better performance because the workload gets grouped in a more GPU-friendly way enabling better GPU utilization.
Examples
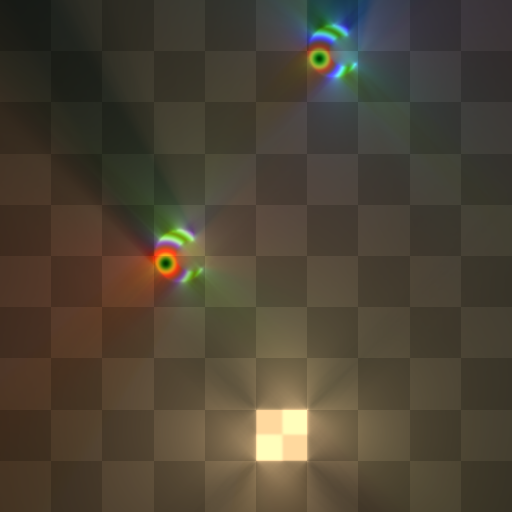 | 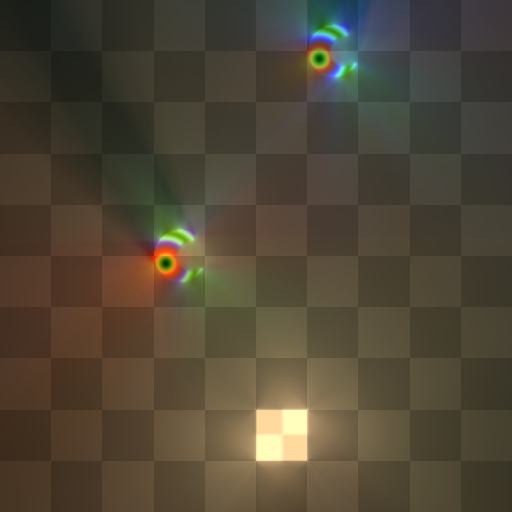 |
| True Trace Threshold 1 | True Trace Threshold 2 |
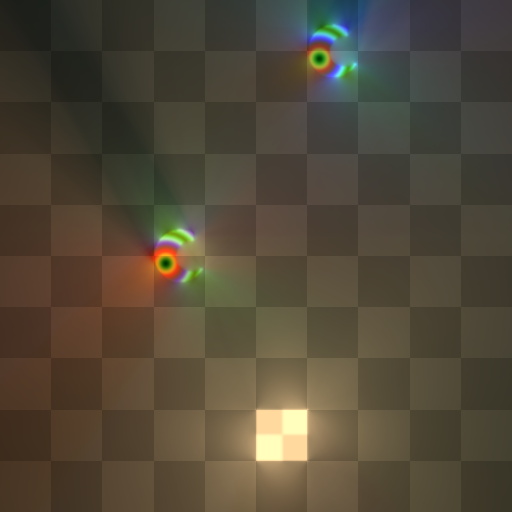 | 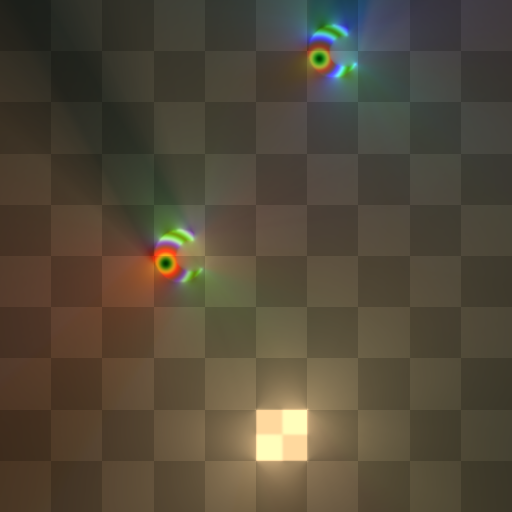 |
| True Trace Threshold 3 | True Trace Threshold 5 |
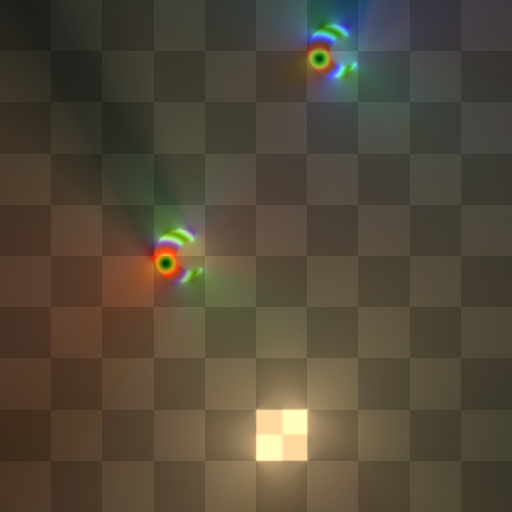 | 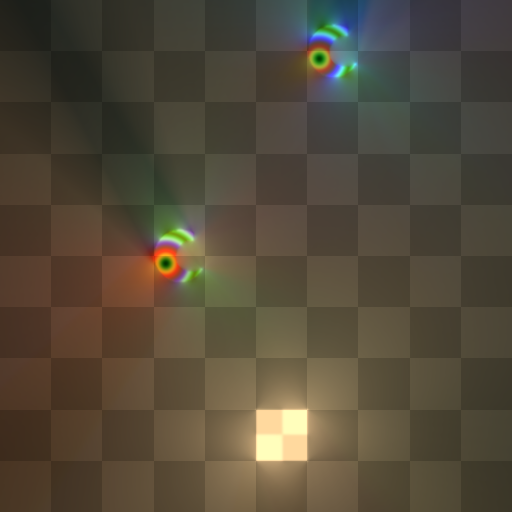 |
| True Trace Threshold 7 | True Trace Threshold 9 |
Notice the diminishing returns. While at threshold 1 there are very noticeable laser-beam-like artifacts, past threshold 5 there is barely any difference at all. The recommended setting of 3 should provide good quality for most cases, unless you need to accurately capture very shallow light rays (e.g., a pinhole scene with a hole very close to light sources).
Border Light Capture Settings
The Radiance Cascades is a screen-space effect. Meaning that on its own it's unable to capture the light information from the outside of the camera frustum. To work around this limitation, there is a separate cone tracing pass that collects the information about the incoming light along the screen borders from different directions so it could be used in the main Radiance Cascades pass. The two settings below provide control over the precision of this pass.
The full scene, used in the examples below (showing the out-of-screen light sources):
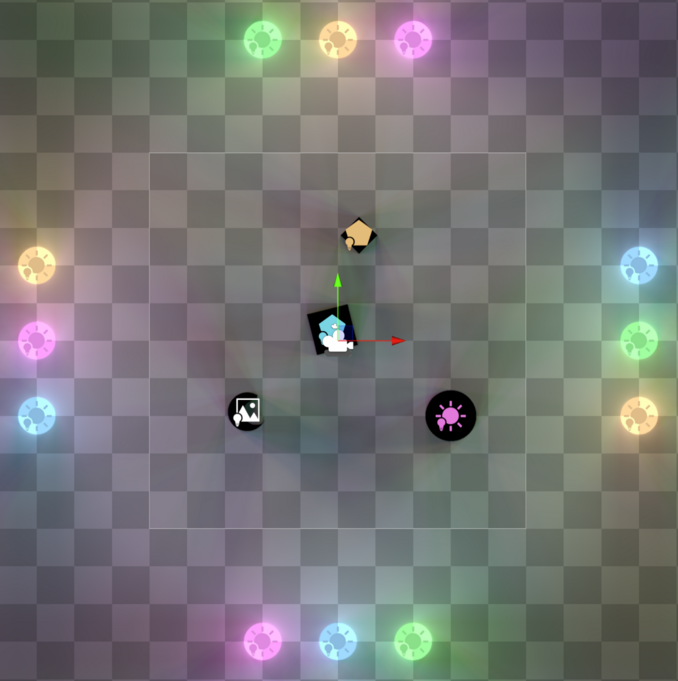
Also note that some of the artifacts caused by the insufficient border light capture quality are less noticeable in the static shots but very apparent in motion.
Border Light Linear Scale
- Range: 0-1
- Default: 0.5
- Description: Determines the scaling factor for border light textures (1 is full lightmap resolution, 0 is a single point along every edge)
Examples
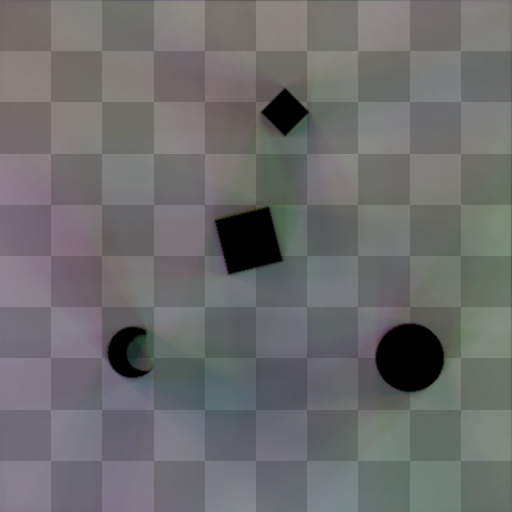 | 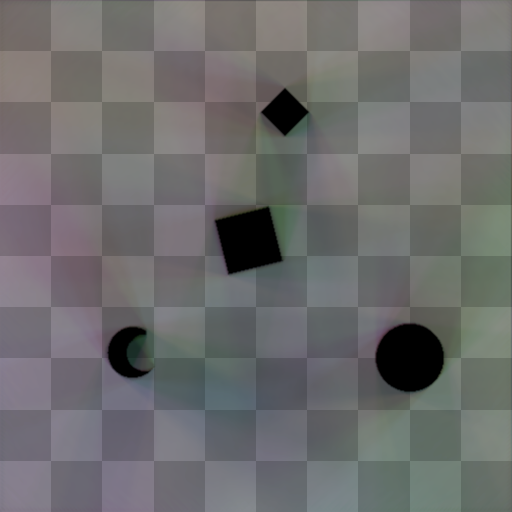 |
| Linear Scale 100% | Linear Scale 25% |
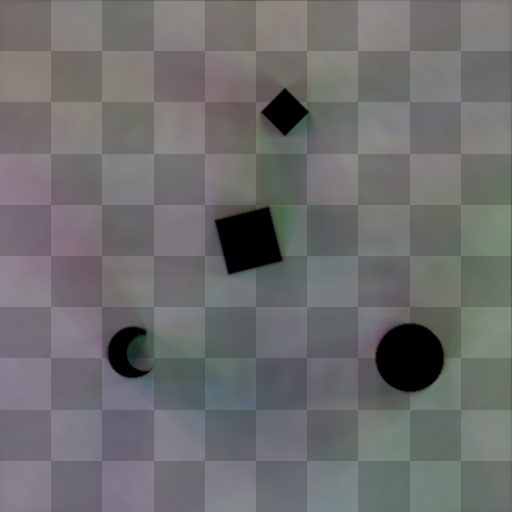 | 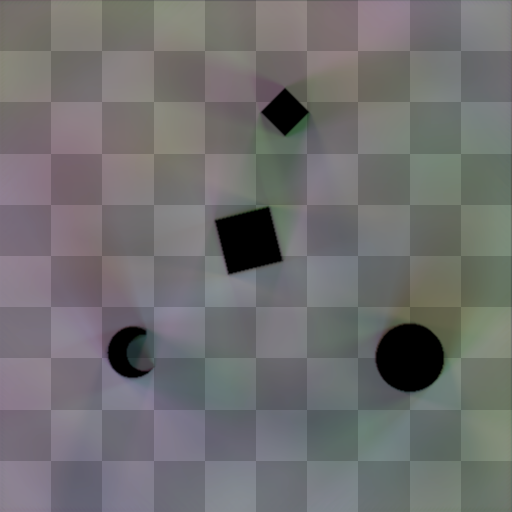 |
| Linear Scale 6.25% | Linear Scale 0.78% |
Border Light Angular Resolution Offset
- Range: 0-16
- Default: 0
- Description: Offset applied to angular resolution of border light textures (0 collects data from all directions required by the HRC pass, 1 is half the directions, 2 from quarter the direction, etc.)
Examples
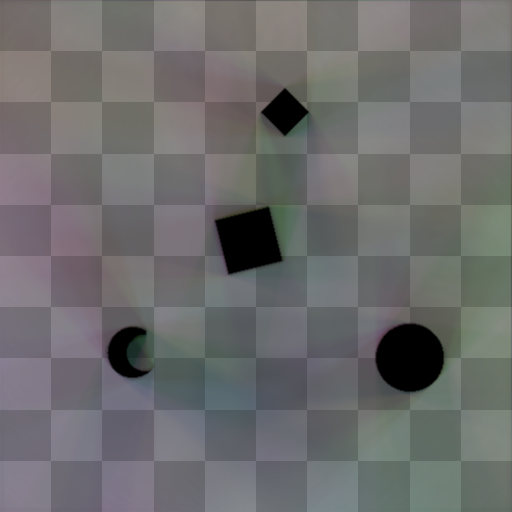 | 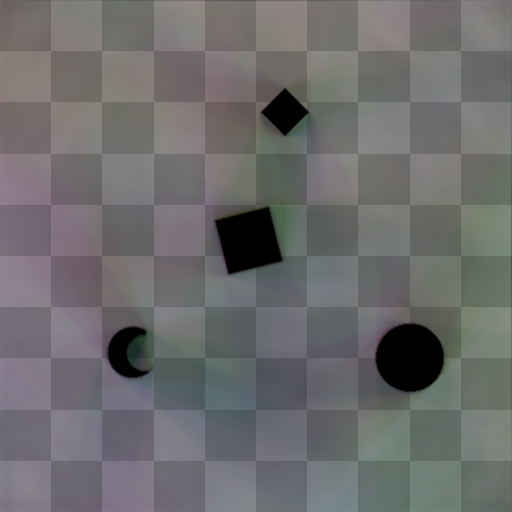 |
| Offset 0 | Offset 2 |
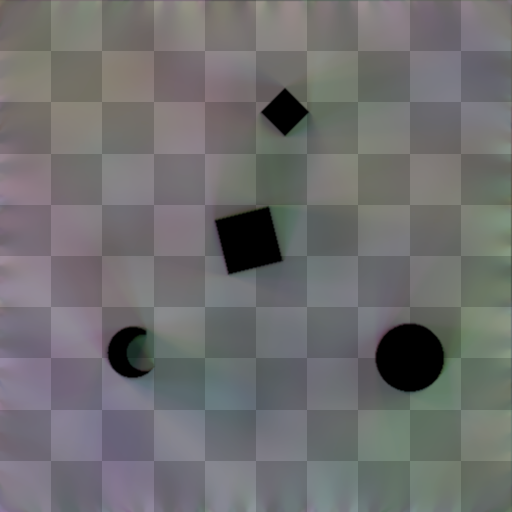 | 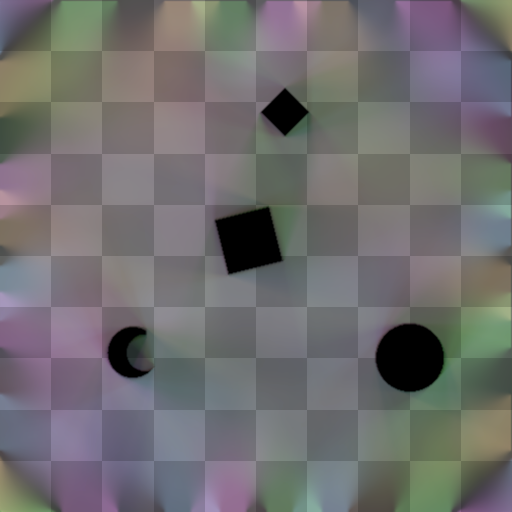 |
| Offset 5 | Offset 7 |
Lightmap Filter
Controls the filtering method applied to the lightmap:
Bilinear
- Uses basic hardware-driven bilinear sampling without additional filtering
- The least expensive option in terms of performance
- May result in blocky/pixelated appearance when using reduced lightmap resolution
- Not recommended for Holographic RC as it preserves checkerboard artifacts that are inherent to the method
Kawase Upsample
- Default: Recommended for most scenarios
- Applies a modified Kawase Upsample kernel to the lightmap:
| 1 | 3 | 1 |
| 3 | 10 | 3 |
| 1 | 3 | 1 |
- Effectively reduces pixelation from lightmap upscaling
- Addresses checkerboard artifacts in Holographic RC mode
Cross
- Applies a cross-blur kernel to the lightmap:
| 0 | 1 | 0 |
| 1 | 4 | 1 |
| 0 | 1 | 0 |
- Less aggressive blur compared to Kawase Upsample
- Mitigates checkerboard artifacts in Holographic RC with less blurring
Examples
All examples are applied to HRC variant
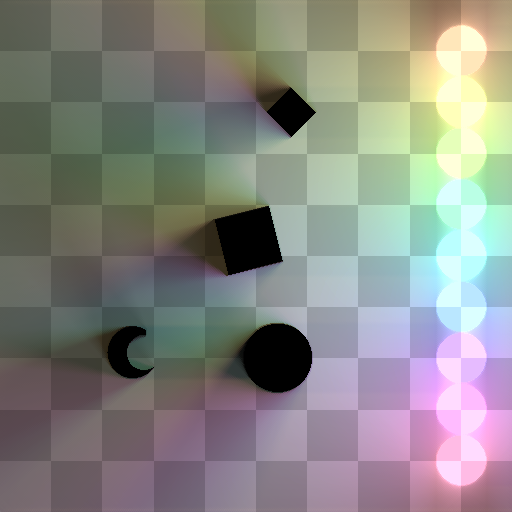 | 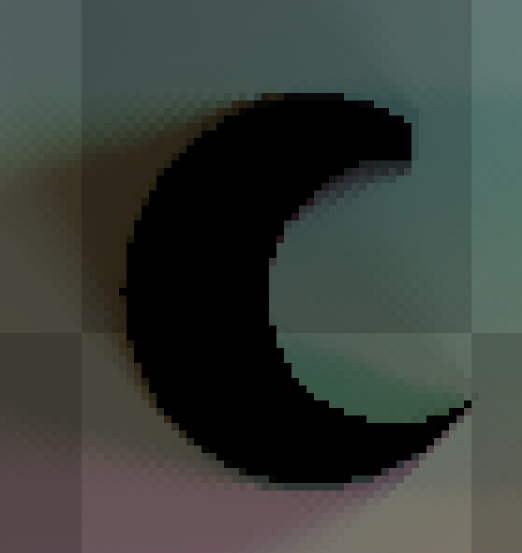 |
| Bilinear | Bilinear closeup |
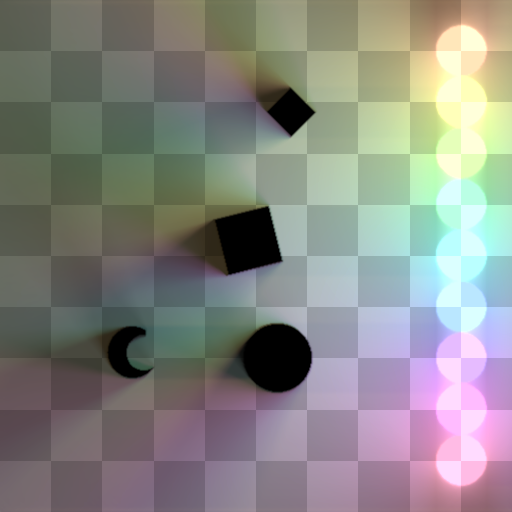 |  |
| Modified Kawase | Modified Kawase closeup |
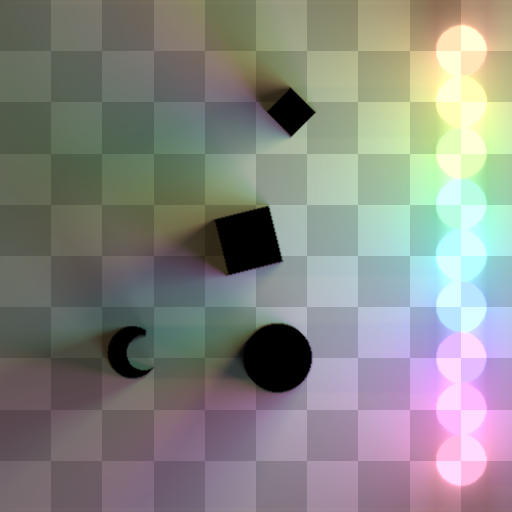 |  |
| Cross | Cross closeup |
See Also
- Usage Guide for practical usage examples
Dim0v.RadianceCascades2D assembly
Dim0v.RadianceCascades2D namespace
| public type | description |
|---|---|
| class RadianceCascadesRendererFeature | Renderer feature for the 2D Radiance Cascades lighting system. Add this feature to your Universal Renderer Data asset to enable the lighting system. |
Dim0v.RadianceCascades2D.Lights namespace
| public type | description |
|---|---|
| struct AnalyticalLightSettings | Configuration settings for analytical lights (Circle and Line types). |
| class LightContributor | Component that defines a light contributor in the 2D Radiance Cascades lighting system. It represents both lights and occluders/shadow casters. |
| enum LightType | Types of light contributors available in the 2D Radiance Cascades system. |
| struct SpriteLightSettings | Configuration settings for sprite-based lights. |
Dim0v.RadianceCascades2D.Utility namespace
| public type | description |
|---|---|
| enum LightmapFilter | Lightmaps filtering method |
| struct QualitySettings | A structure representing various quality settings for the Radiance Cascades lighting system. |
| enum RCVariant | Represents the radiance cascades implementation variant |
RadianceCascadesRendererFeature class
Renderer feature for the 2D Radiance Cascades lighting system. Add this feature to your Universal Renderer Data asset to enable the lighting system.
public class RadianceCascadesRendererFeature : ScriptableRendererFeature
Public Members
| name | description |
|---|---|
| static Instance { get; } | Global access point to the active RadianceCascadesRendererFeature instance. |
| QualitySettings { get; } | Quality settings for the radiance cascades lighting system. |
| override AddRenderPasses(…) | |
| override Create() | |
| override OnCameraPreCull(…) |
See Also
- namespace Dim0v.RadianceCascades2D
RadianceCascadesRendererFeature.Create method
public override void Create()
See Also
- class RadianceCascadesRendererFeature
- namespace Dim0v.RadianceCascades2D
RadianceCascadesRendererFeature.OnCameraPreCull method
public override void OnCameraPreCull(ScriptableRenderer renderer, ref CameraData cameraData)
See Also
- class RadianceCascadesRendererFeature
- namespace Dim0v.RadianceCascades2D
RadianceCascadesRendererFeature.AddRenderPasses method
public override void AddRenderPasses(ScriptableRenderer renderer, ref RenderingData renderingData)
See Also
- class RadianceCascadesRendererFeature
- namespace Dim0v.RadianceCascades2D
QualitySettings structure
A structure representing various quality settings for the Radiance Cascades lighting system.
public struct QualitySettings
Public Members
| name | description |
|---|---|
| BorderLightAngularResolutionOffset | Defines an offset applied to the angular resolution of the border light textures. 0 offset means collecting data from all directions required by the HRC, 1 is 1/2 of the directions required, 2 is 1/4, and so on. |
| BorderLightLinearScale | Determines the scaling factor for the border light textures in HRC. 1 is full lightmap side resolution, 0 is a single point |
| LightmapFilter | Specifies the filtering method to be applied when processing the lightmap. |
| LightmapScaleFactor | Represents the resolution scale factor for the radiance cascades. 1 is the full camera resolution. 0 is a 1x1 texture. |
| MaxRayMarchingSteps | Defines the maximum number of steps for a ray marching used in handling sprite lights. |
| ProcessAnalyticalLightsOnGPU | Determines whether analytical light sources will be processed on the GPU or the CPU. Enabling this option can improve performance by offloading light processing to the GPU instead of the CPU, but its effectiveness may depend on the complexity of the scene and the resolution. |
| RayMarchingTolerance | Defines the tolerance level for the ray marching process when handling sprite lights. Measured in pixels. A lower value increases precision but may incur additional computational cost. |
| TrueTraceThreshold | When UseRayExtensions is true, determines how many cascades will truly trace rays to determine the light fluence as opposed to extrapolating data from lower cascades. |
| UseRayExtensions | Determines whether ray-extensions acceleration structure is used for holographic RC. |
| Variant | Determines which variant of the radiance cascades will be used |
See Also
- namespace Dim0v.RadianceCascades2D.Utility
QualitySettings.TrueTraceThreshold field
When UseRayExtensions is true, determines how many cascades will truly trace rays to determine the light fluence as opposed to extrapolating data from lower cascades.
public int TrueTraceThreshold;
Remarks
Only affects the HolographicRC variant. Has no effect for other variants.
See Also
- struct QualitySettings
- namespace Dim0v.RadianceCascades2D.Utility
QualitySettings.LightmapScaleFactor field
Represents the resolution scale factor for the radiance cascades. 1 is the full camera resolution. 0 is a 1x1 texture.
public float LightmapScaleFactor;
See Also
- struct QualitySettings
- namespace Dim0v.RadianceCascades2D.Utility
QualitySettings.ProcessAnalyticalLightsOnGPU field
Determines whether analytical light sources will be processed on the GPU or the CPU. Enabling this option can improve performance by offloading light processing to the GPU instead of the CPU, but its effectiveness may depend on the complexity of the scene and the resolution.
public bool ProcessAnalyticalLightsOnGPU;
Remarks
Has no effect if there are no active analytical lights in the scene
See Also
- struct QualitySettings
- namespace Dim0v.RadianceCascades2D.Utility
QualitySettings.RayMarchingTolerance field
Defines the tolerance level for the ray marching process when handling sprite lights. Measured in pixels. A lower value increases precision but may incur additional computational cost.
public float RayMarchingTolerance;
Remarks
Has no effect if there are no active sprite lights on the screen
See Also
- struct QualitySettings
- namespace Dim0v.RadianceCascades2D.Utility
QualitySettings.LightmapFilter field
Specifies the filtering method to be applied when processing the lightmap.
public LightmapFilter LightmapFilter;
See Also
- enum LightmapFilter
- struct QualitySettings
- namespace Dim0v.RadianceCascades2D.Utility
QualitySettings.Variant field
Determines which variant of the radiance cascades will be used
public RCVariant Variant;
See Also
- enum RCVariant
- struct QualitySettings
- namespace Dim0v.RadianceCascades2D.Utility
QualitySettings.MaxRayMarchingSteps field
Defines the maximum number of steps for a ray marching used in handling sprite lights.
public int MaxRayMarchingSteps;
Remarks
Has no effect if there are no active sprite lights on the screen
See Also
- struct QualitySettings
- namespace Dim0v.RadianceCascades2D.Utility
QualitySettings.BorderLightLinearScale field
Determines the scaling factor for the border light textures in HRC. 1 is full lightmap side resolution, 0 is a single point
public float BorderLightLinearScale;
Remarks
Only affects the HolographicRC variant. Has no effect for other variants.
See Also
- struct QualitySettings
- namespace Dim0v.RadianceCascades2D.Utility
QualitySettings.UseRayExtensions field
Determines whether ray-extensions acceleration structure is used for holographic RC.
public bool UseRayExtensions;
Remarks
Only affects the HolographicRC variant. Has no effect for other variants.
See Also
- struct QualitySettings
- namespace Dim0v.RadianceCascades2D.Utility
QualitySettings.BorderLightAngularResolutionOffset field
Defines an offset applied to the angular resolution of the border light textures. 0 offset means collecting data from all directions required by the HRC, 1 is 1/2 of the directions required, 2 is 1/4, and so on.
public int BorderLightAngularResolutionOffset;
Remarks
Only affects the HolographicRC variant. Has no effect for other variants.
See Also
- struct QualitySettings
- namespace Dim0v.RadianceCascades2D.Utility
RadianceCascadesRendererFeature.Instance property
Global access point to the active RadianceCascadesRendererFeature instance.
public static RadianceCascadesRendererFeature Instance { get; }
See Also
- class RadianceCascadesRendererFeature
- namespace Dim0v.RadianceCascades2D
LightmapFilter enumeration
Lightmaps filtering method
public enum LightmapFilter
Values
| name | value | description |
|---|---|---|
| Bilinear | -1 | A filtering option that uses basic hardware-driven bilinear sampling without additional filtering or upscaling. The least expensive option. May result in a blocky pixelated appearance for non-100% light map resolution scale. Not recommended for the Holographic RC variant, for it preserves the checkerboard artifacts. |
| KawaseUpsample | 0 | A filtering option that applies the Kawase Upsample technique to the lightmap. The softest option. This method blurs the lightmap to reduce the pixelated appearance caused by downscaling and addresses checkerboard artifacts when used in Holographic RC mode. |
| Cross | 1 | A filtering option that applies a cross blur kernel. Provides a less aggressive blur effect compared to Kawase Upsample. Mitigates checkerboard artifacts in Holographic RC mode with minimal blurring. |
See Also
- namespace Dim0v.RadianceCascades2D.Utility
RCVariant enumeration
Represents the radiance cascades implementation variant
public enum RCVariant
Values
| name | value | description |
|---|---|---|
| Vanilla | 0 | The original implementation of radiance cascades. In some cases, it is the fastest option; however, it is very prone to ringing artifacts. |
| BilinearFix | 1 | A slight modification of the original radiance cascades intended to address the artifacts in the vanilla version. Merges cascades more precisely by casting 4x more rays. |
| HolographicRC | 2 | A radiance cascades variant that uses alternative probe placement achieving perfectly tiled screen coverage by the light probes. |
See Also
- namespace Dim0v.RadianceCascades2D.Utility
LightContributor class
Component that defines a light contributor in the 2D Radiance Cascades lighting system. It represents both lights and occluders/shadow casters.
public class LightContributor : MonoBehaviour
Public Members
| name | description |
|---|---|
| AnalyticalLightSettings { get; } | Settings specific to analytical lights (Circle, Line, and Freeform types). Has no effect on other light types. |
| Color { get; set; } | The color of the light emitted by this contributor. |
| Intensity { get; set; } | The brightness multiplier for this light source. |
| LightType { get; set; } | The type of light source this contributor represents. |
| SpriteLightSettings { get; } | Settings specific to sprite-based lights. Has no effect on other light types. |
| SetDirty() | Marks this light contributor as dirty, indicating that its state has been changed. Make sure to call this after modifying AnalyticalLightSettings or SpriteLightSettings from the code directly. |
See Also
- namespace Dim0v.RadianceCascades2D.Lights
LightContributor.Intensity property
The brightness multiplier for this light source.
public float Intensity { get; set; }
See Also
- class LightContributor
- namespace Dim0v.RadianceCascades2D.Lights
LightContributor.SetDirty method
Marks this light contributor as dirty, indicating that its state has been changed. Make sure to call this after modifying AnalyticalLightSettings or SpriteLightSettings from the code directly.
public void SetDirty()
See Also
- class LightContributor
- namespace Dim0v.RadianceCascades2D.Lights
LightContributor.Color property
The color of the light emitted by this contributor.
public Color Color { get; set; }
See Also
- class LightContributor
- namespace Dim0v.RadianceCascades2D.Lights
LightContributor.LightType property
The type of light source this contributor represents.
public LightType LightType { get; set; }
See Also
- enum LightType
- class LightContributor
- namespace Dim0v.RadianceCascades2D.Lights
AnalyticalLightSettings structure
Configuration settings for analytical lights (Circle and Line types).
public struct AnalyticalLightSettings
Public Members
| name | description |
|---|---|
| Cullable | When true, the light can be culled when outside the view frustum. |
| CullDistance | Maximum distance at which the light affects the scene if Cullable is true. |
| FreeformPoints | Array of points defining the custom shape for freeform lights. |
| SingleSided | When true, the light only emits from one side. |
| Size | The size of the light source in world units. |
See Also
- namespace Dim0v.RadianceCascades2D.Lights
AnalyticalLightSettings.Cullable field
When true, the light can be culled when outside the view frustum.
public bool Cullable;
See Also
- struct AnalyticalLightSettings
- namespace Dim0v.RadianceCascades2D.Lights
AnalyticalLightSettings.CullDistance field
Maximum distance at which the light affects the scene if Cullable is true.
public float CullDistance;
See Also
- struct AnalyticalLightSettings
- namespace Dim0v.RadianceCascades2D.Lights
AnalyticalLightSettings.Size field
The size of the light source in world units.
public float Size;
See Also
- struct AnalyticalLightSettings
- namespace Dim0v.RadianceCascades2D.Lights
AnalyticalLightSettings.SingleSided field
When true, the light only emits from one side.
public bool SingleSided;
See Also
- struct AnalyticalLightSettings
- namespace Dim0v.RadianceCascades2D.Lights
AnalyticalLightSettings.FreeformPoints field
Array of points defining the custom shape for freeform lights.
public Vector2[] FreeformPoints;
See Also
- struct AnalyticalLightSettings
- namespace Dim0v.RadianceCascades2D.Lights
SpriteLightSettings structure
Configuration settings for sprite-based lights.
public struct SpriteLightSettings
Public Members
| name | description |
|---|---|
| LightSourceSprite | The sprite used as the light source. |
See Also
- namespace Dim0v.RadianceCascades2D.Lights
SpriteLightSettings.LightSourceSprite field
The sprite used as the light source.
public Sprite LightSourceSprite;
See Also
- struct SpriteLightSettings
- namespace Dim0v.RadianceCascades2D.Lights
LightType enumeration
Types of light contributors available in the 2D Radiance Cascades system.
public enum LightType
Values
| name | value | description |
|---|---|---|
| Sky | 0 | Ambient light that illuminates the entire scene. |
| Directional | 1 | Light coming from a specific direction, similar to sunlight. |
| Line | 2 | Line segment light source that emits light along its length. |
| Circle | 3 | Circular light source that emits light in all directions. |
| Freeform | 4 | Custom light shape defined by multiple control points. |
| Sprite | 5 | Light source based on a sprite texture. |
See Also
- namespace Dim0v.RadianceCascades2D.Lights