Getting Started with 2D Radiance Cascades
Installation
The package is provided as a hybrid package. To install it, import the .unitypackage file into your project or install it from the Unity Asset Store. The package contents will appear under Packages/com.dim0v.radiance-cascades-2d and it will generally work as a local UPM package.
Samples
The package comes with a sample Space game. To import it, use the standard Unity Package Manager UI:
- Open the package manager through
Window -> Package Manager - Select "2D Radiance Cascades" from the list
- Go to the Samples tab and click "Import"
Basic Setup
Adding and Configuring the Renderer Feature
-
Set up the URP renderer. Both 2D and 3D renderers are supported
-
Select your Renderer 2D Data (or Universal Renderer Data) asset in your project
-
In the Inspector, click "Add Renderer Feature"
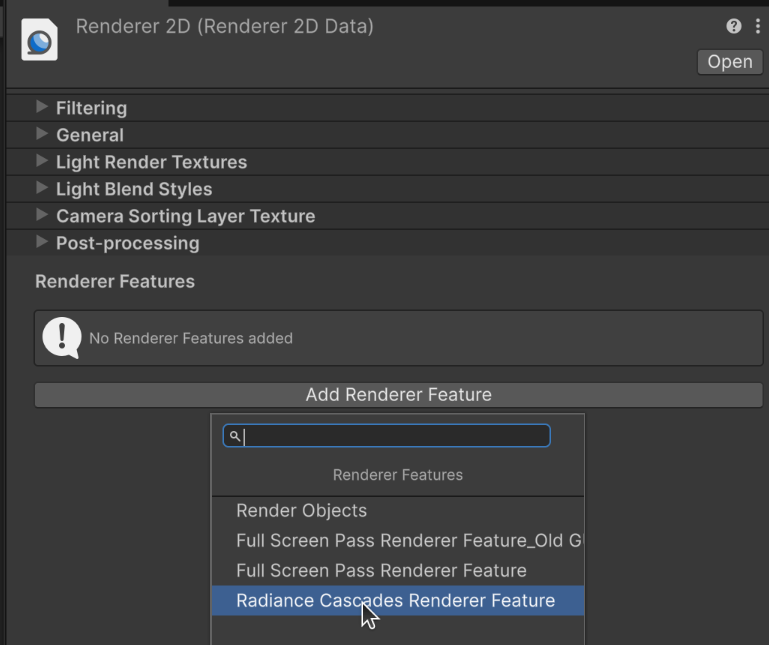
- (optional) This is where you can tweak the Quality Settings in the inspector of the renderer feature
-
(optional) In the "General" section of the Renderer 2D change the "Default Material Type" to
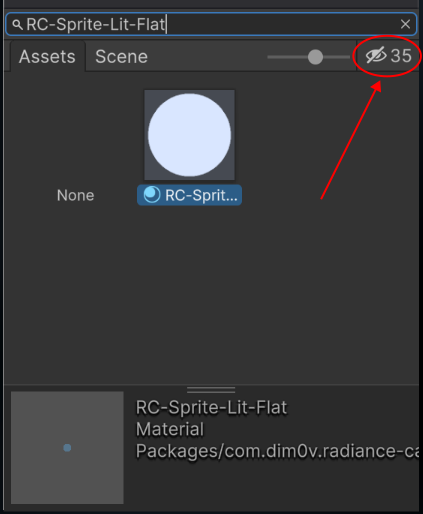
Customand assign theRC-Sprite-Lit-Flatmaterial to "Default Custom Material" so your sprites are lit by default.-
Note: you may need to show hidden packages in the material picker:
-
Creating A Lit Scene
- Create a new 2D scene
- Add light sources and obstacles using either of the options:
GameObject -> Radiance Cascades 2Dmenu- manually adding the "Light Contributor" component to an arbitrary GameObject
- Add some sprites to your scene
- Assign the preconfigured
Radiance Cascades/RC-Sprite-Lit-Flatmaterial to the sprites that should be affected by the lighting.- If your sprites have normal maps, you may want to use
Radiance Cascades/RC-Sprite-Lit-WithNormalmaterial to enable diffuse shading
- If your sprites have normal maps, you may want to use
Demos and Samples
Installation
- Open the Unity Package Manager (
Window→Package Manager) - Select the
2D Radiance Cascadespackage - Go to the
Samplestab Importthe sample you're interested in- The assets will appear under
Assets/Samples/2D Radiance Cascades/{version}/{demo name}with a scene file at the sample root (if applicable)
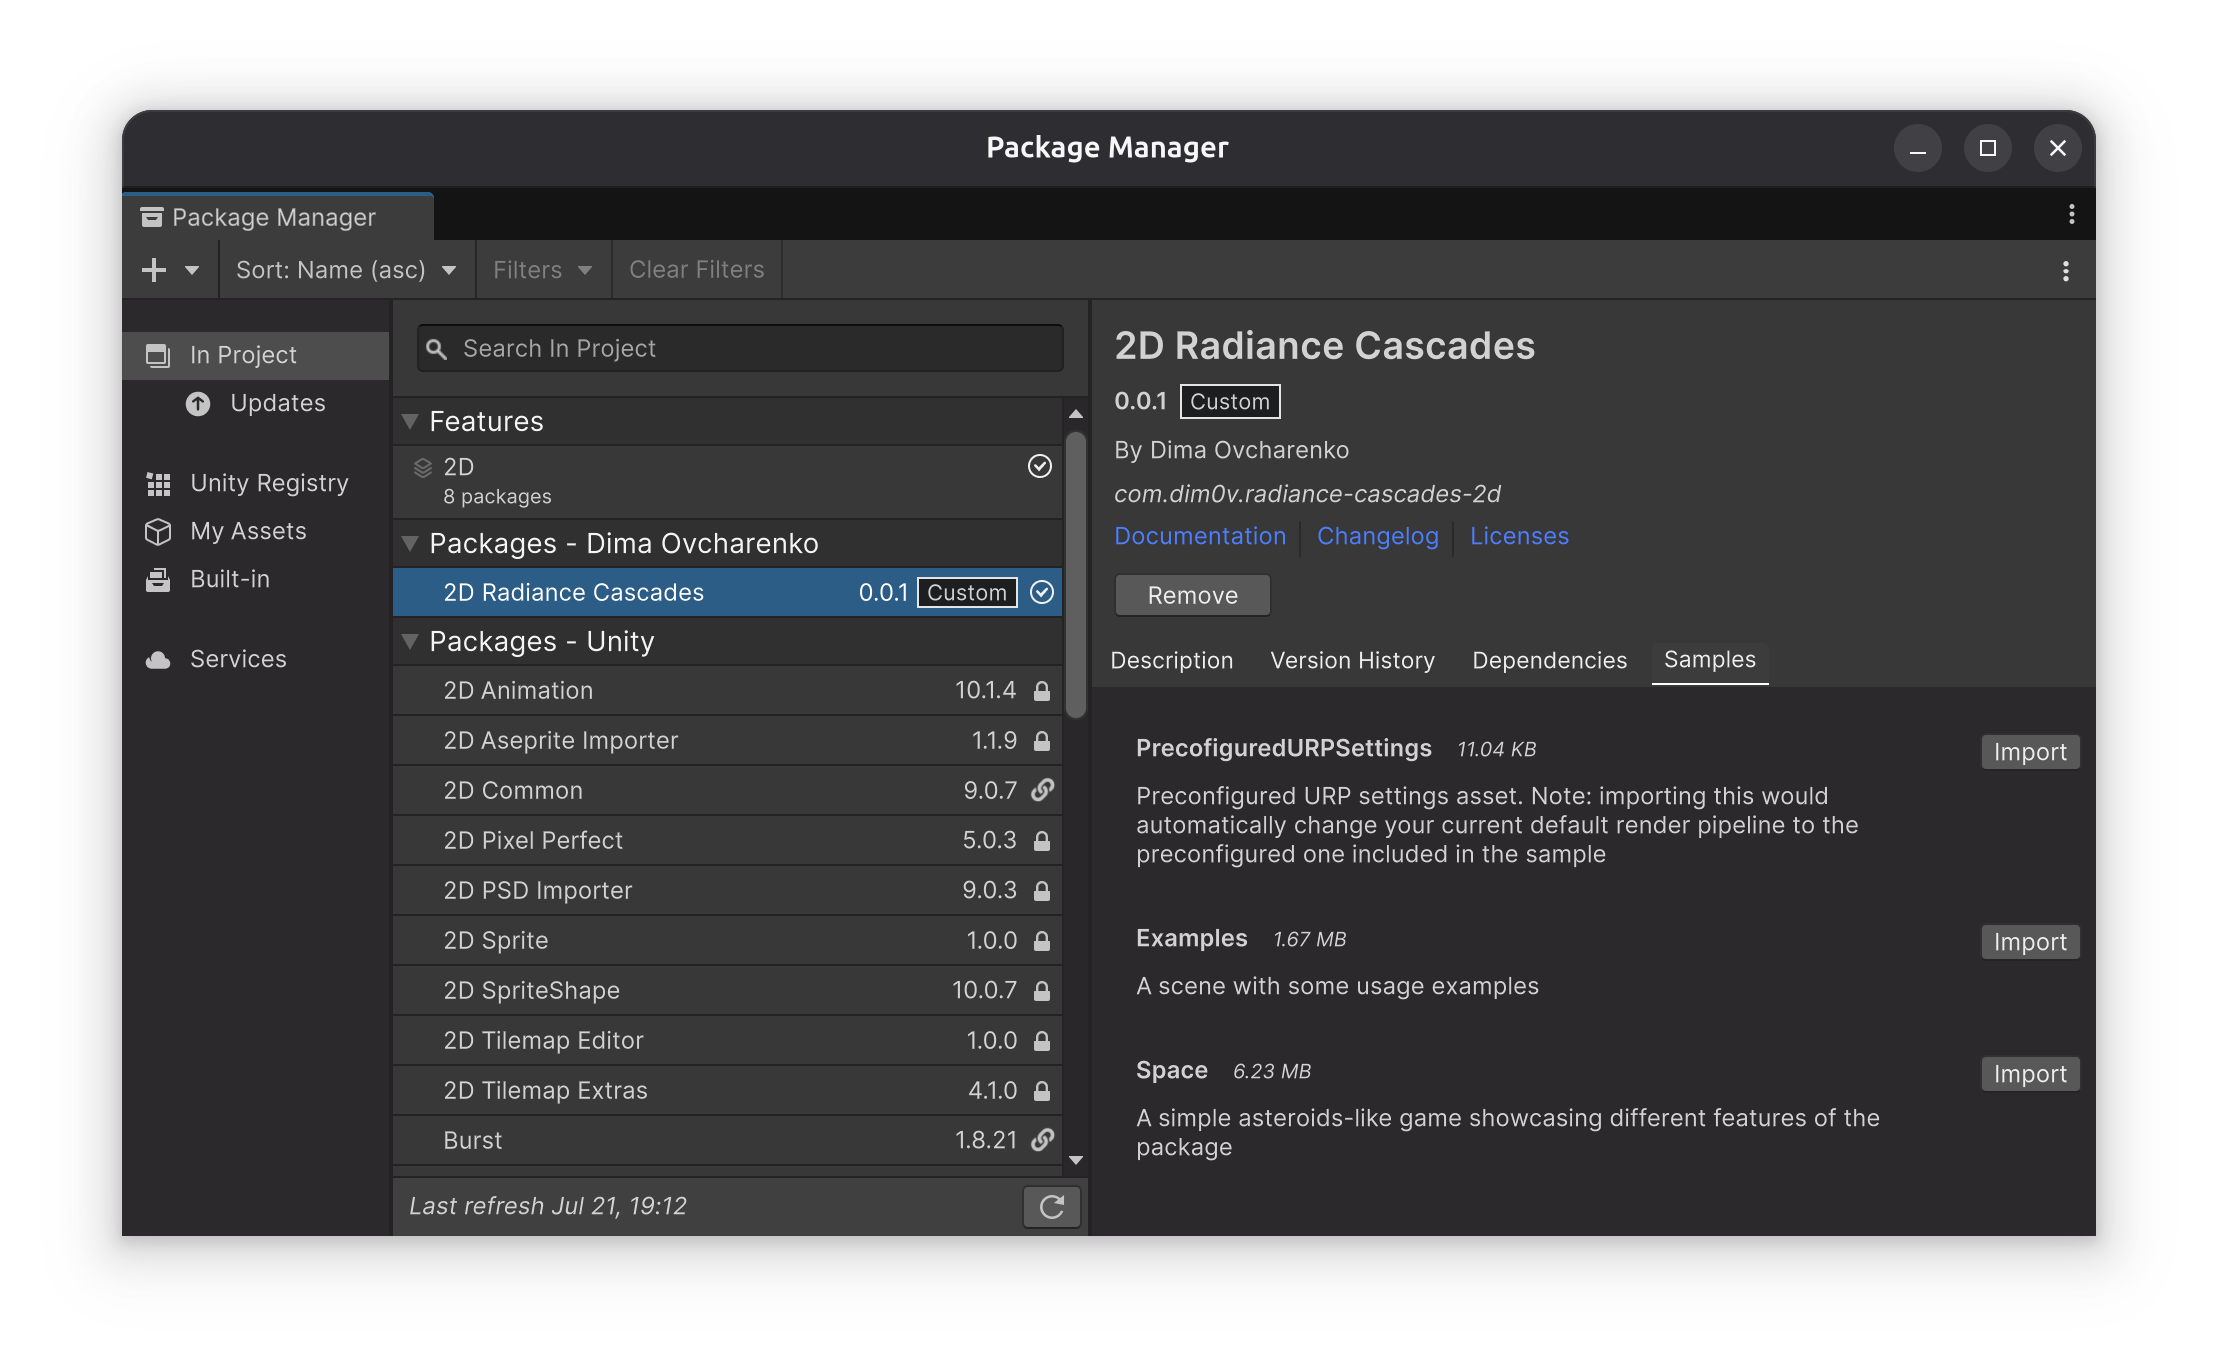
Preconfigured URP Asset
This sample has a pre-configured URP asset with the Radiance Cascades 2D renderer feature added and set up. You can import it to skip the manual setup.
| Note |
|---|
| Importing this sample would automatically assign the included SRP render asset as your default renderer, overriding the previous one. |
Examples
A scene featuring different light setups showcasing various package features and usage examples.
Space Demo
A simple Asteroids-like game featuring various features of the lighting system.
The gameplay: Fly around and shoot at asteroids.
Controls:
- Thrust:
- Keyboard: Up/Down arrow keys or W/S
- Gamepad: Right trigger to accelerate, left trigger to decelerate.
- Rotation:
- Keyboard: Left/Right arrow keys or A/D
- Gamepad: Left stick
- Shoot:
- Keyboard: Control or Space
- Gamepad: South action button (A on Xbox controller)
Explore the demo
- Check out the light sources:
- Global lights under the
Global Lightsgame object in the game scene - Asteroid debris light source in
Prefabs/Debris - Bullet in
Prefabs/Bullet. Note how an unlit sprite is drawn on top of the light source to preserve the sharp light source shape even when the light map is downscaled - The rocket thruster light in the
Prefabs/Playerprefab underPlayer/Thruster/Light
- Global lights under the
- Check out the shadow casters:
- The asteroid in
Prefabs/Asteroid - The rocket in
Prefabs/Player
- The asteroid in
- Check out the light receivers and their materials:
- The asteroid and the rocket.
- Note how their sprites have normal maps attached through the standard Unity "Secondary Textures" mechanism.
- Check out the
Materials/SpriteWithNormal.matmaterial. It uses the package-provided shader for diffuse lighting with normals with the customized distance parameter.
- The nebula background in
Main Camera/Background- Note how it uses the lightmap information in a fully custom material with a custom shader.
- Check out the material shader graph in
Materials/Shaders/NebulaBG.shadergraphand the usage of theGetRCLightMapColornode.
- The asteroid and the rocket.
Next Steps
- Learn about General Concepts
- Set up the Quality Settings according to your needs
- Explore the detailed Usage Guide